Table of content
Radish pickles, known for their satisfying crunch and tangy flavor, are a beloved staple in many cuisines around the world. These crispy delights, often served as a side dish, condiment, or snack, elevate meals with their refreshing taste and textural contrast. While store-bought versions are convenient, nothing compares to the satisfaction of crafting your own batch at home. This article delves into the art of making crispy radish pickles from scratch, offering a detailed guide to achieving that perfect balance of crunch, acidity, and umami. Whether you’re a seasoned home cook or a curious novice, this recipe promises to deliver a jar of pickled perfection every time.
The Allure of Crispy Radish Pickles
Radish pickles, or takuan in Japanese, chai po in Chinese, or muu chua in Vietnamese, vary in flavor and texture across cultures but share a common appeal: their ability to transform a simple radish into a complex, addictive treat. The key to their charm lies in the interplay between the radish’s natural sweetness, the brine’s tanginess, and the subtle heat from spices. When made correctly, these pickles retain a satisfying crunch, making them ideal for adding texture to sandwiches, rice bowls, or even enjoyed straight from the jar.

Ingredients: Simplicity Meets Flavor
The beauty of homemade radish pickles lies in their uncomplicated ingredient list. Here’s what you’ll need:
- Fresh Radishes (4–5 medium-sized): Opt for firm, unblemished daikon radishes or smaller red radishes. Daikon, with its mild sweetness and high water content, is ideal for achieving crispiness.
- Kosher Salt (2 tbsp): Coarse salt draws moisture from the radishes, ensuring a crisp texture.
- Rice Vinegar (1 cup): Mild and slightly sweet, rice vinegar complements the radish’s flavor without overpowering it.
- Sugar (1/4 cup): Balances the vinegar’s acidity and enhances the radish’s natural sweetness.
- Water (1 cup): For diluting the brine.
- Optional Flavor Enhancers:
- Garlic (3 cloves, sliced): Adds aromatic depth.
- Ginger (1 tbsp, grated): Imparts a subtle warmth.
- Red Pepper Flakes (1 tsp): For a hint of heat.
- Mustard Seeds (1 tsp): Provides a mild, earthy note.
The Science Behind Crispiness
Achieving the perfect crunch in radish pickles hinges on two factors: osmosis and cell structure. Radishes, like all vegetables, are composed of cells filled with water. When salted, osmosis draws water out of the cells, concentrating flavors and creating space for the brine to penetrate. This process, called dehydration, firms up the radish’s texture, preventing sogginess. Additionally, radishes contain pectin, a natural polysaccharide that gelatinizes during pickling, further stabilizing the cells and preserving crispness.
Step-by-Step Preparation
Selecting and Prepping the Radishes
- Choose Wisely: Select radishes with smooth, unbruised skin and vibrant green tops (if attached). Avoid radishes that feel soft or have visible cracks.
- Wash Thoroughly: Rinse the radishes under cold water to remove dirt. Scrub gently if necessary.
- Peel or Not to Peel?: While peeling is optional, leaving the skin intact can add color and a slight bitterness. For a milder flavor, peel the radishes using a vegetable peeler.
Slicing Techniques
The way you slice the radishes affects both texture and brine absorption:
- Thin Rounds (1/8-inch thick): Ideal for quick pickling (ready in 24 hours).
- Matchsticks (2-inch length, 1/4-inch thickness): Perfect for sandwiches or salads.
- Spiralized or Wavy Cuts: For a visually appealing twist.
Pro Tip: Use a mandoline slicer for uniform thickness, ensuring even pickling.
Salting: The First Crucial Step
- Layer the Radishes: Place sliced radishes in a colander, sprinkling salt between layers.
- Weight It Down: Cover the radishes with a plate and place a heavy object (e.g., a can of tomatoes) on top. This presses out excess moisture.
- Wait Patiently: Let the radishes sit for 1–2 hours. You’ll notice liquid pooling in the colander—this is normal!
- Rinse and Drain: Rinse the radishes under cold water to remove excess salt, then pat dry with a clean kitchen towel.
Preparing the Brine
The brine is the soul of your pickles. Here’s how to craft the perfect balance:
- In a saucepan, combine rice vinegar, sugar, and water.
- Add optional flavor enhancers (garlic, ginger, etc.).
- Bring the mixture to a simmer over medium heat, stirring until sugar dissolves.
- Remove from heat and let cool completely. Never pour hot brine over vegetables, as it will cook them and ruin the crunch.
Packing the Jar
- Sterilize the Jar: Wash a 1-quart mason jar with hot, soapy water, then rinse and dry it.
- Layer Ingredients: Place a few garlic slices or ginger pieces at the bottom, followed by radishes. Repeat until the jar is 3/4 full.
- Pour the Brine: Ensure the radishes are fully submerged. Leave 1/2 inch of headspace to prevent overflow during fermentation.
Fermentation and Aging
- Seal the Jar: Close the lid tightly.
- Ferment at Room Temperature: Let the jar sit in a cool, dark place (65–75°F / 18–24°C) for 3–5 days. This allows beneficial bacteria to develop, enhancing flavor and crispness.
- Taste Test: After 3 days, open the jar and sample a radish. If it’s too tangy, transfer the jar to the refrigerator to halt fermentation.
Troubleshooting Common Issues
-
Soggy Pickles:
- Cause: Insufficient salting or brine too weak.
- Fix: Increase salt by 1 tbsp next time. For current batch, drain brine, re-salt radishes, and re-pickle.
-
Cloudy Brine:
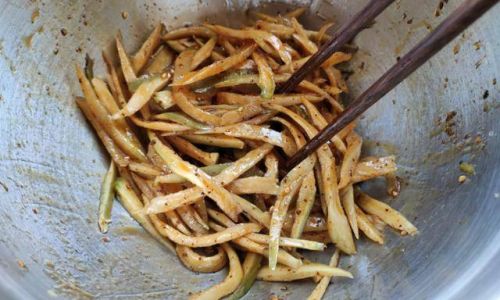
- Cause: Natural yeast or bacteria.
- Fix: Harmless but indicates oxidation. Strain the brine and replace with fresh vinegar.
-
Mold:
- Cause: Exposure to oil or contaminated utensils.
- Fix: Discard the batch immediately. Sterilize jars thoroughly next time.
Variations to Experiment With
- Spicy Radish Pickles: Add 2–3 sliced jalapeños or a tbsp of Sichuan peppercorns to the brine.
- Sweet and Sour: Increase sugar to 1/3 cup and add 1/4 cup apple cider vinegar.
- Herb-Infused: Toss in fresh dill, thyme, or cilantro stems before packing the jar.
- Fermented Radishes: For a probiotic-rich version, skip the vinegar and use a 2% salt brine (20g salt per 1L water). Ferment for 7–10 days.
Storage and Serving Suggestions
- Shelf Life: Properly sealed pickles last 3–4 months in the refrigerator.
- Serving Ideas:
- Top grilled meats or fish with pickled radishes.
- Mix into coleslaw or potato salad for extra crunch.
- Serve alongside fried rice or noodles.
- Enjoy as a low-calorie snack with a sprinkle of chili flakes.
The Cultural Tapestry of Radish Pickles
Radish pickles transcend borders, each culture adding its unique touch:
- Japan: Takuan is sun-dried daikon pickled in rice bran, rice vinegar, and sugar.
- Korea: Chonggak-kimchi features whole young radishes fermented with chili paste.
- Mexico: Rabanos encurtidos are quick-pickled with carrots, onions, and oregano.
Health Benefits: More Than Just Flavor
Radishes are nutritional powerhouses, offering:
- Fiber: Aids digestion and promotes gut health.
- Vitamin C: Boosts immunity and skin health.
- Antioxidants: Combats inflammation and oxidative stress.
Conclusion: A Jar of Possibilities
Crafting crispy radish pickles at home is an act of culinary alchemy—transforming a humble vegetable into a treasure trove of flavor. Whether you prefer them fiery, sweet, or herb-infused, the process rewards patience and creativity. So, grab your jar, sharpen your knife, and embark on a pickling adventure. Your taste buds (and your gut) will thank you.
Final Tip: Label each jar with the date and ingredients. You’ll forget the details, but your future self (and guests) will appreciate the reminder!
This comprehensive guide ensures that even first-time picklers can achieve restaurant-quality results. The key lies in respecting the radish’s natural properties and embracing the magic of fermentation. Happy pickling!

0 comments