Introduction: The Art of Preparing Oil Chicken
Cooking oil chicken, a dish that combines the rich, savory flavors of fried chicken with the tender, juicy texture of a well-cooked bird, is an art form that many culinary enthusiasts strive to perfect. Whether you’re a seasoned chef or a home cook looking to impress your family and friends, mastering the technique of oil chicken can elevate your culinary repertoire to new heights. This comprehensive guide will walk you through every step of the process, from selecting the right ingredients to achieving the perfect crispy exterior and juicy interior. By the end, you’ll be confident in your ability to create a mouthwatering oil chicken that will leave everyone asking for seconds.
Step 1: Choosing the Right Chicken
The foundation of any great oil chicken dish is the quality of the chicken you start with. Here are some key considerations when selecting your bird:
-
Breed and Age: Opt for a younger chicken, typically around 3 to 4 pounds, as it will have a more tender texture and a juicier flavor. Free-range or organic chickens are often preferred for their superior taste and healthier profile.
-
Freshness: Always check the sell-by date and ensure the chicken has been properly refrigerated. Fresh chicken will have a faint, pleasant odor and firm, elastic flesh.
-
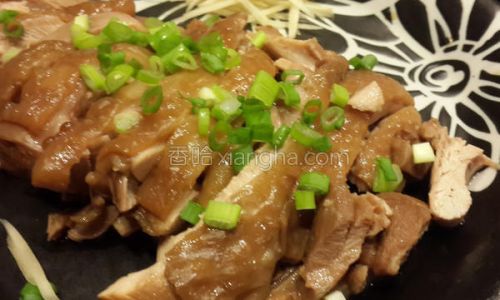
Whole vs. Parts: While whole chickens are traditional, you can also use chicken parts like breasts, thighs, or wings if you prefer. Just adjust the cooking time accordingly.
Step 2: Preparing the Chicken
Once you’ve chosen your chicken, it’s time to prepare it for cooking. This involves a few crucial steps to ensure even cooking and maximum flavor.
-
Rinsing and Drying: Rinse the chicken thoroughly under cold running water to remove any impurities. Pat it dry with paper towels to remove excess moisture. This is essential for achieving a crispy skin.
-
Trimming Fat: Remove any excess fat, especially from the cavity and around the neck area. This will help prevent the chicken from becoming greasy.
-
Seasoning: Season the chicken generously with salt and pepper. You can also use a blend of herbs and spices like garlic powder, paprika, and thyme to add complexity to the flavor. Make sure to season both inside and out.
-
Marinating (Optional): For added flavor depth, you can marinate the chicken in a mixture of soy sauce, rice vinegar, garlic, ginger, and honey for a few hours or overnight. This will infuse the meat with rich, aromatic flavors.
Step 3: Preparing the Oil
The oil you use for frying is crucial to the success of your oil chicken. Here are some tips for selecting and preparing the oil:
-
Type of Oil: Choose a neutral-flavored oil with a high smoke point, such as peanut oil, canola oil, or vegetable oil. Avoid olive oil, which has a lower smoke point and a strong flavor that might overpower the chicken.
-
Amount of Oil: You’ll need enough oil to fully submerge the chicken. A deep fryer with a capacity of at least 4 gallons is ideal, but a large, heavy-bottomed pot can also work.
-
Heating the Oil: Heat the oil to the correct temperature. For chicken, the ideal frying temperature is between 350°F and 375°F. Use a deep-frying thermometer to monitor the temperature accurately.
Step 4: Breading the Chicken (Optional)
While traditional oil chicken recipes often call for a simple seasoning, some cooks prefer to bread their chicken for an extra layer of crispiness. Here’s how to do it:
-
Dry Mix: Combine flour, cornstarch, baking powder, salt, and pepper in a large bowl. The cornstarch and baking powder will help create a lighter, airier crust.
-
Wet Mix: In a separate bowl, whisk together eggs and milk or water until well combined.
-
Coating: Dip the seasoned chicken into the wet mix, then coat it evenly with the dry mix. Shake off any excess to avoid a thick, heavy crust.
-
Resting: Let the breaded chicken rest for about 10-15 minutes before frying. This will help the coating set and adhere better to the chicken.
Step 5: Frying the Chicken
Now it’s time for the main event: frying the chicken. Follow these steps to ensure a successful outcome:
-
Testing the Oil: Before adding the chicken, drop a small piece of breading into the oil. It should sizzle and float immediately. If it browns too quickly, lower the heat; if it doesn’t brown, increase the heat.
-
Adding the Chicken: Carefully lower the chicken into the hot oil using a slotted spoon or frying basket. If using a whole chicken, you may need to hold it by the legs and slowly lower it in to avoid splashing.
-
Maintaining Temperature: Keep the oil temperature steady at around 350°F to 375°F. Adjust the heat as needed to maintain this range.
-
Cooking Time: For a whole chicken, frying time can range from 15 to 20 minutes, depending on its size. Chicken parts will take less time, typically 6 to 8 minutes for breasts and 10 to 12 minutes for thighs and wings. Use a meat thermometer to check the internal temperature; it should reach 165°F.
-
Browning: For an even golden-brown color, you can turn the chicken occasionally with tongs. However, be careful not to pierce the skin, as this can release juices and cause the chicken to steam rather than fry.
-
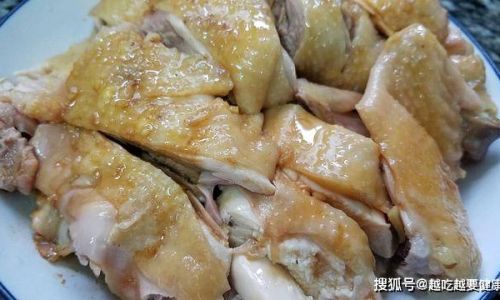
Draining: Once the chicken is cooked, remove it from the oil and let it drain on a wire rack set over a baking sheet. This will help remove excess oil and ensure a crispy finish.
Step 6: Resting and Serving
Like any roasted or grilled meat, resting is crucial for oil chicken. Let the cooked chicken rest for about 10-15 minutes before carving or serving. This allows the juices to redistribute, ensuring a juicy, tender bite every time.
-
Carving: If using a whole chicken, carve it into serving pieces. For chicken parts, simply serve as is.
-
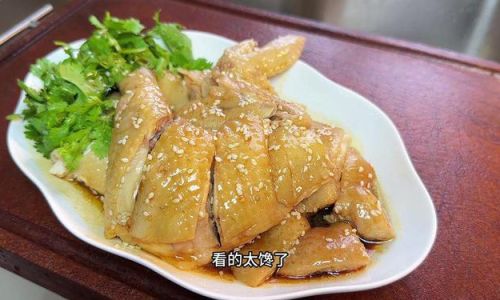
Garnishing: Garnish with fresh herbs like parsley or cilantro, a squeeze of lemon juice, or a sprinkle of fine sea salt to enhance the flavors.
-
Accompaniments: Serve your oil chicken with sides that complement its rich, savory taste. Popular choices include steamed rice, roasted vegetables, pickled vegetables, or a tangy dipping sauce made from soy sauce, vinegar, garlic, and chili.
Conclusion: Perfecting Your Oil Chicken
Cooking oil chicken is a rewarding culinary endeavor that combines precision, patience, and a love for good food. By following the steps outlined in this guide, you’ll be well-equipped to create a dish that balances crispy exterior with juicy, flavorful interior. Remember, the key to success lies in selecting high-quality ingredients, maintaining the correct oil temperature, and allowing the chicken to rest properly after cooking. With practice, you’ll soon be able to whip up a batch of oil chicken that will have everyone coming back for more.
As you continue to experiment and refine your technique, don’t be afraid to add your own personal touches. Whether it’s incorporating unique spices, trying different marinades, or serving your oil chicken with unconventional sides, the possibilities are endless. Happy cooking, and enjoy every crispy, juicy bite of your homemade oil chicken!

0 comments