Introduction: The Charm of Homemade Pork Floss
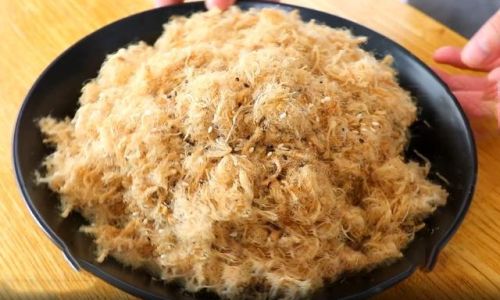
In the realm of culinary delights, pork floss, or “rou song” in Mandarin, holds a special place. This light, airy, and flavorful meat product is a staple in many Asian households, particularly in Taiwan, China, and Southeast Asia. Known for its sweet and savory taste, pork floss is often enjoyed as a snack, spread on bread, mixed into rice, or used as a topping for various dishes. While store-bought pork floss is convenient, nothing beats the satisfaction of crafting your own at home. This guide delves into the simple yet rewarding process of making pork floss, offering easy recipes and expert tips to help you master this delightful homemade treat.
Understanding Pork Floss: A Brief History and Overview
The origins of pork floss can be traced back to ancient China, where it was initially created as a preserved meat product. Over time, it evolved into a popular snack, celebrated for its unique texture and flavor. Pork floss is made by simmering lean pork until tender, shredding it into fine strands, and then drying or frying it until it reaches its signature fluffy consistency. The addition of seasonings like sugar, soy sauce, and five-spice powder enhances its taste, making it an irresistible snack for all ages.
The Benefits of Homemade Pork Floss
-
Customizable Flavors: When you make pork floss at home, you have complete control over the ingredients and seasonings. This allows you to tailor the flavor to your liking, whether you prefer a sweeter or more savory version.
-
Freshness and Quality: Homemade pork floss is made with fresh ingredients, ensuring its quality and freshness. Store-bought varieties, on the other hand, may contain preservatives and additives.
-
Cost-Effective: Making pork floss at home can be more cost-effective, especially if you buy pork in bulk or take advantage of seasonal discounts.
-
Fun and Rewarding: The process of making pork floss is both fun and rewarding. It allows you to bond with family or friends, and the satisfaction of creating something delicious from scratch is unparalleled.
Simple Pork Floss Recipes: Easy Steps to Deliciousness
Below are two simple recipes for making pork floss at home. Both recipes yield approximately 2-3 cups of pork floss and can be adjusted based on your preferences.
Recipe 1: Basic Pork Floss
Ingredients:
- 1 lb (450g) lean pork shoulder or pork belly (fat trimmed off)
- 3 tbsp soy sauce
- 2 tbsp oyster sauce
- 3 tbsp sugar (adjust to taste)
- 1 tbsp honey (optional, for a glossy finish)
- 1 tsp five-spice powder
- 1/2 tsp white pepper
- 2 cloves garlic, minced
- 1-2 tbsp vegetable oil (for frying)
Instructions:
-
Preparation: Cut the pork into small cubes or thin slices. This will make it easier to shred later.
-
Boiling: In a large pot, combine the pork, soy sauce, oyster sauce, sugar, honey, five-spice powder, white pepper, and minced garlic. Add enough water to cover the pork by about an inch. Bring to a boil, then reduce the heat to low and simmer for about 1-1.5 hours, or until the pork is very tender and can be easily shredded with a fork.
-
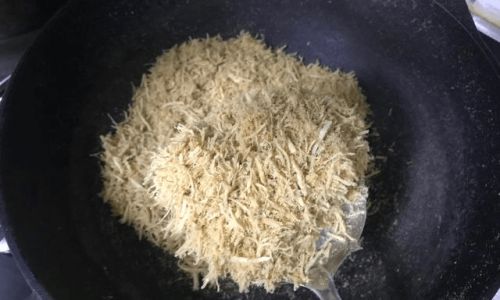
Shredding: Remove the pork from the pot and let it cool slightly. Using two forks or your hands, shred the pork into fine strands. The finer the strands, the fluffier your pork floss will be.
-
Frying: Heat the vegetable oil in a large skillet or wok over medium-low heat. Add the shredded pork in batches, stirring constantly to prevent burning. Fry until the pork is golden brown and slightly crispy, about 5-7 minutes per batch. Be careful not to overcook, as this will make the pork floss too dry.
-
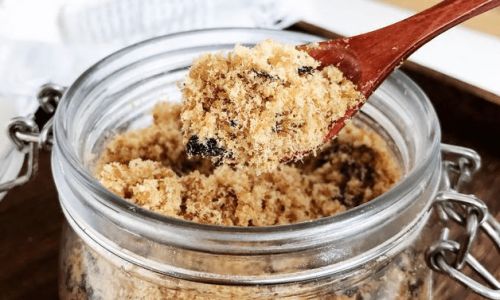
Cooling and Storing: Remove the pork floss from the skillet and let it cool on a baking sheet lined with parchment paper. Once cooled, store in an airtight container at room temperature for up to a week, or in the refrigerator for longer storage.
Recipe 2: Oven-Baked Pork Floss
Ingredients:
- 1 lb (450g) lean pork shoulder or pork belly (fat trimmed off)
- 3 tbsp soy sauce
- 2 tbsp rice vinegar
- 3 tbsp brown sugar (for a deeper caramel flavor)
- 1 tsp sesame oil
- 1/2 tsp five-spice powder
- 1/4 tsp white pepper
- 2 cloves garlic, minced
Instructions:
-
Preparation and Marinating: Cut the pork into small cubes or thin slices. In a large bowl, combine the soy sauce, rice vinegar, brown sugar, sesame oil, five-spice powder, white pepper, and minced garlic. Add the pork and toss to coat evenly. Let it marinate for at least 30 minutes, or overnight for more flavor.

-
Baking: Preheat your oven to 250°F (120°C). Line a baking sheet with parchment paper and spread the marinated pork in a single layer. Bake for about 1.5-2 hours, stirring occasionally to ensure even cooking. The pork should be very tender and slightly caramelized.
-
Shredding and Drying: Remove the pork from the oven and let it cool slightly. Shred the pork into fine strands using two forks or your hands. If you prefer a drier texture, you can return the shredded pork to the oven for an additional 10-15 minutes, stirring occasionally.
-
Cooling and Storing: Let the pork floss cool completely on the baking sheet. Once cooled, store in an airtight container at room temperature for up to a week, or in the refrigerator for longer storage.
Expert Tips for Perfect Pork Floss
-
Choosing the Right Pork: For the best texture and flavor, use lean pork shoulder or pork belly with the fat trimmed off. Avoid using pork with too much fat, as it will make the pork floss greasy.
-
Marinating for Flavor: Marinating the pork overnight will allow the seasonings to penetrate deeper, resulting in more flavorful pork floss.
-
Controlling the Heat: Whether you’re frying or baking, it’s crucial to maintain a low to medium-low heat. This ensures that the pork floss cooks evenly and doesn’t burn.

-
Shredding Technique: The finer you shred the pork, the fluffier and more tender your pork floss will be. Using two forks or your hands works well, but you can also use a food processor with the shredding blade if you prefer.
-
Adjusting Sweetness and Saltiness: Taste the marinade before adding it to the pork. Adjust the sweetness and saltiness to your liking by adding more sugar or soy sauce as needed.
-
Storing Properly: Store homemade pork floss in an airtight container at room temperature for up to a week. For longer storage, refrigerate or freeze. When reheating, avoid overcooking, as this will make the pork floss dry and tough.
Conclusion: The Joy of Homemade Pork Floss
Making pork floss at home is a rewarding experience that combines the satisfaction of crafting something delicious with the joy of sharing it with loved ones. With these simple recipes and expert tips, you’ll be able to create pork floss that rivals store-bought varieties, all while enjoying the process and customizing the flavors to your liking. Whether you’re a seasoned chef or a culinary novice, the art of homemade pork floss is within your reach. So, gather your ingredients, roll up your sleeves, and embark on this delightful culinary journey. Your taste buds will thank you!


0 comments