Introduction:

In the vast culinary landscape, breads occupy a unique and cherished place. They come in myriad forms, flavors, and textures, each offering a distinct taste experience. Among these delightful creations, the Pork Floss Milk Loaf Bun stands out for its harmonious blend of savory and sweet, texture and flavor. Imagine a soft, milk-infused loaf bun filled with the delicate, umami-rich taste of pork floss—a delightful contrast that tantalizes the palate. This article aims to guide you through the step-by-step process of crafting this delightful treat, ensuring that you can bring this gourmet delight to your kitchen with ease.
Section 1: Understanding the Ingredients
Before diving into the recipe, it’s crucial to familiarize yourself with the ingredients that make this loaf bun special. Each component plays a vital role in achieving the desired texture and flavor.
-
Bread Flour: High-protein bread flour is essential for creating a strong dough that can withstand the rigors of shaping and baking. It provides the structure needed for a well-risen loaf.
-
Milk Powder: Adding milk powder enhances the milkiness of the bread, giving it a richer, creamier taste. It also contributes to a softer crumb structure.
-
Instant Dry Yeast: This active ingredient is responsible for the dough’s rise. Instant yeast is convenient to use and doesn’t require activation before mixing.
-
Sugar: Sugar not only adds sweetness but also acts as a food source for the yeast, promoting fermentation. It also helps to tenderize the dough.
-
Salt: Salt enhances the overall flavor of the bread and controls the fermentation rate, preventing the dough from over-rising.
-
Eggs: Eggs contribute to the richness and moisture content of the dough, ensuring a tender crumb and a glossy exterior.
-
Milk: Cold or lukewarm milk is used to activate the yeast and provide hydration to the dough. The lactose in milk adds a subtle sweetness and enhances browning during baking.
-
Unsalted Butter: Butter adds flavor, tenderness, and moisture to the dough. It should be softened to ensure even incorporation into the dough.
-
Pork Floss: This dried, shredded pork is the star filling ingredient. It adds a savory, slightly sweet flavor that complements the milkiness of the bread perfectly.
-
Sesame Seeds: Optional but recommended, sesame seeds add a nutty crunch and visual appeal to the finished loaf.
Section 2: Preparing the Dough
With the ingredients ready, let’s proceed to the dough preparation. This step-by-step guide ensures precision and success.
-
Mixing the Dry Ingredients: In a large mixing bowl, combine the bread flour, milk powder, sugar, and salt. Mix well to distribute the ingredients evenly.
-
Activating the Yeast: In a separate bowl, pour in the lukewarm milk (around 110°F or 45°C). Sprinkle the instant dry yeast over the milk and let it sit for about 5 minutes until frothy. This indicates that the yeast is active and ready to use.
-
Combining Wet and Dry Ingredients: Create a well in the center of the dry ingredients and pour in the yeast mixture, followed by the beaten eggs. Using a dough hook attachment on a stand mixer, mix on low speed until the ingredients come together. Gradually increase the speed to medium and mix for about 8-10 minutes, or until the dough is smooth and elastic.
-
Adding Butter: Once the dough has formed, add the softened butter in small chunks, allowing each piece to be fully incorporated before adding the next. Continue mixing until the dough is smooth and no longer sticky, about 5-7 minutes more.
-
First Fermentation: Transfer the dough to a lightly greased bowl, cover with a damp cloth, and let it rise in a warm, draft-free place for about 1-1.5 hours, or until it has doubled in size.
Section 3: Shaping and Filling the Dough
After the dough has risen, it’s time to shape and fill it with the delicious pork floss.

-
Deflating the Dough: Punch down the risen dough to release any air bubbles. This step ensures that the final loaf has a finer texture.
-
Dividing and Rolling: Divide the dough into equal portions (typically 8-10 pieces for a standard loaf pan). Shape each portion into a ball and let them rest for about 10 minutes to relax the gluten.
-
Rolling Out the Dough: On a lightly floured surface, roll each dough ball into a rectangle about 6 inches long and 4 inches wide.
-
Adding the Pork Floss: Spread a generous layer of pork floss evenly over the surface of each rectangle, leaving a small border around the edges to help seal the dough.
-
Rolling Up the Dough: Starting from the long side, roll up each rectangle tightly, pinching the seam to seal. Shape the roll into a slightly elongated form to fit the loaf pan.
-
Arranging in the Pan: Place the filled dough rolls seam-side down in a greased loaf pan, spacing them slightly apart.
Section 4: Second Fermentation
Let the shaped dough undergo a second fermentation to ensure it rises beautifully in the oven.
-
Covering and Rising: Cover the loaf pan with a damp cloth or plastic wrap and let the dough rise in a warm place for about 45-60 minutes, or until it has risen just above the edge of the pan.
-
Preheating the Oven: While the dough is rising, preheat your oven to 350°F (175°C). If desired, you can also place a pan of hot water on the bottom rack of the oven to create steam, which will help achieve a softer crust.
Section 5: Baking the Loaf
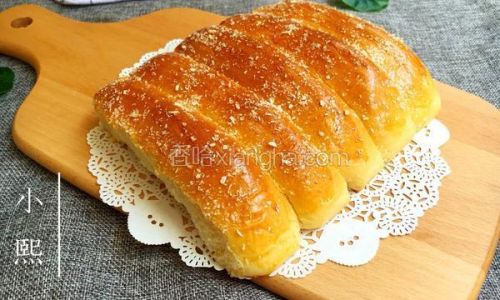
With the dough fully risen, it’s time to bake your masterpiece.
-
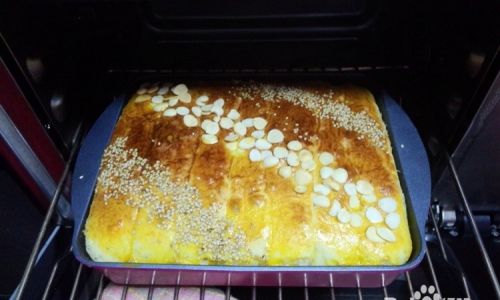
Egg Wash and Sesame Seeds: Brush the top of the loaf with a beaten egg for a glossy finish. Optionally, sprinkle with sesame seeds for added texture and flavor.
-
Baking: Place the loaf pan in the preheated oven and bake for about 30-35 minutes, or until the top is golden brown and the loaf sounds hollow when tapped on the bottom.
-
Checking for Doneness: An instant-read thermometer inserted into the center of the loaf should read between 190-200°F (88-93°C).
Section 6: Cooling and Serving
Once baked, allow the loaf to cool properly to ensure it retains its shape and texture.
-
Cooling: Remove the loaf from the oven and let it cool in the pan for about 10 minutes. Afterward, transfer it to a wire rack to cool completely.
-
Slicing and Serving: Once fully cooled, use a sharp knife to slice the loaf into even pieces. Serve as is, or pair with your favorite spread, jam, or soup for a delightful meal.
Conclusion:
The Pork Floss Milk Loaf Bun is a delightful fusion of flavors and textures that brings a unique twist to traditional bread-making. By following this detailed recipe, you can create a loaf that is not only visually appealing but also bursting with flavor. Whether you’re a seasoned baker or a novice in the kitchen, this recipe promises to deliver a satisfying and rewarding experience. Enjoy the process and savor every bite of your homemade Pork Floss Milk Loaf Buns!


0 comments