Introduction: The Art and Science of Bone Broth
In the culinary world, bone broth stands as a timeless staple, revered for its rich flavor, profound nutritional benefits, and versatility in the kitchen. Unlike regular stock or soup, bone broth is cooked for an extended period, often exceeding 24 hours, to extract maximum nutrients and gelatin from animal bones. This ancient practice, which dates back to prehistoric times, has recently regained popularity due to its perceived health benefits, including improved digestion, enhanced immune function, and joint health.
Making bone broth may seem like a simple task, but achieving a perfectly balanced, flavorful, and nutritious broth requires attention to detail, patience, and an understanding of the underlying principles. This guide will walk you through the entire process, from sourcing the best bones to storing your finished broth, ensuring you end up with a delicious and nutritious elixir that can be enjoyed on its own or used as a base for various dishes.
Step 1: Sourcing High-Quality Bones
The foundation of any good bone broth is the quality of the bones you use. Ideally, you should opt for grass-fed beef bones, free-range chicken or turkey bones, or wild-caught fish bones. These bones are not only richer in nutrients but also tend to produce a more flavorful broth.
- Beef Bones: Look for knuckle bones, marrow bones, and oxtail. Knuckle bones and marrow bones are particularly good for extracting gelatin and minerals.
- Chicken/Turkey Bones: Whole carcasses, necks, wings, and backs are excellent choices. Chicken feet can also be added for extra gelatin.
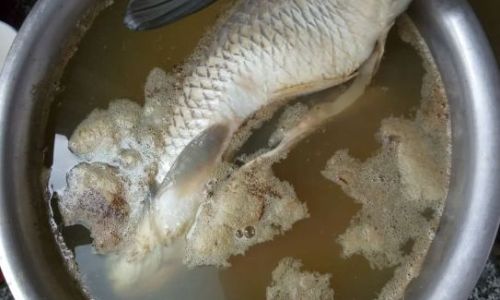
- Fish Bones:鱼头, fish frames, and tails from sustainable sources work well. Note that fish bone broth has a shorter cooking time and a different flavor profile.
Avoid bones from conventionally raised animals, as they may contain higher levels of antibiotics, hormones, and contaminants. Additionally, ensure the bones are fresh and have not been previously frozen, as this can affect the final texture and flavor of your broth.
Step 2: Preparing the Bones
Before you begin cooking, it’s crucial to prepare the bones properly to remove any impurities and enhance the broth’s clarity and taste.

- Rinse the Bones: Place the bones in a colander and rinse them thoroughly under cold running water to remove any surface dirt, blood, or debris.
- Soak the Bones: Fill a large bowl or pot with cold water and submerge the bones. Let them soak for at least 30 minutes to an hour. This step helps draw out more blood and impurities. Change the water if it becomes too bloody or murky.
- Roast the Bones (Optional but Recommended): Preheat your oven to 350°F (175°C). Pat the bones dry with paper towels and place them on a roasting rack or in a baking dish. Roast for about 30-45 minutes, until they are lightly browned and fragrant. This caramelization adds depth and complexity to the broth.
Step 3: Choosing Your Cooking Vessels
The type of pot you use can significantly impact the quality of your bone broth. Here are some recommendations:
- Stainless Steel Pots: These are a safe, neutral choice that won’t react with the broth.
- Enameled Cast Iron Pots: These retain heat well and are easy to clean, making them ideal for long cooking times.
- Slow Cookers: Convenient for those who want to set it and forget it. Choose a model with a ceramic or porcelain insert for better heat retention.
- Stock Pots: Large, heavy-bottomed pots are best for making large batches of broth.
Avoid aluminum, copper, and reactive stainless steel pots, as they can leach metals into your broth, affecting its taste and potentially its health benefits.
Step 4: Assembling Your Ingredients
In addition to the bones, there are several other ingredients that can enhance the flavor and nutritional profile of your bone broth:
- Vegetables: Carrots, celery, onions, and garlic are classics. They add sweetness, depth, and aroma.
- Aromatics: Bay leaves, thyme, rosemary, and black peppercorns provide a subtle herbal flavor.
- Apple Cider Vinegar: Adding a tablespoon or two helps draw out minerals from the bones by creating an acidic environment.
- Water: Use filtered or high-quality tap water. The quality of water can affect the taste of your broth.
Step 5: Cooking the Bone Broth
Now, it’s time to bring all your ingredients together and start cooking.
- Combine Ingredients: Place the prepared bones in your chosen pot. Add chopped vegetables, aromatics, and apple cider vinegar. Fill the pot with water, ensuring the bones are fully submerged. The water level should be about an inch above the bones.
- Bring to a Simmer: Place the pot on the stove over medium-high heat. Bring the mixture to a gentle simmer, skimming off any foam or impurities that rise to the surface with a ladle. This step is crucial for a clear broth.
- Reduce the Heat: Once simmering, reduce the heat to low or the lowest setting on your slow cooker. The goal is to maintain a gentle simmer, not a rolling boil. This slow cooking process allows the bones and vegetables to release their flavors and nutrients gradually.
- Cooking Time: For beef bones, aim for a minimum of 12-24 hours. Chicken and turkey bones require 8-12 hours. Fish bones should be cooked for 4-6 hours. The longer you cook, the more gelatin will be extracted, resulting in a thicker, more nutritious broth.
Step 6: Seasoning and Straining
Once your broth has reached the desired cooking time, it’s time to season and strain it.

- Taste and Season: Remove the pot from heat and let it cool slightly. Taste the broth and adjust the seasoning with salt if needed. Remember, bone broth is a base, so it should be slightly underseasoned to allow for further seasoning when used in recipes.
- Strain the Broth: Place a fine-mesh strainer or cheesecloth over a large bowl or another clean pot. Carefully pour the broth through the strainer, discarding the solids. You can press down gently on the solids with a spoon to extract as much liquid as possible, but avoid forcing it through, as this can cloud the broth.
- Cool and Store: Let the strained broth cool to room temperature, then transfer it to airtight containers. Store it in the refrigerator for up to a week or in the freezer for several months.
Step 7: Using and Enjoying Your Bone Broth
Bone broth is incredibly versatile and can be used in numerous ways:
- Soup Bases: Use it as the foundation for soups, stews, and gravies.
- Sauces and Marinades: Incorporate it into sauces, marinades, and braising liquids for added flavor and nutrition.
- Drinking Broth: Enjoy it as a warm, nourishing drink on its own, especially during cold weather.
- Cooking Grains and Vegetables: Use it instead of water when cooking grains like rice or quinoa, or steaming vegetables.
- Bone Broth Ice Cubes: Freeze it in ice cube trays for easy portioning and use in smoothies, soups, or stir-fries.
Conclusion: The Healing Power of Bone Broth
Making bone broth is not just about creating a delicious culinary staple; it’s a practice steeped in tradition and science. By following these steps, you’ll be able to craft a broth that is not only rich in flavor but also packed with nutrients that can support your overall health. Whether you’re looking to improve your digestion, boost your immune system, or simply enjoy a hearty, homemade soup, bone broth is a versatile and nutritious addition to your diet.
Remember, the beauty of bone broth lies in its simplicity and adaptability. Feel free to experiment with different bones, vegetables, and herbs to find a flavor profile that suits your taste buds and nutritional needs. With patience and practice, you’ll soon be a master of this ancient art, creating batches of nourishing, delicious bone broth that will warm your body and soul.


0 comments