Introduction
Raspberries, with their vibrant color, delicate texture, and sweet-tart flavor, are a cherished addition to many culinary delights. Whether enjoyed fresh in a bowl of morning cereal, blended into a smoothie, or baked into a pie, these berries offer a burst of summer’s sweetness that is hard to resist. However, their short shelf life can be a source of frustration for those who wish to enjoy their taste beyond the brief raspberry season. Fortunately, there are several effective methods for preserving raspberries, allowing you to savor their flavor year-round. This comprehensive guide will explore various techniques for how to preserve raspberries, including freezing, canning, drying, and making jams and preserves. By the end, you’ll be equipped with the knowledge and skills necessary to extend the life of your raspberries and enjoy them whenever you please.

Understanding Raspberries: A Brief Overview
Before diving into preservation methods, it’s essential to understand a bit about raspberries themselves. Raspberries belong to the Rubus genus, which includes a diverse range of plants known for their edible fruits. The most commonly cultivated species for commercial use is Rubus idaeus, but there are numerous varieties, each with its own unique flavor profile and growing habits.
Raspberries are aggregate fruits, meaning they are composed of multiple small drupelets surrounding a central core. This structure gives raspberries their distinctive appearance and texture. They are rich in vitamins, antioxidants, and dietary fiber, making them a nutritious addition to any diet.
When selecting raspberries for preservation, look for firm, brightly colored berries with no signs of mold or decay. Freshness is key, as raspberries that are already starting to decompose will not preserve well.
Freezing Raspberries: The Most Popular Method
Freezing raspberries is the most straightforward and widely used preservation method. It’s simple, requires minimal equipment, and preserves the berries’ flavor and texture remarkably well. Here’s a step-by-step guide to freezing raspberries:
-
Preparation:
- Rinse the raspberries gently under cold running water.
- Pat them dry using a clean kitchen towel or paper towels. Excess moisture can cause freezer burn.
- Inspect each berry carefully, discarding any that are moldy, soft, or damaged.
-
Flash Freezing (Optional but Recommended):
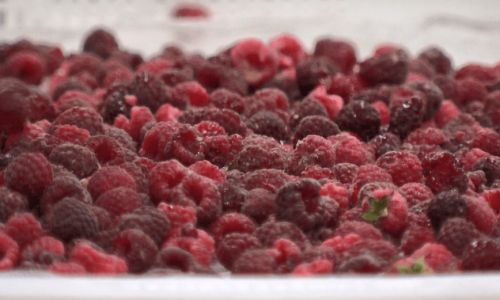
- Spread the raspberries in a single layer on a baking sheet lined with parchment paper.
- Place the sheet in the freezer for about 2-4 hours, or until the berries are frozen solid. This step prevents the berries from clumping together when stored in a freezer bag.
-
Storage:
- Once flash-frozen, transfer the berries to airtight freezer bags or containers.
- Remove as much air as possible from the bags to prevent freezer burn.
- Label the bags with the date and contents.
- Store in the freezer for up to one year.
-
Using Frozen Raspberries:
- To use frozen raspberries, simply remove the desired amount from the freezer and allow them to thaw at room temperature or in the refrigerator.
- Alternatively, you can use them frozen directly in smoothies, baked goods, or sauces.
Canning Raspberries: Preserving in a Jar
Canning raspberries is another effective preservation method that allows you to store the berries for longer periods. While it requires more equipment and preparation than freezing, canned raspberries can be a convenient addition to your pantry.
-
Equipment and Supplies:
- Canning jars with lids and rings
- Canning pot or large stockpot
- Jar lifter
- Funnel
- Ladle
- Clean cloth or paper towels
- Water bath canner (optional but recommended for a safer process)
-
Preparation:
Follow the same preparation steps as for freezing: rinse, dry, and inspect the raspberries.
-
Syrup Preparation (Optional):
- You can pack the raspberries in a light syrup to enhance their flavor and texture during storage.
- To make a light syrup, combine 2 cups of water with 1 cup of sugar in a saucepan and bring to a boil. Stir until the sugar is completely dissolved, then reduce the heat and keep the syrup warm.
-
Packing the Jars:
- Fill clean, hot canning jars with raspberries, leaving about 1/2 inch of headspace.
- If using syrup, pour the warm syrup over the berries, leaving the same headspace.
- Wipe the rim of each jar clean with a cloth or paper towel to remove any residue.
- Secure the lids and rings tightly.
-
Processing:
- Place the jars in a canning pot or large stockpot, ensuring they are fully submerged in water. The water should cover the jars by at least 1-2 inches.
- Bring the water to a rolling boil and process the jars for 15 minutes (adjust time based on altitude).
- Use a jar lifter to carefully remove the jars from the pot and place them on a clean towel or rack to cool.
- Listen for the pinging sound as the lids seal. Once cool, check each jar for a tight seal by pressing the center of the lid. It should not move.
-
Storage:
Store canned raspberries in a cool, dark place for up to one year.

Drying Raspberries: Preserving Through Dehydration
Drying raspberries is a great way to concentrate their flavor and create a versatile ingredient for baking, snacking, or cooking. Dehydrated raspberries can be stored for long periods without refrigeration.
-
Equipment and Supplies:
- Food dehydrator or oven with a convection setting and a fan
- Mesh trays or baking sheets lined with parchment paper
- Clean cloth or paper towels
-
Preparation:
Follow the same preparation steps as for freezing and canning.
-
Drying:
- Preheat your dehydrator to its lowest setting, typically around 135°F (57°C). If using an oven, set it to its lowest temperature with the convection fan on.
- Spread the raspberries in a single layer on the mesh trays or baking sheets.
- Place in the dehydrator or oven and allow them to dry for about 12-24 hours, depending on the humidity and the equipment used. The raspberries should be fully dried, with no moisture remaining.
-
Storage:
- Once dried, transfer the raspberries to an airtight container or jar.
- Store in a cool, dark place for up to one year.
Making Raspberry Jams and Preserves: Capturing Summer in a Jar
Making raspberry jam or preserves is a delightful way to preserve the berries while adding a homemade touch to your pantry. This method not only extends the shelf life of raspberries but also transforms them into a versatile, sweet spread.
-
Ingredients:
- 4 cups fresh raspberries
- 3 cups sugar (adjust to taste)
- 1/4 cup lemon juice (freshly squeezed)
- 1/4 cup water (optional, for thinner jam)
- 2 tablespoons pectin (optional, for firmer set)
-
Preparation:
- Rinse and crush the raspberries using a potato masher or fork. You can leave them somewhat chunky or puree them for a smoother jam.
- Combine the crushed raspberries, sugar, lemon juice, and water (if using) in a large, heavy-bottomed pot.
- Stir over medium heat until the sugar is completely dissolved and the mixture begins to boil.
-
Cooking:
- If using pectin, add it according to the package instructions.
- Boil the mixture, stirring frequently, until it reaches the desired consistency. This can take anywhere from 10-30 minutes, depending on your preferred jam thickness and whether you’re using pectin.
- To test for doneness, spoon a small amount of jam onto a chilled plate and let it cool. Run your finger through the jam; if it wrinkles, it’s ready.
-
Skimming and Jarring:
- Skim off any foam that has formed on the surface of the jam.
- Ladle the hot jam into clean, hot canning jars, leaving about 1/4 inch of headspace.
- Wipe the rim of each jar clean and secure the lids and rings tightly.
-
Processing:
- Process the jars in a water bath canner for 10 minutes (adjust time based on altitude).
- Remove the jars and let them cool completely. Check for seals as described earlier.
-
Storage:
Store the jars in a cool, dark place for up to one year. Once opened, store in the refrigerator.
Conclusion
Preserving raspberries is a rewarding endeavor that allows you to enjoy the sweet taste of summer throughout the year. Whether you choose to freeze,


0 comments