Canning fruits at home is a delightful way to extend the shelf life of seasonal produce and enjoy the sweet flavors of summer long after the season has passed. Whether you’re preserving strawberries, peaches, cherries, or any other fruit, the process of making and preserving homemade fruit cans can be both rewarding and straightforward with the right techniques. This guide will walk you through the essential steps to ensure your homemade fruit cans are safely preserved and retain their deliciousness for months or even years.
Understanding the Basics of Canning
Before diving into the specifics of preserving homemade fruit cans, it’s crucial to understand the basics of canning. Canning is a method of preserving food by processing it in airtight containers and heating the containers to a sufficient temperature to destroy microorganisms and inactivate enzymes that could cause spoilage. This process creates an environment where bacteria, molds, and yeasts cannot grow, thereby extending the food’s shelf life.
There are two primary methods of canning: water bath canning and pressure canning. Water bath canning is suitable for high-acid foods like fruits, pickles, jams, and jellies, while pressure canning is necessary for low-acid foods like vegetables, meats, and some types of fish to ensure the destruction of harmful bacteria like Clostridium botulinum, which can cause botulism.
Equipment Needed for Canning
To make and preserve homemade fruit cans, you’ll need some specific equipment. Here’s a list of essentials:
- Canning Jars: Choose jars specifically designed for canning, such as Mason jars. They come in various sizes, from pint to quart, depending on your needs.
- Canning Lids and Rings: New lids are crucial for each canning session, as the sealing compound cannot be reused. Rings can be reused if they’re in good condition.
- Large Pot or Canner: A large stockpot or a dedicated canning pot with a rack to keep jars from direct heat contact is necessary. For water bath canning, the pot should be deep enough to fully submerge the jars by at least 1-2 inches of water.
- Jar Lifter: A jar lifter makes it easier and safer to remove hot jars from the canning pot.
- Funnel: A wide-mouth funnel helps pour hot fruit filling into jars without spilling.
- Ladle: A heat-resistant ladle is useful for transferring hot fruit mixture.
- Bubble Remover or Chopstick: This tool helps remove air bubbles from jars, ensuring a better seal.
- Towel or Oven Mitts: Protect your hands with towels or oven mitts when handling hot jars and utensils.
- Pressure Canner (optional but recommended for low-acid foods): If you plan to can vegetables or other low-acid foods, a pressure canner is a must.
Preparing the Fruit
The quality of your fruit will directly impact the final product. Choose fresh, ripe fruits that are free from bruises, mold, and pests. Here’s how to prepare different types of fruits for canning:
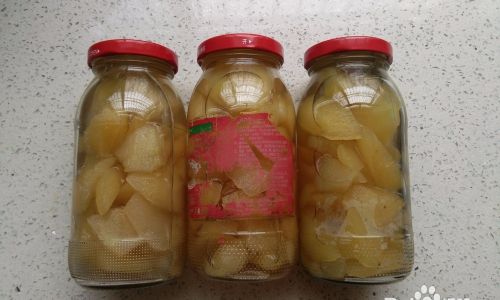
- Stone Fruits (Peaches, Nectarines, Plums): Peel, pit, and slice the fruit into uniform pieces. You can also blanch the fruit in boiling water for 30 seconds to 1 minute to soften the skin before peeling.
- Berries (Strawberries, Blueberries, Raspberries): Hull strawberries and rinse all berries gently. You can leave them whole or halve larger berries.
- Apples and Pears: Peel, core, and slice or chop the fruit. To prevent browning, you can dip the slices in a solution of lemon juice and water (one part lemon juice to three parts water).
- Grapes: Wash thoroughly and remove stems. You can leave them whole or halve them if desired.
Making the Syrup (Optional)
While some people prefer to can fruits in their natural juices or water, others like to use a syrup to enhance flavor and texture. Here are a few syrup options:
- Extra Light Syrup: 1 cup water, 3/4 cup sugar
- Light Syrup: 2 cups water, 1 1/2 cups sugar
- Medium Syrup: 3 cups water, 2 1/4 cups sugar
- Heavy Syrup: 4 cups water, 3 1/2 cups sugar
Boil the syrup ingredients together until the sugar is completely dissolved, then let it cool slightly before using.
Packing the Jars
- Sterilize Jars: Wash jars, lids, and rings in hot, soapy water and rinse well. Place jars in the canning pot, cover with water, and bring to a simmer for 10 minutes to sterilize. Keep the lids and rings in hot water until ready to use.
- Fill Jars: Use the funnel to pour hot syrup (if using) into the bottom of each jar. Add fruit, packing it tightly but not so tightly that it crushes. Leave headspace according to your canning recipe—typically between 1/2 inch to 1 inch from the top of the jar.
- Remove Air Bubbles: Use the bubble remover or a chopstick to gently stir the fruit and syrup, releasing any trapped air bubbles. Wipe the rim of the jar clean with a damp cloth to remove any residue that could interfere with sealing.
- Apply Lids and Rings: Place a clean lid on each jar and secure it with a ring, tightening just until fingertip-tight. Do not overtighten.
Processing the Jars
- Water Bath Canning: Lower the jars into the simmering water in the canning pot, ensuring they are fully submerged. Bring the water to a rolling boil and start timing. Processing times vary based on jar size and fruit type. For example, pints of sliced peaches may need to be processed for 25-30 minutes.
- Pressure Canning (if needed): Follow the manufacturer’s instructions for your pressure canner. Processing times for low-acid foods are typically longer and at a higher pressure than for water bath canning.
Cooling and Storing
- Remove Jars: After processing, carefully remove jars from the canner using the jar lifter and place them on a towel or rack to cool completely. Avoid moving them for at least 12 hours to ensure proper sealing.
- Check Seals: Once cool, press the center of each lid with your fingertip. If it does not pop up, the jar is sealed. If it does, store that jar in the refrigerator and use it within a few days.
- Label and Store: Wipe the jars clean, label them with the contents and date, and store them in a cool, dark place. Properly canned fruits can be stored for up to a year or longer.
Conclusion
Preserving homemade fruit cans is a fantastic way to enjoy the bounty of summer throughout the year. By following these steps and using the right equipment, you can ensure your canned fruits are safe, delicious, and ready to enjoy whenever you want. Whether you’re making sweet, syrupy peaches or tangy, crunchy berries, the satisfaction of opening a jar of homemade fruit canned with love is unparalleled. Happy canning!



0 comments