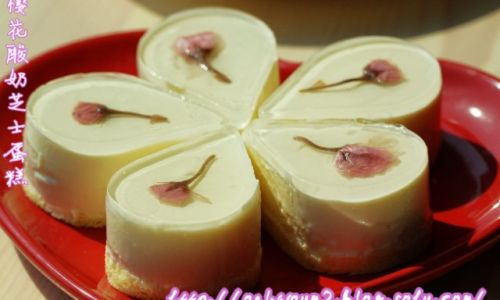
Creating a Sakura Cheese Layered Cake is an enchanting culinary journey that blends the delicate beauty of sakura (cherry blossoms) with the creamy indulgence of cheese. This dessert is not just a treat for the taste buds; it’s a visual masterpiece that brings spring’s charm to your table. Perfect for special occasions, family gatherings, or simply as a self-pampering treat, this layered cake combines the flavors and aesthetics of Japanese culture with Western baking techniques. Let’s dive into the step-by-step process of crafting this exquisite dessert.
Ingredients:
For the Cake Layers:
- 2 1/2 cups all-purpose flour
- 2 1/2 tsp baking powder
- 1/2 tsp salt
- 1 cup unsalted butter, softened
- 1 1/2 cups granulated sugar
- 4 large eggs, at room temperature
- 2 tsp vanilla extract
- 1 cup whole milk, at room temperature
- 1 tbsp sakura syrup (or cherry blossom syrup, if available) for flavor and color
- Pink food coloring (optional, for a stronger sakura hue)
For the Sakura Buttercream:
- 1 cup unsalted butter, softened
- 4 cups powdered sugar, sifted
- 1/4 cup heavy cream
- 1 tsp vanilla extract
- 2-3 drops pink food coloring
- Edible sakura petals or dried cherry blossom petals for garnish
For the Cheese Filling:
- 8 oz cream cheese, softened
- 1/4 cup powdered sugar
- 1 cup heavy whipping cream
- 1 tsp vanilla extract
- Fresh cherries or maraschino cherries, halved and drained, for filling layers
Additional Tools and Equipment:
- Three 8-inch round cake pans
- Parchment paper
- Cooling racks
- Offset spatula
- Piping bags and tips (optional, for decorative buttercream)
- Mixing bowls
- Electric mixer or stand mixer
- Measuring cups and spoons
- Rubber spatula
Instructions:
Step 1: Prepare the Cake Layers
-
Preheat and Prepare: Preheat your oven to 350°F (175°C). Grease and line the bottom of three 8-inch round cake pans with parchment paper. Lightly grease the parchment paper as well.
-
Dry Ingredients: In a medium bowl, whisk together the flour, baking powder, and salt. Set aside.
-
Cream the Butter and Sugar: In a large mixing bowl, use an electric mixer to cream the softened butter and granulated sugar together until light and fluffy, about 3-4 minutes.
-
Add Eggs and Vanilla: Beat in the eggs one at a time, ensuring each egg is fully incorporated before adding the next. Mix in the vanilla extract.
-
Combine Wet and Dry Ingredients: With the mixer on low speed, add the dry ingredients to the butter mixture in three additions, alternating with the milk. Begin and end with the dry ingredients. Mix until just combined.
-
Infuse Sakura Flavor: Stir in the sakura syrup. If you want a stronger pink color, add a few drops of pink food coloring until you reach your desired hue. Be cautious with the food coloring; a little goes a long way.
-
Bake: Divide the batter evenly among the prepared cake pans. Smooth the tops with a spatula. Bake for 20-25 minutes, or until a toothpick inserted into the center comes out clean.
-
Cool: Allow the cakes to cool in the pans for about 10 minutes, then transfer them to cooling racks to cool completely. Once cool, wrap each layer in plastic wrap and refrigerate for at least an hour to make them easier to handle during assembly.
Step 2: Make the Sakura Buttercream
-
Cream the Butter: In a large mixing bowl, beat the softened butter until creamy and smooth, about 2 minutes.
-
Add Powdered Sugar: Gradually add the powdered sugar, one cup at a time, beating on low speed until combined. Scrape down the sides of the bowl as needed.
-
Add Cream and Vanilla: Beat in the heavy cream and vanilla extract until the buttercream is light and fluffy, about 3-4 minutes.
-
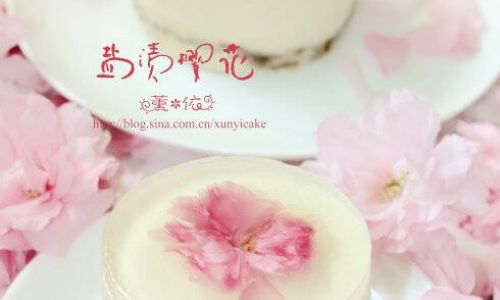
Color and Flavor: Add the pink food coloring, a few drops at a time, until you achieve a soft pink color reminiscent of sakura blossoms. Taste and adjust sweetness if necessary by adding more powdered sugar.
Step 3: Prepare the Cheese Filling
-
Beat Cream Cheese: In a medium mixing bowl, use an electric mixer to beat the softened cream cheese until smooth and creamy.
-
Sweeten: Gradually add the powdered sugar and continue to beat until well combined.
-
Whip Cream: In a separate bowl, whip the heavy cream and vanilla extract until stiff peaks form.
-
Combine: Gently fold the whipped cream into the cream cheese mixture until fully incorporated. Be careful not to overmix, as this can cause the filling to become too runny.
Step 4: Assemble the Cake
-
Level the Cakes: Using a serrated knife, level the tops of the chilled cake layers to ensure they are flat. This will help create a smooth, even cake.
-
Add Buttercream: Place the first cake layer on your serving plate or cake stand. Spread a thin layer of Sakura Buttercream on top to act as a crumb coat. This will help keep cake crumbs from mixing with the filling.
-
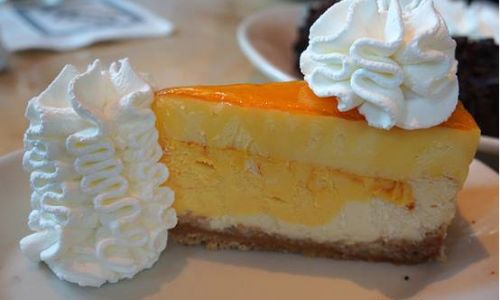
Add Cheese Filling and Cherries: Spread a generous layer of the cheese filling over the buttercream. Arrange halved cherries evenly on top of the filling.
-
Stack Layers: Place the second cake layer on top and repeat the process of spreading buttercream, cheese filling, and cherries.
-
Top Layer: Add the third cake layer and spread a thin layer of buttercream on top and around the sides to seal in the filling.
-
Frost the Cake: Use the remaining Sakura Buttercream to frost the entire cake, ensuring smooth and even coverage. You can use an offset spatula for a professional finish.
-
Decorate: Pipe decorative borders or swirls with the buttercream using piping bags and tips, if desired. Garnish with edible sakura petals or dried cherry blossom petals for a beautiful, authentic touch.
Step 5: Serve and Enjoy
Refrigerate the assembled cake for at least 30 minutes to allow the buttercream to set. Slice with a sharp knife, ensuring each serving showcases the beautiful layers and decorative elements. Serve chilled or at room temperature, accompanied by a cup of hot tea or coffee for the ultimate sakura-inspired dessert experience.
Creating a Sakura Cheese Layered Cake is a labor of love that brings together the sweet flavors of cherry blossoms with the rich, creamy texture of cheese. With meticulous attention to detail and a touch of artistic flair, you can transform your kitchen into a canvas for this stunning seasonal dessert. Enjoy every bite, savoring the harmony of flavors and the visual delight it brings to your table.

0 comments