Introduction
Pine nuts, also known as pignoli nuts, are a delicate and nutritious treat enjoyed worldwide. Their sweet, buttery flavor makes them a perfect addition to various dishes, from salads and pastas to baked goods and desserts. However, achieving the perfect roasted pine nut can be a challenge for even the most seasoned chefs. This guide will walk you through the process of how to roast pine nuts, ensuring you end up with a crunchy, flavorful snack that retains all its natural goodness.
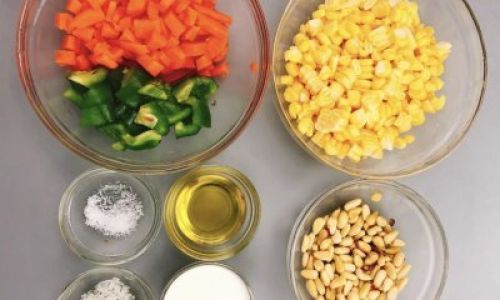
Understanding Pine Nuts
Before diving into the roasting process, it’s essential to understand a bit about pine nuts. They come from the cones of several species of pine trees, primarily the stone pine (Pinus pinea). Pine nuts are small, oval-shaped, and have a soft, creamy interior encased in a hard shell. Their delicate nature means they can be prone to burning if not roasted correctly.
Choosing the Right Pine Nuts
-
Freshness Matters: Always opt for fresh pine nuts. Older nuts can become rancid, losing their flavor and texture. Look for nuts that are light in color and free from discoloration or mold.
-
Variety: Different pine nut varieties have slightly different flavors and textures. Stone pine nuts are the most common and have a mild, buttery taste. Korean pine nuts, on the other hand, are slightly larger and have a nuttier flavor.
-
Source: If possible, buy pine nuts from a reputable supplier who can guarantee their freshness and origin. Imported nuts might have traveled a long way, which can affect their quality.
Preparation Before Roasting
-
Cleaning: Although pine nuts are generally clean, it’s a good idea to inspect them for any debris or shells. A quick pass through a sieve or a light picking over can remove any unwanted particles.
-
Toasting Oil (Optional): Some recipes recommend using a small amount of neutral oil, such as grapeseed or canola oil, to coat the nuts before roasting. This can help them roast more evenly and add a slight glossiness. However, be cautious with the amount of oil, as too much can make the nuts greasy.
Roasting Techniques
There are several methods to roast pine nuts, each yielding slightly different results. Here, we’ll explore three popular techniques: stovetop, oven, and microwave.
Stovetop Roasting
Stovetop roasting is a quick and effective way to toast pine nuts, especially if you’re working with a small batch.
-
Materials Needed: A dry, heavy-bottomed skillet or frying pan, wooden spoon or spatula, and a heatproof bowl.
-
Steps:
-
Preheat the Pan: Place the skillet over medium-low heat. Preheating ensures the nuts don’t stick to the cold surface.

-
Add the Nuts: Pour the pine nuts into the pan in a single layer. Avoid overcrowding, as this can cause uneven roasting.
-
Constant Stirring: Continuously stir the nuts with a wooden spoon or spatula. This prevents them from burning and ensures even roasting.
-
Watch Carefully: The roasting process is quick, usually taking around 3-5 minutes. The nuts will start to turn golden brown and release a nutty aroma.
-
Remove from Heat: Once the nuts are evenly toasted, immediately transfer them to a heatproof bowl to stop the cooking process. Overcooking can quickly turn golden brown into burnt.
-
Oven Roasting
Oven roasting is ideal for larger batches and offers more control over the roasting temperature.
-
Materials Needed: Baking sheet, parchment paper or silicone baking mat, and an oven preheated to 325°F (165°C).
-
Steps:
-
Preheat the Oven: Ensure your oven is preheated to the correct temperature.
-
Prepare the Baking Sheet: Line the baking sheet with parchment paper or a silicone baking mat to prevent sticking.
-
Spread the Nuts: Spread the pine nuts in a single layer on the prepared baking sheet.
-
Roast: Place the baking sheet in the preheated oven and roast for about 8-10 minutes, stirring halfway through to ensure even roasting.
-
Check for Doneness: Keep a close eye on the nuts. They should be golden brown and fragrant when done.
-
Cool: Remove from the oven and let them cool slightly on the baking sheet before transferring to a bowl or container.
-
Microwave Roasting
For those who prefer a faster, more hands-off approach, microwave roasting can be an option, though it requires careful monitoring to avoid burning.
-
Materials Needed: Microwave-safe bowl, microwave, and a spoon or spatula for stirring.
-
Steps:
-
Place the Nuts: Put the pine nuts in a microwave-safe bowl in a single layer.
-
Microwave on Low Power: Microwave on a low setting, typically 20-30 seconds at a time, stirring after each interval.
-
Watch Closely: Pine nuts can burn quickly in the microwave. Keep a close eye on them and stop as soon as they turn golden brown and fragrant.
-
Cool: Let them cool slightly before using or storing.
-
Storing Roasted Pine Nuts
Proper storage is crucial to maintaining the freshness and crunch of your roasted pine nuts.
-
Airtight Container: Store the cooled nuts in an airtight container. Glass jars with tight-fitting lids work well.
-
Cool, Dark Place: Keep the container in a cool, dark place away from direct sunlight and heat sources.
-
Refrigeration: For longer storage, consider refrigerating or freezing the nuts. They will keep for several months in the freezer, though their texture might slightly change upon thawing.
Conclusion
Roasting pine nuts might seem like a simple task, but achieving perfection requires attention to detail and the right technique. Whether you choose the stovetop, oven, or microwave method, following the steps outlined above will help you produce crunchy, flavorful pine nuts that elevate any dish. Remember, the key to success is patience, constant stirring, and careful monitoring to prevent burning. With these tips in mind, you’ll be able to enjoy homemade roasted pine nuts that are as delicious as they are nutritious. Happy roasting!

0 comments