Introduction
In the realm of culinary delights, stir-frying snail meat, commonly known as “escargots” in French cuisine or “tian luo” in Chinese contexts, offers a unique and flavorful experience. While many associate snails primarily with French gourmet dishes, the art of preparing and stir-frying them has a rich history across various cultures, including those in Asia. This guide aims to demystify the process of how to stir-fry snail meat, from sourcing and preparing the snails to crafting a delicious dish that will tantalize your taste buds.
Section 1: Understanding Snail Varieties and Sourcing

Before diving into the cooking process, it’s crucial to understand the different types of snails suitable for stir-frying. The most commonly used species for culinary purposes include the Roman snail (Helix pomatia), the Burgundy snail (Helix aspersa), and in Asian cuisine, the Chinese mystery snail (Cipangopaludina chinensis). Each variety has its unique texture and flavor profile, but for stir-frying, smaller to medium-sized snails are generally preferred as they cook more evenly and quickly.
Sourcing Fresh Snails:
- Local Farms and Markets: Seek out local snail farms or wet markets where live snails are sold. Freshness is key, as it ensures better taste and texture.
- Online Retailers: Various online platforms specialize in selling live snails, often shipped overnight to ensure freshness.
- Foraging: If you live in an area where snails are abundant, foraging can be a sustainable option. However, ensure you identify the species correctly and avoid areas polluted by pesticides or other contaminants.
Section 2: Preparing the Snails
Cleaning and preparing snails is a vital step that cannot be overlooked. Improperly cleaned snails can harbor dirt, parasites, or even small stones, which can detract from the final dish’s quality.
Cleaning Procedure:

- Soaking: Place live snails in a large container filled with clean, cold water. Add a handful of coarse salt to help draw out any dirt and impurities. Let them soak for at least 24 hours, changing the water every 6-8 hours.
- Rinsing: Rinse the snails thoroughly under running water, checking each one for any remaining debris.
- Boiling for Initial Cleanse: Bring a large pot of water to a boil. Blanch the snails for about 2-3 minutes. This step not only further cleanses them but also makes it easier to remove the meat from the shell.
- Shell Removal: After boiling, let the snails cool slightly. Use a small pick or knife to carefully prize open the shells and remove the meat. Discard the shells and any internal organs, focusing on the muscular foot and the edible portion.
Section 3: Marinating and Seasoning
Marinating the snail meat is essential for tenderizing and infusing it with flavor. This step also helps to balance the natural, slightly mucousy texture of snail meat.
Marinade Ingredients:
- Soy sauce or fish sauce (for an Asian twist)
- Minced garlic
- Ginger, finely chopped
- Shaoxing wine or dry sherry (optional, for added depth)
- A pinch of white pepper
- Sugar or honey (a touch to balance the savory flavors)
- Cornstarch or potato starch (for tenderizing and creating a glossy coat)
Marinating Process:
- In a bowl, mix all the marinade ingredients together until well combined.
- Add the cleaned snail meat, ensuring it’s fully submerged in the marinade.
- Cover the bowl and let it sit in the refrigerator for at least 1-2 hours, preferably overnight for maximum flavor penetration.
Section 4: Stir-Frying the Snail Meat

Now, we arrive at the heart of the process – stir-frying. This technique requires high heat and quick cooking to retain the meat’s tenderness and lock in all the flavors.
Stir-Fry Ingredients:
- Marinated snail meat
- Vegetable oil (peanut, sesame, or grapeseed oil work well)
- Aromatics: sliced green onions, chopped garlic, and ginger
- Vegetables: bell peppers, snap peas, or baby corn (optional, for added texture and color)
- Oyster sauce or hoisin sauce (for extra umami)
- Chili flakes or fresh chilies (optional, for heat)
- Scallions, chopped, for garnish
- Sesame seeds, toasted, for garnish
Stir-Fry Steps:
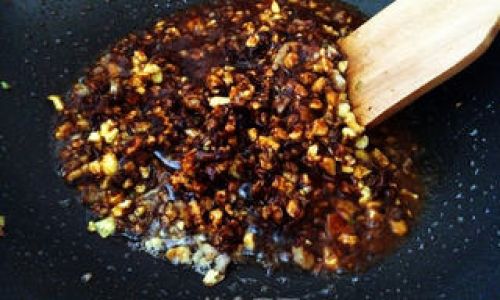
- Heat the Pan: Place a wok or large frying pan over high heat and add enough oil to coat the bottom generously.
- Aromatics: Once the oil is hot and slightly smoking, add the sliced green onions, garlic, and ginger. Stir-fry until fragrant, about 30 seconds to 1 minute.
- Vegetables: If using, add the vegetables and stir-fry for another 2-3 minutes until they are tender-crisp.
- Snail Meat: Add the marinated snail meat, spreading it out in a single layer if possible. Stir-fry for about 2-3 minutes, until the meat is heated through and slightly caramelized.
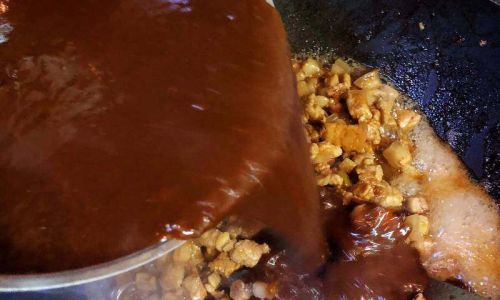
- Sauces: Pour in the oyster sauce or hoisin sauce, stirring quickly to coat the meat and vegetables evenly. Adjust seasoning with additional soy sauce or salt if needed.
- Final Touches: Add chili flakes or fresh chilies if desired, and stir-fry for another 30 seconds. Remove from heat and garnish with chopped scallions and toasted sesame seeds.
Section 5: Serving and Enjoying
Serve your stir-fried snail meat hot, accompanied by steamed rice or noodles to soak up the delicious sauce. This dish pairs wonderfully with a crisp green salad or light vegetable side to balance the rich flavors.

Creative Variations:
- Spicy Kick: Incorporate Sichuan peppercorns or Sriracha sauce for a fiery twist.
- Thai Fusion: Add lemongrass, kaffir lime leaves, and coconut milk for a tropical, aromatic flavor.
- Garlicky Delight: Increase the amount of garlic for a pungent, garlic-forward dish.
Conclusion
Stir-frying snail meat may seem like an unconventional culinary endeavor, but with the right techniques and ingredients, it can become a delightful and satisfying addition to your repertoire. By sourcing fresh snails, meticulously preparing them, and using a well-balanced marinade, you’ll be well on your way to crafting a dish that balances savory, sweet, and umami flavors in perfect harmony. Whether you’re exploring new culinary frontiers or simply looking to impress dinner guests, mastering the art of stir-frying snail meat will undoubtedly elevate your cooking skills and expand your culinary horizons. Enjoy your culinary adventure!


0 comments