Introduction
Clams, often referred to as the unsung heroes of the seafood world, are a delightful and nutritious addition to any culinary repertoire. Their delicate flavor and versatility make them a favorite among chefs and home cooks alike. However, handling clams properly is crucial to ensuring their freshness, safety, and overall quality. This comprehensive guide will walk you through every step of handling clams, from purchasing and storing them to cleaning, preparing, and cooking them. By following these guidelines, you’ll be able to enjoy fresh, delicious clams with confidence.
Section 1: Purchasing Clams
When it comes to buying clams, there are a few key factors to consider to ensure you’re getting the freshest, highest-quality product.
1. Choose a Reliable Source
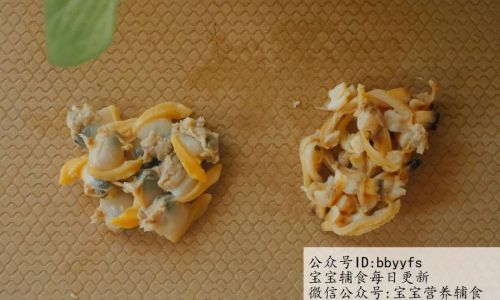
The first step in purchasing clams is to find a reputable supplier. Look for fishmongers or seafood markets that specialize in fresh, locally sourced seafood. These vendors are more likely to have clams that were recently harvested and handled properly. Avoid purchasing clams from sources that have a poor reputation or appear to be selling old or damaged shellfish.
2. Inspect the Shells
When inspecting clams, look for shells that are tightly closed. This is a sign that the clam is still alive and fresh. If a clam’s shell is slightly open, you can tap it gently. If it closes quickly, it’s still alive and safe to eat. Avoid clams with broken or cracked shells, as these may indicate that the clam has been damaged or is no longer viable.
3. Check for Odor
Fresh clams should have a mild, briny smell. If they have a strong, unpleasant odor, it’s a sign that they may be spoiled. Trust your nose when it comes to seafood; if something smells off, it’s best to err on the side of caution and avoid purchasing it.
4. Ask About Harvest Dates
If possible, ask your supplier about the harvest dates of the clams. Clams that were recently harvested are more likely to be fresh and of higher quality. Avoid clams that have been sitting around for too long, as their freshness and flavor can degrade over time.
Section 2: Storing Clams
Proper storage is essential for maintaining the freshness and quality of clams. Here are some tips for storing clams correctly.
1. Keep Them Wet
Clams need to stay moist to stay alive and fresh. Store them in a container with a damp cloth or paper towel on the bottom. Cover the container with a lid or plastic wrap to keep the moisture in. Avoid using ice directly on the clams, as this can kill them.
2. Refrigerate Immediately
Once you’ve purchased your clams, refrigerate them as soon as possible. The colder temperatures will slow down the clam’s metabolism and help them stay fresh longer. Keep them in the coldest part of your refrigerator, ideally in a container that’s separate from other foods to prevent cross-contamination.
3. Don’t Store for Too Long
Clams are best eaten within a day or two of purchase. The longer they sit, the more their quality and flavor will degrade. If you can’t eat them right away, try to use them within a few days for the best results.
4. Monitor for Signs of Spoilage
While clams are stored, keep an eye on them for any signs of spoilage. If they start to smell bad or their shells become brittle and fragile, it’s a sign that they’re no longer fresh and should be discarded.
Section 3: Cleaning Clams
Cleaning clams is an important step in preparing them for cooking. Here’s how to do it properly.
1. Rinse Under Cold Water
Start by rinsing the clams under cold running water. This will help remove any dirt, sand, or debris that’s stuck to their shells. Use a gentle scrubbing motion with your hands or a soft brush to dislodge any stubborn particles.
2. Soak in Saltwater
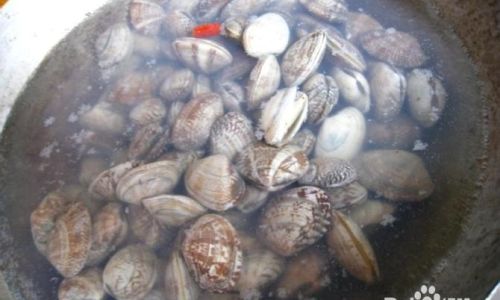
To further clean the clams, soak them in a solution of saltwater for about 20-30 minutes. This will help them expel any sand or grit that’s inside their shells. Use a ratio of about 1 cup of salt per gallon of water. Make sure the water is cold, as warm water can kill the clams.
3. Discard Any Dead Clams
While soaking, check the clams periodically. Any that remain open and don’t close when tapped are likely dead and should be discarded. Dead clams can cause food poisoning, so it’s important to be thorough in this step.
4. Rinse Again
After soaking, rinse the clams under cold water once more to remove any remaining saltwater or debris. Pat them dry with a clean paper towel before proceeding with your recipe.
Section 4: Preparing Clams for Cooking
Once your clams are clean, it’s time to prepare them for cooking. Here are some tips for getting them ready for the kitchen.
1. Choose the Right Cooking Method
Clams can be cooked in a variety of ways, including steaming, boiling, baking, and grilling. The cooking method you choose will depend on your personal preference and the recipe you’re using. Steaming and boiling are popular methods for clams, as they help to open the shells and cook the clam meat evenly.
2. Use Fresh Ingredients
When cooking clams, use fresh, high-quality ingredients to enhance their flavor. This includes herbs, spices, vegetables, and broths. Avoid using overly strong flavors or ingredients that could overpower the delicate taste of the clams.
3. Don’t Overcook
Clams cook quickly, so it’s important to monitor them carefully to avoid overcooking. Overcooked clams can become tough and rubbery, losing their delicate texture and flavor. Generally, clams are done cooking when their shells have opened and the meat is tender and opaque.
4. Discard Any Unopened Shells
After cooking, discard any clams that haven’t opened. This is a sign that they were either dead before cooking or didn’t cook properly. Eating unopened clams can be dangerous, as they may contain harmful bacteria.
Section 5: Cooking Clams
Now that your clams are clean and prepared, it’s time to cook them. Here are some popular recipes and cooking methods for clams.
1. Steamed Clams
Steaming clams is a simple and delicious way to cook them. Place the cleaned clams in a steamer basket over boiling water. Add a few herbs, such as garlic, parsley, or thyme, to the water for added flavor. Steam the clams until their shells open, about 5-10 minutes. Serve with melted butter, lemon juice, and a sprinkle of fresh herbs.
2. Boiled Clams
Boiling clams is another popular cooking method. Bring a large pot of salted water to a boil. Add the cleaned clams and cook until their shells open, about 5-7 minutes. Serve with drawn butter, cocktail sauce, or lemon wedges.
3. Baked Clams
Baked clams can be a delicious and elegant dish. Preheat your oven to 400°F (200°C). Place the cleaned clams in a baking dish and add a mixture of breadcrumbs, garlic, parsley, and cheese. Drizzle with olive oil and bake until the clams open and the topping is golden brown, about 10-15 minutes.
4. Grilled Clams
Grilling clams is a great way to add a smoky flavor to your dish. Preheat your grill to medium-high heat. Place the cleaned clams on the grill grate and cook until their shells open, about 5-7 minutes per side. Brush with melted butter or a barbecue sauce during grilling for extra flavor.
Section 6: Serving and Enjoying Clams
Once your clams are cooked, it’s time to serve and enjoy them. Here are some tips for serving and eating clams.
1. Serve with Accompaniments
Clams can be served with a variety of accompaniments to enhance their flavor. Popular options include melted butter, lemon juice, cocktail sauce, and fresh herbs. You can also serve them with crusty bread for sopping up the delicious juices.
2. Presentation Matters
When serving clams, presentation can make a big difference. Arrange them on a platter or in bowls with their shells open, displaying the tender meat inside. Garnish with fresh herbs, lemon slices, or a sprinkle of sea salt for an elegant touch.
3. Share the Experience
Clams are often enjoyed as a shared dish, making them perfect for gatherings and social events. Serve them at a party or family dinner and let everyone dig in with their hands, enjoying the

0 comments