Introduction

In the realm of autumn’s bounty, spiny chestnuts (Castanea mollissima or its various species) stand out as a delightful yet challenging treat. These nutritious and flavorful delicacies, encased in their prickly husks, offer a unique culinary experience that is both rewarding and somewhat daunting for those unfamiliar with their preparation. The process of shelling spiny chestnuts, while seemingly intricate, can be mastered with the right techniques and tools. This guide aims to demystify the art of shelling these prickly wonders, ensuring that you can enjoy their sweet, starchy flesh without the hassle of getting pricked.
Understanding Spiny Chestnuts
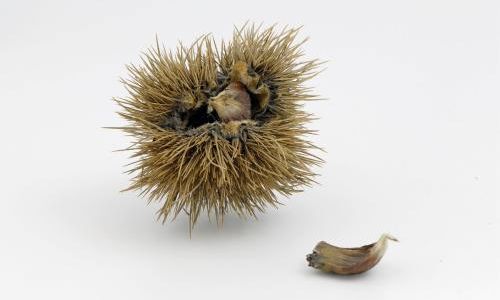
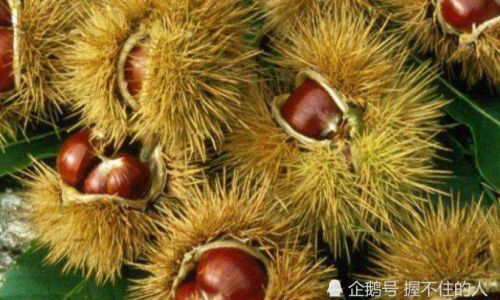
Before diving into the shelling process, it’s crucial to understand the basic structure of a spiny chestnut. These nuts are enclosed within a spiny, green husk that protects them from predators and environmental stressors. Inside this husk lies a hard, outer shell, which in turn houses the edible kernel. The outer shell is often covered with a thin, inner membrane that can be sticky and difficult to remove.
Choosing the Right Chestnuts
The first step in shelling spiny chestnuts successfully is selecting the right ones. Freshness is key; look for chestnuts that are still within their husks, ideally picked within the past few days. The husks should be bright green with firm, tightly closed spines. Avoid chestnuts with cracked husks or those that feel soft or hollow, as they may be moldy or insect-infested.
Preparation: Handling the Prickles
Handling spiny chestnuts requires caution to prevent injury. Wearing thick gloves is advisable, as the spines can easily pierce through thinner materials. Alternatively, you can use a pair of tongs or a thick cloth to grip the nuts securely.
Step-by-Step Shelling Process
-
Removing the Husk
The first challenge lies in removing the spiny husk without getting pricked. One effective method is to use a sharp knife or scissors to carefully cut open the husk along its seam. Another approach is to roast the chestnuts whole in their husks over an open flame or in an oven preheated to 400°F (200°C) for about 5-10 minutes. The heat will cause the husks to curl away from the nut, making them easier to peel off with gloves or tongs. Be cautious when handling hot chestnuts, as they can still retain heat even after removal from the heat source.
-
Cooling and Cracking
Once the husks are removed, allow the chestnuts to cool slightly. This step is crucial because attempting to crack them while they are still warm may result in a shattered kernel. Place the nuts on a hard surface and use a nutcracker specifically designed for chestnuts, or a hammer wrapped in a cloth to avoid damaging the kernels. Apply gentle, even pressure to crack the shell open.
-
Removing the Inner Shell and Membrane
With the outer shell cracked, you’ll need to separate the kernel from the inner shell and membrane. This can be done by gently prying the kernel out with a small knife or your fingers, taking care not to cut or crush it. For stubborn membranes, soaking the cracked nuts in hot water for a few minutes can soften the membrane, making it easier to peel away.
Alternatively, you can use a more traditional method employed in some regions: roasting the cracked nuts again for a brief period (about 3-5 minutes at 350°F or 175°C). The heat will cause the membrane to shrink and loosen, allowing for easier removal.
Alternative Shelling Techniques
For those seeking more efficient or automated methods, several tools and gadgets are available in the market:
- Chestnut Shellers: Electric or manual devices designed specifically for cracking and peeling chestnuts. These can be highly effective but may come with a higher price tag.
- Chestnut Peeling Machines: Commercial-grade equipment suitable for large-scale processing. These are generally not suitable for home use due to their size and cost.
- Pressure Cookers: Using a pressure cooker to cook chestnuts before shelling can soften the shells and membranes, making them easier to remove. However, this method requires precise timing to avoid overcooking the kernels.
Storage and Usage Tips
Once shelled, chestnuts can be stored in the refrigerator for up to a week or in the freezer for several months. To maintain their freshness, place them in an airtight container lined with paper towels to absorb any excess moisture.
When it comes to using shelled chestnuts, the possibilities are endless. They can be roasted, boiled, baked, or incorporated into various dishes such as stews, pies, and desserts. Their nutty, slightly sweet flavor pairs well with both savory and sweet ingredients, making them a versatile addition to any culinary repertoire.
Safety and Precautions

Throughout the shelling process, safety should be your top priority. Always wear protective gloves when handling raw chestnuts, and be cautious when using sharp tools or handling hot nuts. Additionally, keep children and pets away from the workspace to prevent accidents.
Conclusion
Shelling spiny chestnuts may seem like a daunting task, but with the right techniques, tools, and precautions, it can become a rewarding endeavor. By mastering the art of shelling these prickly nuts, you’ll unlock a world of culinary possibilities, enjoying the sweet, earthy flavor of fresh chestnuts in a variety of dishes. Whether you’re a seasoned chef or a home cook eager to experiment, the journey of transforming spiny chestnuts from their prickly state to a delicious treat is both a challenge and a delight. Happy shelling!
0 comments