Introduction
Preparing a delicious meal that includes meat filling can be a delightful experience, but the process often begins with a seemingly mundane task: thawing the frozen meat. Whether you’re making meatballs, burgers, or stuffed dishes, having your meat filling ready to use is crucial. However, thawing meat incorrectly can lead to food safety issues and a compromised texture. In this comprehensive guide, we’ll explore various methods to quickly and safely thaw meat filling, ensuring your culinary endeavors are both successful and enjoyable.
Understanding the Importance of Safe Thawing
Before diving into the specifics of thawing techniques, it’s essential to understand why safe thawing practices are vital. Frozen meat maintains its quality and safety by inhibiting the growth of bacteria. However, as soon as the thawing process begins, bacteria can start to multiply, especially if the meat is left in conditions that are too warm for too long.
The key to safe thawing is to do it slowly and at controlled temperatures to prevent the rapid growth of harmful bacteria. This doesn’t mean you have to wait hours or days for your meat filling to thaw; there are effective methods to speed up the process while still maintaining safety.
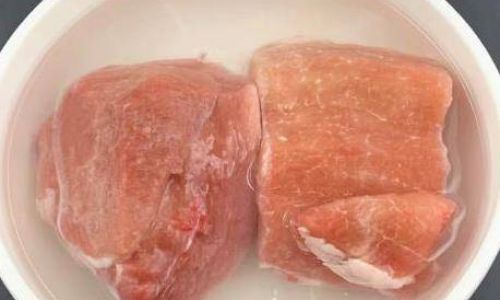
Thawing Methods: A Comprehensive Analysis
-
Refrigerator Thawing: The Safest Option
The refrigerator is the safest place to thaw meat filling, as it maintains a consistent temperature that prevents rapid bacterial growth. While it’s not the fastest method, it’s reliable and ensures your meat remains in a safe condition throughout the thawing process.
-
Steps:
- Remove the meat filling from the freezer and place it in a container or on a plate to catch any juices that may leak.
- Place the container or plate on a lower shelf in the refrigerator to minimize the risk of cross-contamination with other foods.
- Allow the meat filling to thaw completely in the refrigerator. This can take several hours to a couple of days, depending on the size and thickness of the meat.
-
Pros:
- Ensures food safety by maintaining a consistent low temperature.
- Prevents cross-contamination in the refrigerator.
- Preserves the quality and texture of the meat.
-
Cons:
Can be time-consuming, especially for large quantities or thick cuts of meat.
-
Tips:
- Plan ahead and allow enough time for thawing in the refrigerator.
- Use a meat thermometer to check the internal temperature of the meat before cooking to ensure it’s still safe to eat (it should not be above 40°F or 4.4°C).
-
-
Cold Water Thawing: A Faster Alternative
If you need to thaw meat filling more quickly, submerging it in cold water is a safe and effective alternative. This method works by transferring heat from the water to the meat, speeding up the thawing process.
-
Steps:
- Remove the meat filling from its packaging, but keep it in a sealed, leak-proof plastic bag to prevent cross-contamination and to keep the water from soaking into the meat.
- Submerge the sealed bag in a bowl or sink filled with cold water. Ensure the meat is fully submerged.
- Change the water every 30 minutes to maintain its cold temperature.
- Continue the process until the meat filling is completely thawed.
-
Pros:
- Faster than refrigerator thawing.
- Maintains food safety if the water is kept cold.
-
Cons:
- Requires constant monitoring to change the water.
- Can be messy and requires extra preparation.
-
Tips:
- Use a large bowl or sink to ensure the meat is fully submerged.
- Keep a close eye on the water temperature and change it frequently to prevent it from warming up.
- Never use hot water to thaw meat, as this can lead to rapid bacterial growth and could start to cook the outer layers of the meat.
-
-
Microwave Thawing: The Quickest, But Riskiest Option
The microwave offers the fastest thawing option, but it comes with the highest risk of compromising food safety and quality. Microwave thawing can cause uneven heating, leading to spots where the meat starts to cook while other areas remain frozen.
-
Steps:
- Remove any packaging from the meat filling and place it on a microwave-safe dish.
- Set the microwave to the defrost or low power setting.
- Thaw the meat in short intervals, usually 2-3 minutes per pound, pausing to turn or flip the meat between intervals to ensure even thawing.
- Check the meat frequently to avoid over-thawing or partial cooking.
-
Pros:
- Extremely fast.
- Convenient for last-minute preparations.
-
Cons:
- High risk of partial cooking and bacterial growth.
- Can lead to uneven thawing and a compromised texture.
-
Tips:
- Use the lowest power setting and shortest intervals possible.
- Monitor the meat closely to avoid over-thawing.
- Consider cooking the meat immediately after thawing in the microwave to minimize the risk of bacterial growth.
-
-
Countertop Thawing: Not Recommended
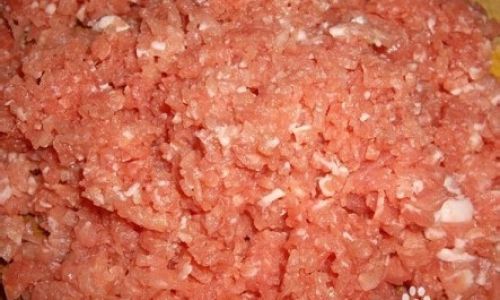
Thawing meat filling on the countertop or in any warm environment is not recommended due to the high risk of bacterial growth. Warm temperatures accelerate the multiplication of bacteria, which can lead to food poisoning.
-
Risks:
- Rapid bacterial growth.
- Potential for food poisoning.
- Compromised meat quality and texture.
-
Alternative:
Use one of the above-mentioned safe thawing methods instead.
-
Additional Tips for Successful Thawing
-
Proper Packaging:
Always thaw meat in its original packaging or a sealed, leak-proof plastic bag to prevent cross-contamination and to keep juices from dripping onto other foods.
-
Separation:
If thawing multiple packages of meat filling, keep them separated to prevent any juices from mixing and potentially spreading bacteria.
-
Immediate Cooking:
Once thawed, cook the meat filling immediately to further reduce the risk of bacterial growth.
-
Storage:
If you need to store thawed meat filling before cooking, do so in the refrigerator and use it within a day or two.
-
Hygiene:
Wash your hands, utensils, and surfaces thoroughly after handling raw meat to prevent cross-contamination.
Conclusion
Thawing meat filling doesn’t have to be a time-consuming or stressful task. By choosing the right method and following safe practices, you can quickly and easily prepare your meat filling for cooking while maintaining food safety and quality. Whether you opt for the slow and steady refrigerator method, the faster cold water technique, or the risky but quick microwave option, always prioritize food safety and monitor the thawing process closely. With the right approach, you’ll be able to enjoy delicious, homemade meals featuring perfectly thawed and cooked meat filling in no time.
Further Reading and Resources
For more in-depth information on food safety, thawing techniques, and meat handling, consider consulting the following resources:
-
Food Safety and Inspection Service (FSIS): The FSIS, a division of the United States Department of Agriculture (USDA), provides comprehensive guidelines on food safety, including thawing and handling raw meat. Visit their website for the latest updates and recommendations.
-
Food and Drug Administration (FDA): The FDA offers valuable information on food safety, including safe thawing practices for various types of meat and poultry. Their guidelines can be found on the FDA’s official website.
-
Cooking and Food Safety Books and Articles: There are numerous books and articles available that provide detailed information on food safety, thawing techniques, and meat handling. Consider consulting these resources for additional tips and techniques.
-
Culinary Schools and Cooking Classes: Many culinary schools and cooking classes offer courses on food safety and meat handling. Enrolling in a class can provide hands-on experience and expert guidance on safe thawing and cooking practices.
By staying informed and following best practices, you can ensure that your meat filling is thawed safely and effectively, ready to be transformed into a delicious meal that your family and friends will enjoy. Happy cooking!


0 comments