Table of content
Cleaning pork intestines, often referred to as chitterlings or simply “fei chang” in Chinese cuisine, can be a daunting task for many home cooks. The organ’s texture and the notion of thorough cleaning can deter even the most adventurous food enthusiasts. However, with the right techniques and tools, washing pork intestines can be both simple and effective, ensuring a delicious and hygienic dish. This guide will walk you through the step-by-step process of how to clean pork intestines simply and thoroughly, making them ready for your favorite recipes.
Understanding Pork Intestines
Before diving into the cleaning process, it’s essential to understand what pork intestines are and why they require special attention during preparation. Pork intestines are the tubular organs that serve as part of the digestive system in pigs. They come in various sections, including the small intestine and large intestine, each with its own texture and use in cooking.
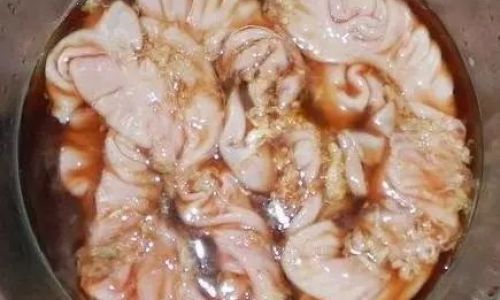
The outer layer of pork intestines is typically tough and may contain fat, while the inner lining is smooth but can harbor impurities such as undigested food, bacteria, and other debris. Therefore, cleaning pork intestines involves removing these impurities while preserving the integrity of the intestine itself.
Importance of Thorough Cleaning
Thorough cleaning of pork intestines is crucial for several reasons:
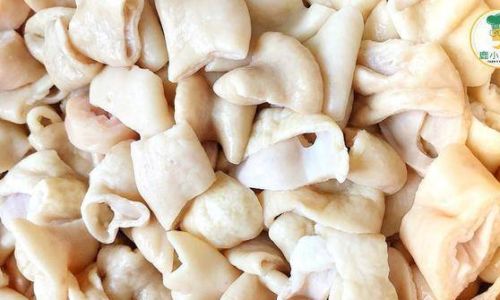
- Hygiene: Removing impurities ensures that the final dish is safe to eat, minimizing the risk of food poisoning.
- Flavor: Impurities can impart unwanted flavors and odors to the cooked intestines, affecting the overall taste of your dish.
- Texture: Proper cleaning helps to achieve a tender and pleasant texture, making the intestines more enjoyable to eat.
Preparation Before Cleaning
Before you begin the cleaning process, gather all necessary tools and ingredients. You will need:
- Fresh or frozen pork intestines
- A large cutting board
- A sharp knife
- A large bowl or sink
- Cold water
- Salt
- Vinegar or lemon juice (optional for additional odor removal)
- Paper towels or clean cloths
- Rubber gloves (optional but recommended for hand protection)
Step-by-Step Cleaning Process
Step 1: Inspection and Trimming
- Inspection: Begin by inspecting the intestines carefully. Look for any tears, holes, or areas with excessive fat or debris. Discard any damaged or unappealing pieces.
- Trimming: Use a sharp knife to trim away any excess fat, membranes, or other unwanted parts. This step is crucial for a cleaner final product and can make the subsequent cleaning process easier.
Step 2: Initial Rinse
- Rinsing: Place the trimmed intestines in a large bowl or sink filled with cold water. Rinse them thoroughly under running water to remove any loose debris or surface impurities.
- Draining: Drain the water and repeat the rinsing process until the water runs clear or nearly clear. This initial rinse helps to remove the most obvious impurities and prepares the intestines for more thorough cleaning.
Step 3: Salt Scrubbing
- Salt Application: Sprinkle a generous amount of coarse salt over the intestines. The salt acts as an abrasive, helping to loosen and remove stubborn impurities.
- Scrubbing: Use your hands or a clean cloth to scrub the intestines gently but firmly. Pay special attention to the inner lining, where most impurities tend to accumulate.
- Rinsing and Repeating: Rinse the intestines thoroughly under running water to remove the salt and any impurities that have been loosened. Repeat the salt scrubbing and rinsing process until you are satisfied with the cleanliness of the intestines.
Step 4: Vinegar or Lemon Juice Treatment (Optional)
- Soaking: If you want an additional layer of odor removal, soak the cleaned intestines in a solution of vinegar or lemon juice and water. The acidity of vinegar or lemon juice helps to neutralize unpleasant odors and can make the intestines more palatable.
- Rinsing: After soaking for about 15-30 minutes, rinse the intestines thoroughly under running water to remove any residual vinegar or lemon juice.
Step 5: Final Rinse and Inspection
- Final Rinse: Give the intestines a final rinse under running water to ensure that all impurities, salt, vinegar, or lemon juice have been removed.
- Inspection: Carefully inspect the intestines once more. Look for any remaining impurities or areas that may require additional cleaning. If necessary, repeat the salt scrubbing or vinegar/lemon juice treatment.
Step 6: Drying and Storage
- Drying: Pat the intestines dry with paper towels or clean cloths. Removing excess moisture helps to prevent bacteria growth and keeps the intestines fresher for longer.
- Storage: If you are not ready to cook the intestines immediately, store them in an airtight container in the refrigerator for up to a few days. Alternatively, you can freeze them for longer-term storage.
Tips for Successful Cleaning
- Use Fresh or High-Quality Frozen Intestines: Fresh or high-quality frozen intestines are easier to clean and less likely to harbor harmful bacteria. Avoid using intestines that have been sitting in the refrigerator or on the shelf for too long.
- Work in a Clean Environment: Clean your workspace, utensils, and hands thoroughly before starting the cleaning process. This helps to prevent cross-contamination and ensures a hygienic final product.
- Be Patient and Thorough: Cleaning pork intestines takes time and patience. Don’t rush the process, and be thorough in your efforts to remove all impurities.
- Wear Rubber Gloves: While not strictly necessary, wearing rubber gloves can protect your hands from the rough texture of the intestines and any potential bacteria.
- Use a Mild Odor Neutralizer: If the intestines have a strong odor, consider using a mild odor neutralizer like vinegar or lemon juice. However, be careful not to use too much, as it can affect the final flavor of the cooked intestines.
Cooking Pork Intestines
Once your pork intestines are clean, they are ready for cooking. There are many delicious recipes that use cleaned pork intestines, including chitterlings, sauerkraut and intestines, and stir-fries. When cooking, remember to cook the intestines thoroughly to ensure that they are safe to eat. This typically involves simmering or boiling them for an extended period, followed by any additional cooking steps required by your recipe.
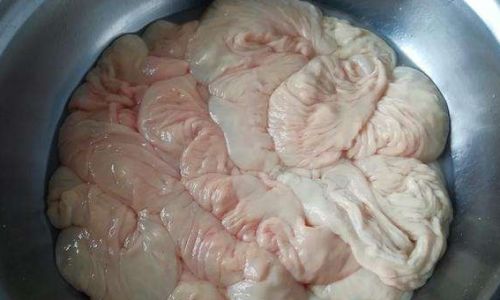
Conclusion
Cleaning pork intestines may seem like a daunting task, but with the right techniques and tools, it can be both simple and effective. By following the step-by-step process outlined in this guide, you can achieve clean, hygienic, and delicious pork intestines ready for your favorite recipes. Remember to use fresh or high-quality frozen intestines, work in a clean environment, be patient and thorough, and consider using a mild odor neutralizer if necessary. With these tips in mind, you can enjoy the culinary delights of pork intestines without worrying about hygiene or flavor issues. Happy cooking!


0 comments