Table of content
Cleaning sheep intestines, a traditional task often undertaken in culinary practices across various cultures, can be a daunting prospect for many. The organ’s delicate texture and the potential for harboring impurities make the process seem intricate and time-consuming. However, with the right techniques and tools, you can clean sheep intestines efficiently and effectively, ensuring they are ready for use in your favorite dishes. This guide will provide you with comprehensive steps to clean sheep intestines quickly and thoroughly.
Understanding Sheep Intestines
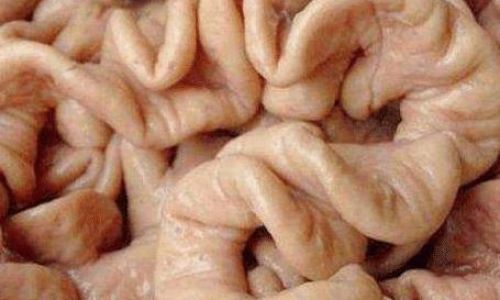
Before diving into the cleaning process, it’s essential to understand the structure and characteristics of sheep intestines. Sheep intestines are composed of multiple layers, including the mucosa (innermost layer), submucosa, muscularis, and serosa (outermost layer). The mucosa is where most of the impurities and fats reside, making it the primary focus of the cleaning process.
Preparation Before Cleaning
-
Gather Supplies: Equip yourself with the necessary tools and supplies, including:
- Sheep intestines
- Rubber gloves (for protection)
- A sharp knife (for trimming)
- A large cutting board
- A large bowl or sink filled with cold water
- Salt (preferably coarse)
- Vinegar or lemon juice (for odor removal)
- A hose or faucet with adjustable water pressure
- A fine-tooth brush or a cloth (for scrubbing)
- Paper towels or clean cloths (for drying)
-
Inspect the Intestines: Carefully inspect the intestines for any tears, punctures, or large pieces of fat and debris. Discard any damaged portions.
Step-by-Step Cleaning Process
Step 1: Initial Rinse
Begin by rinsing the intestines under cold running water to remove any loose debris and feces. Use your hands to gently squeeze the intestines, helping to dislodge any stuck-on matter. Be cautious not to stretch or tear the tissue.

Step 2: Trim and Turn
Once the intestines are somewhat cleaned, use a sharp knife to trim off any excess fat, membranes, or connective tissue. Next, carefully turn the intestines inside out. This step is crucial as it exposes the mucosa, the layer that needs the most thorough cleaning.
Step 3: Salt and Vinegar Treatment
Fill a large bowl or sink with cold water and add a generous amount of coarse salt. Submerge the inside-out intestines in the saltwater solution. The salt acts as an abrasive, helping to loosen and remove fats, mucus, and other impurities. Allow the intestines to soak for about 15-20 minutes, gently stirring occasionally.

After soaking, drain the saltwater and rinse the intestines thoroughly under cold water. Next, prepare a vinegar or lemon juice solution (about 1 part vinegar/lemon juice to 3 parts water). Soak the intestines in this solution for another 10-15 minutes. Vinegar and lemon juice are natural disinfectants and odor neutralizers, helping to eliminate any lingering smells.
Step 4: Scrubbing
Remove the intestines from the vinegar/lemon solution and rinse them once more. Using a fine-tooth brush or a soft cloth, gently scrub the inside surface of the intestines. Pay close attention to any stubborn spots or areas that still appear dirty. Scrubbing helps to remove any remaining impurities and ensures a smoother texture.

Step 5: Rinse and Repeat
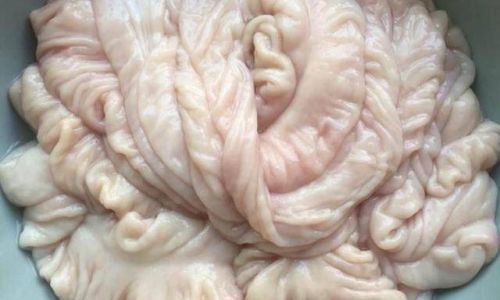
Rinse the intestines thoroughly under cold running water to wash away all traces of salt, vinegar, and scrubbing debris. Inspect the intestines closely to ensure they are clean. If necessary, repeat the soaking and scrubbing process until you are satisfied with the cleanliness.
Step 6: Final Rinse and Turn
Once the intestines are thoroughly cleaned, turn them right-side out. Give them a final rinse under cold water, ensuring that no soap residue, salt, or vinegar remains.

Drying and Storage
- Air Dry: Lay the cleaned intestines on a clean cloth or paper towels and allow them to air dry. Avoid direct sunlight or heat, which could damage the tissue.
- Refrigeration: Once dry, store the intestines in an airtight container in the refrigerator. They can be kept for several days if properly handled.
- Freezing: For longer storage, wrap the intestines tightly in plastic wrap or freezer bags and store them in the freezer. Properly frozen intestines can be kept for several months.
Tips for Success
- Work in Batches: If you have a large quantity of intestines to clean, working in smaller batches can make the process more manageable.
- Patience and Gentleness: Cleaning sheep intestines requires patience and a gentle touch. Rushing the process can lead to tears or damage to the tissue.
- Odor Control: While vinegar and lemon juice are effective odor neutralizers, ensure you rinse the intestines thoroughly to avoid transferring these flavors to your final dish.
In conclusion, cleaning sheep intestines quickly and thoroughly is achievable with the right techniques and tools. By following the steps outlined in this guide, you can transform potentially off-putting organs into a versatile ingredient for a wide range of culinary creations. Whether you’re preparing traditional sausage, chitterlings, or simply exploring new culinary frontiers, clean sheep intestines are a valuable addition to your kitchen repertoire.


0 comments