Table of content
Introduction
Pickling is a preservation technique that enhances the flavor and shelf life of various vegetables and fruits. Among the myriad of options available, Jerusalem artichokes, also known as sunchokes, offer a unique and nutritious choice for pickling. These tuberous roots are native to North America and are prized for their crisp texture and nutty, slightly sweet flavor. Pickling Jerusalem artichokes not only preserves their freshness but also infuses them with a tangy, tangy-sweet taste that makes them an excellent addition to salads, sandwiches, and various dishes.
In this guide, we will delve into the intricacies of how to pickle Jerusalem artichokes for a delightful taste. From selecting the perfect artichokes to crafting a flavorful brine, we will cover every step in detail to ensure your pickled Jerusalem artichokes are a hit.
Selecting the Right Jerusalem Artichokes
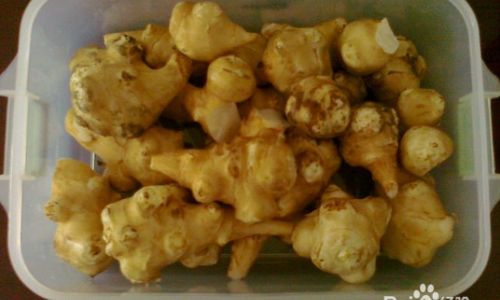
The first step in pickling Jerusalem artichokes is selecting the right ones. Here are a few tips to help you choose the best artichokes for pickling:
-
Appearance: Look for firm, smooth, and blemish-free artichokes. Avoid those with soft spots, cracks, or mold.
-
Size: While size can vary, smaller to medium-sized artichokes tend to be more tender and flavorful. Larger ones might be fibrous and less enjoyable.
-
Freshness: Jerusalem artichokes should have a fresh, earthy aroma. Avoid those that smell musty or have an off-putting odor.
-
Seasonality: Jerusalem artichokes are typically harvested in the fall. Try to source fresh, locally grown artichokes during this time to ensure maximum freshness and flavor.
Once you have your artichokes, it’s essential to prepare them properly before pickling. This involves cleaning, peeling (if desired), and cutting them into uniform pieces to ensure consistent pickling.
Preparing the Jerusalem Artichokes
-
Cleaning: Rinse the artichokes thoroughly under cold running water to remove any dirt and debris. Use a vegetable brush to scrub off any stubborn soil.
-
Peeling: Peeling is optional but can improve the texture and appearance of your pickled artichokes. Use a sharp knife or vegetable peeler to remove the tough outer skin. Be careful not to cut into the flesh too deeply, as this can result in loss of flavor and texture.
-
Cutting: Cut the artichokes into uniform pieces. This could be slices, sticks, or even small cubes, depending on your preference. Uniformity is key to ensure even pickling.
-
Soaking: To remove excess starch and prevent discoloration, soak the cut artichokes in a bowl of cold water for about 30 minutes. You can add a tablespoon of vinegar to the water, which will help maintain their bright color.
Crafting the Pickling Brine
The brine is the lifeblood of pickling, and its composition will greatly influence the final taste of your Jerusalem artichokes. Here’s a classic brine recipe that balances sweetness, tanginess, and saltiness perfectly:
Ingredients:
- 2 cups distilled white vinegar (or apple cider vinegar for a milder taste)
- 2 cups water
- 1/4 cup granulated sugar (or honey for a natural sweetness)
- 2 tablespoons pickling salt (or kosher salt)
- 1 teaspoon whole black peppercorns
- 1 teaspoon whole allspice berries
- 1 teaspoon mustard seeds
- 1 small onion, thinly sliced
- 2 cloves garlic, thinly sliced
- 1-2 fresh bay leaves
- 1-2 dried red chili peppers (optional, for a spicy kick)
Instructions:
-
Combine Ingredients: In a large pot, combine the vinegar, water, sugar, and salt. Stir until the sugar and salt are fully dissolved.
-
Add Aromatics: Add the peppercorns, allspice berries, mustard seeds, sliced onion, garlic, bay leaves, and chili peppers (if using). These aromatics will infuse the brine with layers of flavor.
-
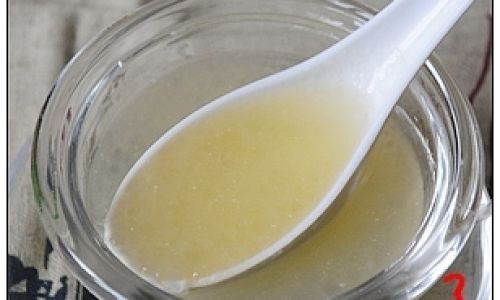
Simmer: Bring the mixture to a gentle simmer over medium heat. Do not boil vigorously, as this can cause the aromatics to release their flavors too quickly and become bitter.
-
Taste and Adjust: Taste the brine and adjust the sweetness, tanginess, and saltiness to your liking. Remember, the flavors will intensify as the artichokes pickle.
-
Cool: Remove the pot from heat and let the brine cool to room temperature. You can speed up this process by placing the pot in an ice water bath.
Pickling the Jerusalem Artichokes
Now that your brine is ready and your artichokes are prepped, it’s time to start pickling. Here’s a step-by-step guide:
-
Sterilize Jars: Ensure your pickling jars are clean and sterile. You can do this by washing them in hot, soapy water, rinsing them thoroughly, and then sterilizing them in a boiling water canner for about 10 minutes. Let them air dry or dry them with a clean cloth.
-
Pack the Artichokes: Pack the prepared artichokes tightly into the sterile jars. Make sure there are no air pockets, as these can cause spoilage.
-
Pour in the Brine: Pour the cooled brine over the artichokes, ensuring they are fully submerged. Use a clean, non-reactive utensil to press down on the artichokes if necessary to keep them submerged.
-
Seal the Jars: Secure the lids tightly on the jars. If you’re using canning jars with two-piece lids, make sure the rubber seals are in place and the screw bands are tightened just until finger-tight.
-
Process in a Water Bath (Optional): For long-term storage, you can process the jars in a boiling water canner. Place the jars in the canner, ensuring they are fully submerged in water. Bring the water to a rolling boil and process for about 10-15 minutes, depending on your altitude and jar size. Use a canning rack or jar lifter to carefully remove the jars from the canner and let them cool on a towel or wooden surface.
-
Store: If you’re not processing the jars for long-term storage, you can store them in the refrigerator instead. Let the jars sit at room temperature for about 24 hours to allow the flavors to meld, then transfer them to the refrigerator. They will be ready to eat after about a week but will continue to develop flavor over time.
Serving and Enjoying Your Pickled Jerusalem Artichokes
Once your pickled Jerusalem artichokes are ready, there are endless ways to enjoy them. Here are a few ideas to inspire you:
- Salads: Add them to mixed greens, grain salads, or pasta salads for a crunchy, tangy addition.
- Sandwiches: Use them as a crunchy topping on sandwiches, burgers, or wraps.
- Appetizers: Serve them as a tangy, refreshing appetizer with a side of dip or cheese.
- Side Dishes: Pair them with roasted meats, grilled vegetables, or potatoes for a flavorful contrast.
- Snacks: Enjoy them straight from the jar as a healthy, tangy snack.
Troubleshooting Common Issues
Even with the best intentions, pickling can sometimes present challenges. Here are a few common issues and how to troubleshoot them:
- Soft Artichokes: If your pickled artichokes are too soft, it could be due to overcooking or not using enough vinegar in the brine. Ensure you use the correct ratio of vinegar to water and avoid boiling the brine vigorously.
- Discoloration: Discoloration can occur due to exposure to air or improper storage. Make sure the artichokes are fully submerged in the brine and store them in a cool, dark place.
- Cloudy Brine: Cloudy brine is usually caused by bacteria or yeast. Ensure your jars and tools are sterile, and use clean, fresh ingredients. If the brine becomes cloudy and has an off-putting odor, discard the batch and start again.
Conclusion
Pickling Jerusalem artichokes is a delightful way to preserve their fresh, nutty flavor and enjoy them throughout the year. By following the steps outlined in this guide, you can create a tangy, tangy-sweet brine that complements the artichokes perfectly. Whether you’re a seasoned pickler or a novice, with the right ingredients and techniques, you can craft delicious, homemade pickled Jerusalem artichokes that will be a hit at any gathering. So, gather your ingredients, roll up your sleeves, and start pickling!


0 comments