Introduction
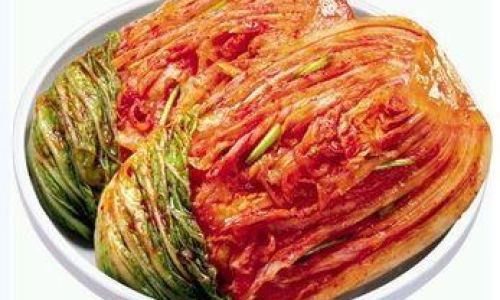
Kimchi, a traditional Korean fermented vegetable dish, holds a special place in the culinary heritage of the Korean peninsula. Its tangy, spicy, and slightly sour flavor profile is a testament to the art of fermentation, blending simplicity with complexity. While there are numerous variations, spicy kimchi, often made with napa cabbage as its base, is the most widely recognized. This guide will walk you through the process of making homemade spicy kimchi, from preparing the vegetables to achieving the perfect fermentation.
Understanding Fermentation
Before diving into the recipe, it’s crucial to understand the basics of fermentation. Fermentation is a biological process that involves the conversion of sugars into acids, gases, or alcohol by microorganisms like bacteria and yeast. In the context of kimchi, lactic acid bacteria (LAB) play a pivotal role. These bacteria consume the sugars in the cabbage and produce lactic acid, which preserves the kimchi and gives it its characteristic tangy flavor.
Proper fermentation not only enhances the taste but also boosts the nutritional value of kimchi by increasing the levels of beneficial probiotics. It’s important to note that the success of your kimchi fermentation depends on several factors, including temperature, salt concentration, and the presence of oxygen.
Ingredients
- 1 medium-sized head of napa cabbage (about 2 kg)
- 100g coarse sea salt (or kosher salt)
- 60g Korean chili flakes (gochugaru)
- 3 medium-sized carrots, shredded
- 1 medium-sized daikon radish, shredded
- 3-4 green onions, chopped
- 3 cloves of garlic, minced
- 1-inch piece of fresh ginger, minced
- 2 tablespoons fish sauce (optional, for added flavor depth)
- 2 tablespoons sugar (optional, to balance the heat and acidity)
- 1 tablespoon rice vinegar (optional, for a slight tang)
- About 1 cup of water (for brine)
- 1-2 tablespoons of Korean chili paste (gochujang, optional, for extra flavor)
- 1 tablespoon of Asian sesame oil (optional, for richness)
- Salt for brining (additional, if needed)
Tools and Equipment

- Large mixing bowls
- Clean cutting boards and knives
- A large glass jar or ceramic crock with a tight-fitting lid (ensure it’s large enough to hold the cabbage and brine)
- Clean kitchen towels or cheesecloth
- Rubber bands or string
- Large spoon or ladle for mixing
- Clean hands or food-safe gloves
Step-by-Step Instructions
Preparing the Cabbage
-
Cleaning the Cabbage: Start by removing any outer leaves of the cabbage that might be damaged or dirty. Rinse the cabbage under cold running water, then pat it dry using a clean kitchen towel.
-
Cutting the Cabbage: Cut the cabbage lengthwise into quarters, keeping the root end intact to help maintain the structure. Remove the core if it’s thick and tough.
-
Salting the Cabbage: In a large mixing bowl, sprinkle the coarse sea salt evenly over the cabbage quarters. Rub the salt into the leaves gently but firmly, ensuring it reaches all layers. Let the cabbage sit for about 2 hours, occasionally massaging the leaves to help draw out moisture.
Making the Brine
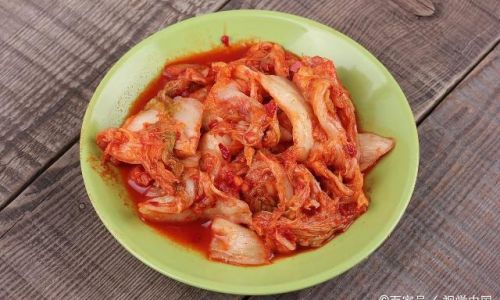
- Collecting the Moisture: After 2 hours, you should notice a pool of liquid at the bottom of the bowl. This is the brine formed from the cabbage’s natural juices and the added salt. If there isn’t enough liquid to cover the cabbage halfway, you can make additional brine by mixing 1 tablespoon of salt per cup of water until it dissolves.
Preparing the Seasoning Paste
-
Mixing the Dry Ingredients: In a medium-sized mixing bowl, combine the Korean chili flakes, minced garlic, and minced ginger. Mix well to ensure an even distribution of flavors.
-
Adding Wet Ingredients: Incorporate the shredded carrots, shredded daikon radish, chopped green onions, fish sauce (if using), sugar (if using), rice vinegar (if using), Korean chili paste (if using), and sesame oil (if using) into the dry ingredient mixture. Stir until a thick, paste-like consistency is achieved.
Assembling the Kimchi
-
Rinsing the Cabbage: Rinse the salted cabbage quarters under cold water to remove excess salt. Pat them dry gently with clean kitchen towels. Be careful not to tear the leaves.
-
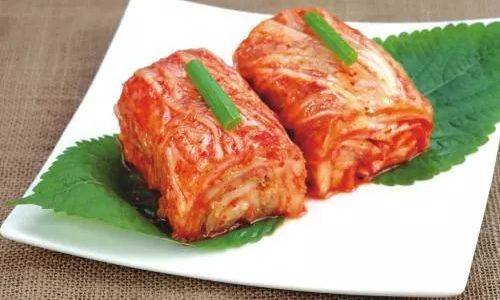
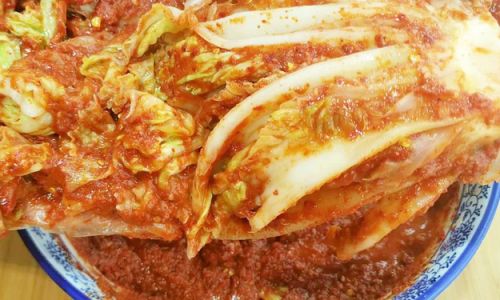
Applying the Paste: Working with one cabbage quarter at a time, apply a generous amount of the seasoning paste between each layer of leaves, ensuring even coverage. You can use your hands or a spoon for this step.
-
Packing the Jar: Tightly pack the seasoned cabbage quarters into the prepared glass jar or ceramic crock. Press down firmly to eliminate air pockets and ensure the cabbage is submerged in the brine. If necessary, add more brine (using the saltwater solution if you made it) to cover the cabbage completely.
Fermentation
-
Covering the Jar: Cover the opening of the jar with a clean kitchen towel or cheesecloth. Secure it with a rubber band or string to keep out contaminants while allowing gases produced during fermentation to escape.
-
Finding the Right Spot: Place the jar in a cool, dark place where the temperature remains consistent, ideally between 60-75°F (16-24°C). Avoid direct sunlight and areas with extreme temperature fluctuations.
-
Monitoring the Fermentation: Check the kimchi daily for the first few days to ensure it’s submerged in brine. If necessary, press down the cabbage to keep it submerged and add more brine if levels drop. The fermentation process will start to bubble and release gases, which is normal.
-
Taste Testing: After about 3-7 days (depending on your taste preference and ambient temperature), start tasting the kimchi. It should have developed a tangy, slightly sour flavor with a nice crunch. If you prefer a more intense flavor, you can let it ferment for an additional 1-2 days.
Storing the Kimchi
-
Refrigeration: Once you’re satisfied with the flavor, transfer the jar of kimchi to the refrigerator to slow down the fermentation process. This will help preserve the kimchi and prevent it from becoming overly sour.
-
Burping the Jar: Occasionally, especially in the first few days after refrigerating, you may need to “burp” the jar by loosening the lid slightly to release built-up gases. After a week or so in the fridge, the fermentation will slow significantly.
Conclusion
Making your own spicy kimchi is a rewarding culinary endeavor that not only saves money but also allows you to customize the flavors to your liking. By understanding the basics of fermentation and following this step-by-step guide, you can create delicious, probiotic-rich kimchi that rivals the best Korean restaurants. Remember, the art of fermentation is patient and requires attention to detail, but the end result is well worth the effort. Enjoy your homemade kimchi as a side dish, a topping for burgers or tacos, or even as a base for soups and stews. Happy fermenting!

0 comments