Table of content
Pickling dried radish, a timeless culinary tradition in many parts of Asia, especially China, offers a delightful blend of tangy, sweet, and savory flavors. This preserved delicacy is not only a testament to the ingenuity of preserving food but also a culinary delight that can be enjoyed throughout the year. If you’re eager to learn how to craft the most delicious pickled dried radish, this guide will take you through every step, ensuring you achieve perfection in both texture and taste.
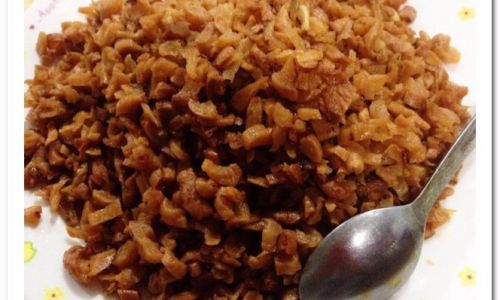
Understanding the Ingredients: The Heart of Flavor
Before diving into the preparation, it’s crucial to understand the key ingredients and their roles in creating the perfect pickled dried radish.
Fresh Radishes: Start with the freshest radishes you can find. They should be firm, with a bright color and smooth skin. Varieties like daikon (Chinese white radish) or even smaller, more compact ones work well for drying.
Salt: Salt acts as a preservative and draws out moisture from the radishes, aiding in the drying process. The type of salt can influence the final flavor; sea salt or kosher salt are preferred for their clean, subtle taste.
Sugar: Balances the acidity and adds a touch of sweetness, enhancing the overall harmony of flavors.
Vinegar: Essential for creating the tangy, sour taste. Rice vinegar, apple cider vinegar, or even white vinegar can be used, each contributing its unique flavor profile.

Spices and Aromatics: Ingredients like garlic, ginger, chili peppers, and Sichuan peppercorns add depth and complexity to the pickled radish. These can be adjusted according to personal preference.
Oil: A small amount of oil, such as sesame oil or vegetable oil, can be added to enhance the aroma and mouthfeel of the final dish.
Step-by-Step Guide to Making Pickled Dried Radish
Step 1: Preparation and Drying
-
Cleaning the Radishes: Start by thoroughly washing the radishes under running water. Remove any dirt or imperfections. Pat them dry using a clean kitchen towel.
-
Slicing: Depending on the size of the radishes, slice them into thin rounds, sticks, or even julienne cuts. Thinner slices will dry faster and pickle more evenly.
-
Salting: In a large bowl, toss the sliced radishes with a generous amount of salt. The ratio is roughly 1 tablespoon of salt for every pound of radishes. Mix well to ensure all pieces are coated. Let the radishes sit for about 2-3 hours, occasionally tossing to distribute the salt evenly. This process will draw out moisture.

-
Draining and Drying: After the salting period, drain the radishes, discarding the liquid. Pat them dry once more with paper towels or a clean cloth. Spread the radish slices in a single layer on clean, dry baking sheets or drying racks. Place them in a well-ventilated area or use a food dehydrator set to a low temperature (around 135°F or 57°C). Drying time can vary from 12 to 24 hours, depending on thickness and humidity. The goal is to achieve a chewy yet slightly crisp texture.
Step 2: Preparing the Pickling Liquid
-
Boiling the Vinegar Mixture: In a medium saucepan, combine vinegar, sugar, and a pinch of salt. The ratio can be adjusted to taste, but a good starting point is 1 cup of vinegar, 1/4 cup of sugar, and 1/2 teaspoon of salt. Heat until the sugar and salt are fully dissolved. If using spices like garlic, ginger, and chili peppers, add them to the vinegar mixture during this stage and let it simmer for a few minutes to infuse the flavors.
-
Cooling: Remove the saucepan from heat and let the vinegar mixture cool completely. This is crucial to prevent the radishes from becoming mushy when added to the hot liquid.
Step 3: Pickling and Storage
-
Combining: Once the radishes are fully dried and the pickling liquid is cool, place the dried radishes in a clean, glass jar or container. Pour the vinegar mixture over the radishes, ensuring they are fully submerged. If necessary, use a smaller, clean weight (like a small glass jar filled with water) to keep the radishes from floating to the top.
-
Flavor Adjustment: Taste the pickling liquid before sealing the jar. If you prefer a more intense flavor, you can add more vinegar, sugar, or spices directly to the jar.
-
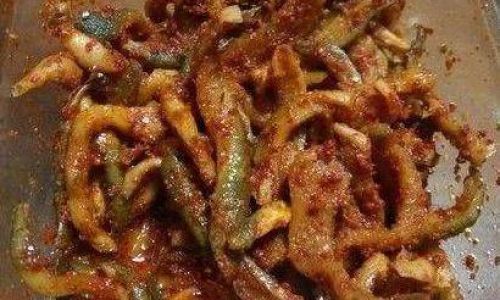
Sealing and Aging: Tightly seal the jar and let it sit at room temperature for a day or two to allow the flavors to meld. For best results, transfer the jar to the refrigerator after this initial period. Cold temperatures will slow down the pickling process, allowing the radishes to develop a more complex flavor over time.
-
Waiting: Patience is key. The pickled dried radishes will continue to develop flavor as they sit in the refrigerator. Ideally, wait at least a week before tasting, but they can be enjoyed anytime after that, with flavor improving over several weeks.
Tips for Perfect Pickled Dried Radish
- Quality Ingredients: Always use high-quality, fresh ingredients. This makes a significant difference in the final taste.
- Control Humidity: Drying radishes in a humid environment can prolong the drying process and affect the texture. Use a dehydrator or find a dry, well-ventilated spot.
- Balance of Flavors: Taste your pickling liquid frequently during preparation to ensure a balanced blend of sweet, sour, and savory notes.
- Storage: Proper storage in an airtight container in the refrigerator is essential to maintain freshness and flavor.
- Experimentation: Don’t be afraid to experiment with different spices and flavors. Adding a splash of soy sauce, sesame oil, or even a hint of citrus can create unique variations.
Conclusion
Making pickled dried radish is not just a culinary endeavor but a journey through flavors and textures. By following these steps and tips, you’ll be able to craft a delicious, tangy, and slightly sweet treat that can be enjoyed as a snack, a side dish, or even an ingredient in more complex recipes. The beauty of pickling lies in its versatility and the ability to preserve the essence of fresh produce for later enjoyment. So, gather your ingredients, roll up your sleeves, and embark on this delightful culinary adventure. Your taste buds will thank you!



0 comments