Table of content
Preserving fruits through various techniques has been a cornerstone of culinary traditions worldwide, allowing for the enjoyment of seasonal delights year-round. Among these preservation methods, salt-preserving stands out as a simple yet effective way to capture the essence of fruits, particularly citrus, at their peak. Salt-preserved citrus, commonly known as salt-preserved mandarin oranges or salted lemons depending on the region and type of citrus used, is a cherished condiment in many cuisines. It adds a burst of tangy, salty flavor to dishes, enhances marinades, and makes for delightful beverages. In this guide, we will focus on how to make salt-preserved citrus using kumquats or small mandarin oranges, commonly referred to as salt-preserved citrus or salt-preserved ume (though traditionally ume refers to pickled plums).
Understanding the Basics
Before diving into the process, it’s crucial to understand the science behind salt-preserving. Salt acts as a natural preservative by drawing out moisture from the fruit, creating an environment hostile to bacteria and fungi. This dehydration process, combined with the high salt concentration, preserves the fruit while allowing its flavors to concentrate and develop over time.
Choosing the Right Citrus
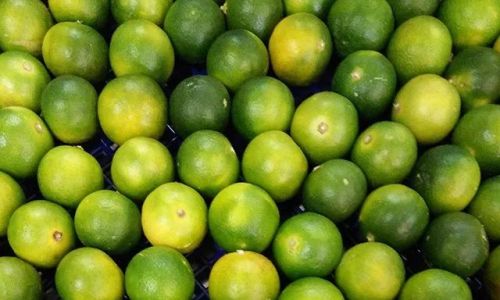
When selecting citrus for salt-preserving, opt for firm, unblemished fruits with a good balance of sweetness and tartness. Kumquats, small mandarin oranges, and even some varieties of lemons can be used. Kumquats are particularly favored due to their thin skin, which becomes edible and adds a unique layer of flavor. Ensure the citrus is fresh and free from any signs of decay.
Equipment and Ingredients
- Fresh citrus (kumquats, small mandarin oranges, or lemons)
- Coarse sea salt or kosher salt (avoid using table salt as it may contain additives)
- A clean, sterile jar with a tight-fitting lid
- A clean knife and cutting board
- Optional: A fine-mesh strainer or cheesecloth for draining excess salt later
Preparation Steps
Step 1: Cleaning and Drying
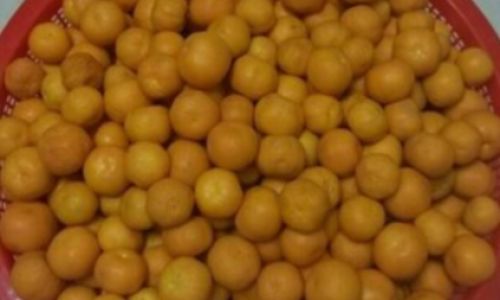
Begin by thoroughly washing the citrus fruits under running water to remove any dirt or pesticides. Pat them dry using a clean kitchen towel or let them air-dry completely. Ensuring the fruits are dry is crucial to prevent mold during the preservation process.
Step 2: Preparing the Citrus
Depending on the size and type of citrus, you may need to handle them differently:
- Kumquats: Leave them whole, as their thin skin is edible and adds flavor.
- Small Mandarin Oranges: Cut them into halves or quarters, removing any seeds but keeping the peel on.
- Lemons: If using lemons, quarter them and remove the seeds, but again, keep the peel intact.
Step 3: Layering Salt and Citrus
In your prepared jar, start by adding a layer of coarse salt at the bottom. Place a layer of citrus fruits on top of the salt, ensuring they are packed tightly but not crushed. Sprinkle another layer of salt over the fruits, followed by another layer of citrus. Repeat this process until you’ve used all the fruits and salt, ending with a thick layer of salt on top to ensure all surfaces of the citrus are covered.
Step 4: Sealing and Storing
Once the jar is filled, tightly close the lid. The citrus will start releasing juices, which will mix with the salt to create a brine. Place the jar in a cool, dark place away from direct sunlight. The ideal temperature for this process is between 65°F to 75°F (18°C to 24°C).
The Waiting Game: Fermentation and Aging
Salt-preserving is a slow process that involves fermentation. Over the first few weeks, you may notice bubbles or a slight hissing sound, which indicates that the citrus is releasing gases as it ferments. This is normal and should not be a cause for concern.

After about a month, you can start checking the citrus periodically. The fruits should have shrunk and become more pliable, and the brine should have a salty, citrusy aroma. Depending on your taste preference, you can let the citrus ferment for anywhere between 3 months to a year. The longer it ferments, the more concentrated and flavorful it will become.
Managing Moisture and Mold
During the fermentation process, it’s essential to monitor for any signs of mold. While a thin layer of white, yeast-like substance (known as Kahm yeast) on the surface of the brine is harmless and can be skimmed off, any black, fuzzy mold indicates contamination and the batch should be discarded.
If you notice too much liquid accumulating in the jar, you can carefully remove the citrus fruits, strain off the excess liquid, and repack the fruits with fresh salt before resealing. This helps maintain the desired saltiness and prevents the brine from becoming too diluted.
Using Your Salt-Preserved Citrus
Once your citrus has reached your desired level of flavor and texture, it’s ready to use. Rinse off the excess salt before incorporating it into recipes. Salt-preserved citrus can be added to marinades, sauces, drinks, or enjoyed on its own as a snack. Its unique blend of saltiness, tanginess, and sweetness makes it a versatile ingredient that can elevate various dishes.
Conclusion
Making salt-preserved citrus is a rewarding culinary endeavor that not only preserves the bounty of the season but also adds depth and complexity to your cooking. By following these steps and paying attention to detail, you can create a condiment that will enhance your meals and bring a touch of elegance to your kitchen. Remember, patience is key; the best flavors develop over time. Enjoy the process and the delicious results!



0 comments