Introduction
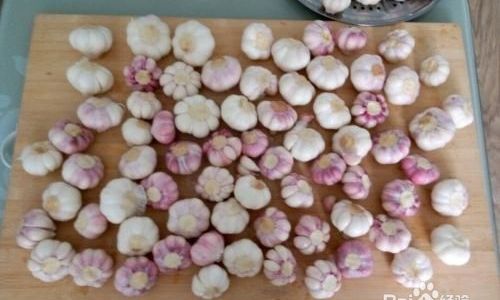
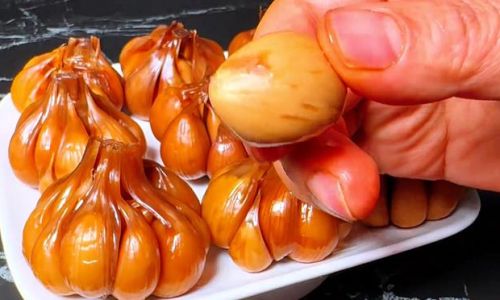
In the realm of culinary traditions, pickling holds a special place, preserving the essence of fruits, vegetables, and even meats for future enjoyment. Among the myriad of pickled delicacies, sweet and sour pickled garlic stands out, blending the tangy acidity of vinegar with the natural sweetness of sugar and the robust flavor of garlic. This timeless preservation technique not only enhances the garlic’s taste but also extends its shelf life, making it a staple in many households across Asia, particularly in China.
In this comprehensive guide, we delve into the intricacies of how to craft authentic sweet and sour pickled garlic. From selecting the perfect garlic bulbs to balancing the pickling liquid, every step is crucial in achieving that perfect harmony of flavors. Whether you’re a seasoned chef or a culinary enthusiast embarking on your first pickling adventure, this guide promises to equip you with the knowledge and skills necessary to create a jar of delicious, tangy, and slightly sweet pickled garlic that will delight your taste buds and impress your guests.
Chapter 1: Understanding the Ingredients
1 Garlic Selection
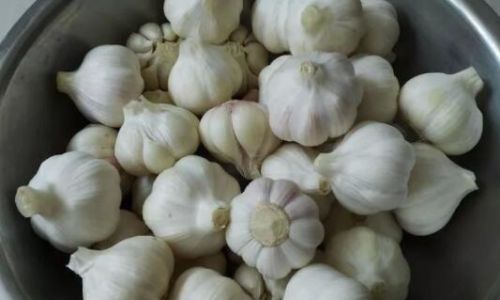
The foundation of any pickled garlic recipe is, of course, the garlic itself. For authentic sweet and sour pickled garlic, choose fresh, firm bulbs with tight, papery skin. Avoid bulbs that are soft, moldy, or have sprouted, as these indicators suggest that the garlic is past its prime.
Varieties such as hardneck and softneck garlic are commonly used for pickling. Hardneck garlic, known for its robust flavor and larger cloves, is ideal for those who prefer a stronger garlic taste. Softneck garlic, on the other hand, offers a milder flavor and is easier to peel, making it a good choice for those who want to balance the tangy pickling liquid with a subtler garlic essence.
2 Vinegar and Sugar
The sweet-and-sour balance is key to this recipe, and vinegar and sugar are the primary agents responsible for this. White vinegar, rice vinegar, or apple cider vinegar are all suitable choices. White vinegar provides a clean, sharp tang, while rice vinegar offers a milder, sweeter acidity, and apple cider vinegar adds a hint of fruitiness.
Sugar, preferably granulated white sugar, is used to counteract the vinegar’s acidity and create the desired sweetness. For a healthier alternative, you can use honey or maple syrup, though these may slightly alter the final flavor profile.
3 Seasonings and Spices
While garlic, vinegar, and sugar form the core of the recipe, seasonings and spices can elevate the dish to new heights. Common additions include:
- Ginger: Adds a subtle heat and a fresh, aromatic flavor.
- Red Pepper Flakes: For a hint of spice.
- Star Anise and Cloves: Provide warmth and depth.
- Cinnamon Stick: Adds complexity and a touch of sweetness.
- Salt: Enhances the flavors and acts as a natural preservative.
Feel free to experiment with these seasonings to suit your personal taste preferences.
Chapter 2: Preparation and Pickling Process
1 Preparing the Garlic
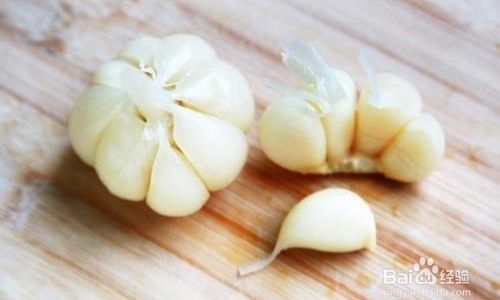
Begin by separating the garlic bulbs into individual cloves. Peel each clove carefully, ensuring that the garlic remains intact. If you prefer, you can leave the garlic cloves whole, but for a quicker pickling process and more even flavor distribution, slicing the cloves thinly or into halves can be beneficial.
Once peeled, rinse the garlic cloves under cold running water to remove any dirt or debris. Pat them dry using a clean kitchen towel or paper towels. Excess moisture can affect the pickling process and could lead to mold growth.
2 Preparing the Pickling Liquid
In a large saucepan, combine the vinegar, sugar, and any additional seasonings or spices you’ve chosen. The ratio of vinegar to sugar can vary depending on your taste preferences, but a good starting point is a 2:1 ratio of vinegar to sugar. For example, if you’re using 2 cups of vinegar, you would add 1 cup of sugar.
Heat the mixture over medium heat, stirring occasionally until the sugar completely dissolves. Allow the liquid to simmer for a few minutes to meld the flavors of the spices. Be careful not to let it boil vigorously, as this could reduce the liquid too much and alter the final consistency.
3 Jar Preparation
While the pickling liquid is heating, prepare a clean, sterile jar for the garlic. Glass jars are ideal as they are non-reactive and easy to clean. Ensure the jar is thoroughly washed with hot, soapy water and rinsed well. You can also sterilize the jar by immersing it in boiling water for a few minutes or running it through the dishwasher on the sanitize setting.
4 Pickling the Garlic
Once the pickling liquid has cooled slightly (it should not be boiling hot as this could cook the garlic and soften it too much), carefully pour it over the prepared garlic cloves in the jar. Ensure that all the garlic is fully submerged in the liquid. If necessary, use a weight, such as a small glass or a clean stone, to keep the garlic submerged. Air bubbles trapped between the cloves can cause mold, so press down gently to release any trapped air.
5 Sealing and Storing
Seal the jar tightly with a lid and label it with the date and contents. Place the jar in a cool, dark place away from direct sunlight. The pickling process can take anywhere from a few days to a couple of weeks, depending on your preferred level of tanginess and the temperature of your storage area. Colder temperatures will slow down the pickling process, while warmer temperatures will speed it up.
Chapter 3: Monitoring and Adjusting
1 Checking for Taste
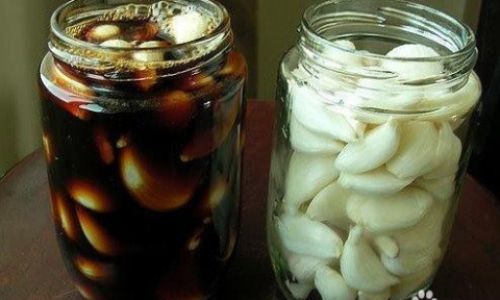
Periodically check the pickled garlic for taste and texture. Start tasting after about a week. If you prefer a milder, less tangy garlic, you may remove it from the pickling liquid sooner. For a more intense flavor, allow it to sit longer.
2 Adjusting the Pickling Liquid
If you find the pickling liquid too tangy or too sweet after tasting, you can make adjustments. For a less tangy liquid, add a bit more sugar. For a sweeter liquid, add a splash more vinegar. Remember to reheat the liquid gently to dissolve any added sugar and then let it cool before pouring it back over the garlic.
3 Storing for Long-Term Use
Once you’ve achieved the desired flavor, you can transfer the pickled garlic to a clean jar with a tight-fitting lid for long-term storage in the refrigerator. Properly stored, sweet and sour pickled garlic can last for several months.
Chapter 4: Serving and Enjoying
1 Serving Suggestions
Sweet and sour pickled garlic is a versatile condiment that can be enjoyed in various ways. It pairs beautifully with rice dishes, noodles, and stir-fries, adding a burst of flavor and a tangy kick. It’s also a delightful addition to salads, sandwiches, and even burgers.
2 Health Benefits
Beyond its culinary appeal, pickled garlic offers several health benefits. Garlic is rich in antioxidants and has been shown to have anti-inflammatory and immune-boosting properties. The vinegar in the pickling liquid also aids in digestion and may help regulate blood sugar levels.
Conclusion
Crafting authentic sweet and sour pickled garlic is a rewarding culinary endeavor that combines the art of preservation with the science of flavor balance. By carefully selecting your ingredients, meticulously preparing the garlic and pickling liquid, and patiently monitoring the pickling process, you can create a jar of delicious, tangy, and slightly sweet pickled garlic that will delight your taste buds and become a cherished staple in your kitchen.
Whether you’re preserving a bounty of fresh garlic from your garden, looking to add a unique twist to your culinary repertoire, or simply craving a tangy, sweet treat, sweet and sour pickled garlic is a delightful and healthy choice. So, gather your ingredients, roll up your sleeves, and embark on this delicious pickling journey. Your taste buds will thank you!

0 comments