Introduction
Steaming buns, a staple in many Asian cuisines, especially in China, is an art form that combines tradition with culinary precision. While yeast is traditionally used to leaven buns, baking soda offers a quick and effective alternative for those seeking a simpler, more straightforward method. Baking soda, also known as sodium bicarbonate, reacts with acidic ingredients in the dough to produce carbon dioxide gas, causing the dough to rise. This guide will walk you through the process of making delicious, fluffy buns using baking soda, from preparing the dough to steaming them to perfection.
Understanding the Ingredients
Before diving into the recipe, let’s understand the key ingredients and their roles:
- Flour: The foundation of the dough, providing structure and texture.
- Baking Soda: Acts as the leavening agent, reacting with acid to create carbon dioxide bubbles that make the dough rise.
- Acidic Ingredient: Typically vinegar, buttermilk, or even yogurt, which reacts with baking soda to produce the necessary gas for leavening.
- Water or Milk: Moisture essential for dough formation and to activate the baking soda.
- Salt: Enhances flavor and controls the fermentation process.
- Shortening or Oil: Adds tenderness and moisture to the buns.
Step-by-Step Guide to Making Baking Soda Buns
Step 1: Gather Your Ingredients and Equipment
-
Ingredients:
- 3 cups all-purpose flour
- 1 teaspoon baking soda
- 1 teaspoon salt
- 1 tablespoon white vinegar or 1/4 cup buttermilk (for acidity)
- 3/4 cup warm water (adjust as needed)
- 2 tablespoons vegetable oil or shortening
-
Equipment:
- Mixing bowls
- Measuring cups and spoons
- Dough hook or wooden spoon
- Clean kitchen towel or plastic wrap
- Steamer or large pot with a steaming rack
- Baking paper or parchment paper
Step 2: Prepare the Dough
-
Combine Dry Ingredients: In a large mixing bowl, whisk together the flour, baking soda, and salt until well combined. This ensures an even distribution of the leavening agent and salt throughout the dough.
-
Create a Well: Make a well in the center of the dry ingredients and pour in the vinegar or buttermilk. Add the vegetable oil or shortening and most of the warm water, reserving a little for later if needed.
-
Mix the Dough: Using a dough hook, wooden spoon, or your hands, gradually incorporate the dry ingredients into the wet ones. Start mixing until a shaggy dough forms. If the dough is too dry, add a little more water, a teaspoon at a time, until it comes together into a cohesive ball.
-
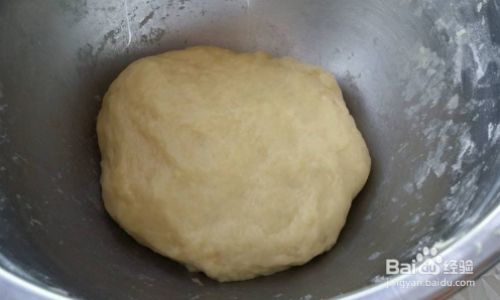
Knead the Dough: Transfer the dough to a lightly floured surface and knead for about 8-10 minutes until it becomes smooth and elastic. Kneading helps develop gluten, which gives the buns their structure and chewy texture.
Step 3: First Rise
- Shape the Dough: Place the kneaded dough back into the mixing bowl, cover it with a clean kitchen towel or plastic wrap, and let it rest for about 30 minutes. This initial rest allows the gluten to relax and the dough to slightly rise, making it easier to shape into buns.
Step 4: Shape the Buns
-
Divide the Dough: Once the dough has rested, punch it down to release any air bubbles. Divide it into equal portions, typically around 8-10 pieces, depending on the desired size of your buns.
-
Form the Buns: Shape each portion into a smooth ball by cupping your hands around the dough and rotating it in a circular motion on the work surface. Place the shaped buns on a piece of baking paper or parchment paper to prevent sticking.
Step 5: Second Rise
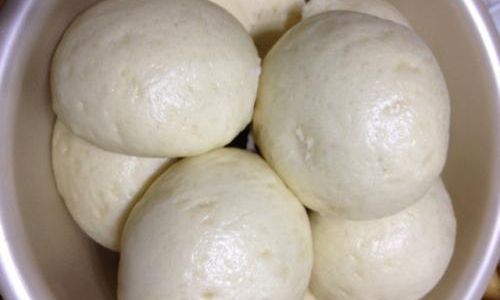
- Prepare for Rising: Cover the shaped buns with a clean kitchen towel or plastic wrap and let them rise for another 20-30 minutes. This second rise is crucial for achieving a fluffy texture. The buns should look slightly puffier and touch slightly springy when gently pressed.
Step 6: Prepare the Steamer
-
Fill the Steamer: While the buns are undergoing their second rise, fill the bottom of your steamer with water and bring it to a boil. If using a pot with a steaming rack, ensure the water level is below the rack to prevent the buns from getting soaked.
-
Arrange the Buns: Once the water is boiling, carefully place the parchment paper with the buns onto the steaming rack, making sure they are not overcrowded. If using a traditional bamboo steamer, you can place the buns directly onto the steaming layers lined with parchment paper or banana leaves.
Step 7: Steam the Buns
-
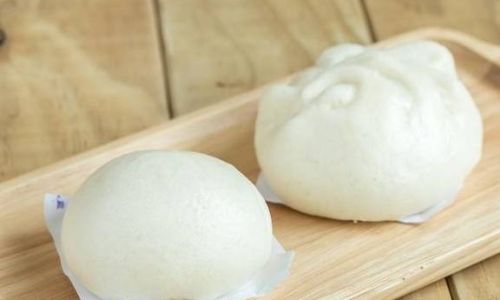
Steam Time: Cover the steamer and steam the buns for about 12-15 minutes. The exact timing may vary depending on the size of the buns and the power of your steamer. The buns should be cooked through and have a nice golden hue when done.
-
Check for Doneness: To check if the buns are cooked, carefully lift one out and tap the bottom. It should sound hollow.
Step 8: Cool and Serve
-
Cool Slightly: Remove the steamed buns from the steamer and let them cool on a wire rack for a few minutes. This helps them set and prevents them from becoming soggy.
-
Serve Warm: Serve the buns warm, plain, or with your favorite fillings such as red bean paste, meat, or vegetables. They are perfect for breakfast, lunch, or dinner and can be enjoyed as a standalone snack or part of a larger meal.
Troubleshooting Tips
- Dense Buns: If your buns turn out dense, it could be due to insufficient rising time or not enough acidity in the dough. Ensure you let the dough rise properly and use an acidic ingredient like vinegar or buttermilk.
- Soggy Bottoms: This often happens if the buns are placed directly on the steaming rack without parchment paper or if the water level in the steamer is too high. Use parchment paper to line the rack and keep the water level below the rack.
- Uneven Cooking: Make sure the buns are not overcrowded in the steamer to allow for even steam circulation.
Conclusion
Using baking soda to steam buns is a quick and effective alternative to traditional yeast-based methods. By following the steps outlined in this guide, you can achieve fluffy, delicious buns that are perfect for any occasion. Whether you’re a seasoned baker or new to the world of steaming, this recipe offers a straightforward approach to enjoying homemade buns without the complexity of yeast. Happy baking and steaming!

0 comments