Introduction
Mulberry leaves, known scientifically as Morus alba, have been valued for centuries not only for their nutritional benefits but also for their traditional medicinal properties. Native to China, these leaves have found their way into various cultures and cuisines, often being dried to preserve them for later use. Dried mulberry leaves are rich in antioxidants, vitamins, and minerals, making them a staple in herbal remedies and natural health practices. In this comprehensive guide, we will explore the step-by-step process of how to make dried mulberry leaves, ensuring you harness their full potential while maintaining their quality and nutritional integrity.
Understanding Mulberry Leaves
Before diving into the drying process, it’s crucial to understand the basics of mulberry leaves. These leaves are elliptic to oval in shape, with a serrated margin and a distinctive green color. They are typically harvested during the spring and summer when they are at their freshest and most nutrient-dense. Mulberry leaves are known to contain various beneficial compounds, including flavonoids, polyphenols, and amino acids, which contribute to their health-promoting effects.
Why Dry Mulberry Leaves?
Drying mulberry leaves serves several purposes:
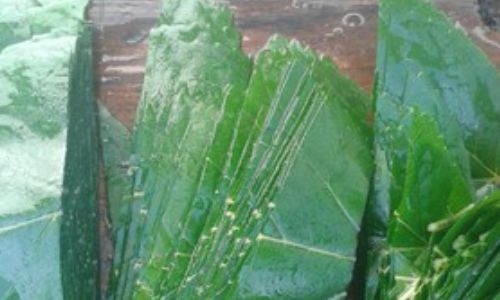
- Preservation: Drying extends the shelf life of the leaves, allowing you to enjoy their benefits throughout the year.
- Concentration: The drying process concentrates the nutrients and flavors, making the leaves more potent.
- Convenience: Dried leaves are easier to store and transport, making them accessible regardless of location.
- Versatility: Dried mulberry leaves can be used in teas, herbal remedies, cooking, and even in skincare products.
Choosing the Right Mulberry Leaves
The quality of your dried mulberry leaves begins with the leaves you choose to harvest or purchase. Here are some tips for selecting the best mulberry leaves:
- Organic Growth: Opt for organically grown mulberry leaves to avoid pesticides and other chemicals.
- Freshness: Look for vibrant green leaves with no signs of wilting, discoloration, or pest damage.
- Variety: Different mulberry varieties may have slightly different nutritional profiles and flavors. Choose the one that best suits your needs.
- Harvest Timing: Harvest leaves during the peak growing season, typically in spring and early summer, when they are most nutrient-rich.
Preparing for Drying
Once you have your mulberry leaves, the next step is to prepare them for drying. This involves cleaning and sorting the leaves to ensure they are ready for the drying process.
Cleaning the Leaves
- Rinse: Gently rinse the leaves under cold running water to remove dirt, dust, and any debris.
- Pat Dry: Use a clean cloth or paper towels to pat the leaves dry. Avoid rubbing them as this can bruise the leaves and release unwanted enzymes.
- Inspect: Carefully inspect each leaf, discarding any that are damaged, discolored, or have pests.
Sorting and Sorting Again
- Size Sorting: Separate the leaves by size. This will help ensure uniform drying and make it easier to store the finished product.
- Quality Check: Perform a final quality check, removing any leaves that don’t meet your standards.
Drying Methods
There are several methods you can use to dry mulberry leaves, each with its own set of pros and cons. The most common methods include air-drying, sun-drying, and using a dehydrator.
Air-Drying
Air-drying is a simple, low-tech method that requires minimal equipment. Here’s how to do it:
- Stringing: Thread the leaves onto a string, spacing them out evenly to ensure good air circulation.
- Hanging: Hang the string in a well-ventilated area away from direct sunlight. Good air circulation is key to preventing mold and mildew.
- Duration: Air-drying can take several days to a week, depending on the humidity and temperature. Check the leaves regularly to ensure they are not molding.
Sun-Drying
Sun-drying is another traditional method that leverages the sun’s heat to dry the leaves.
- Spread Out: Lay the leaves in a single layer on a clean, dry surface such as a screen or tray.
- Sun Exposure: Place the tray in direct sunlight. Rotate the leaves occasionally to ensure even drying.
- Monitoring: Keep an eye on the leaves, bringing them in if it starts to rain or if the temperature drops significantly at night.
- Completion: Sun-drying typically takes 1-3 days, depending on the intensity of the sun and the weather conditions.
Using a Dehydrator
A dehydrator is a convenient, modern option that offers more control over the drying process.
- Setting Up: Preheat your dehydrator to a temperature between 95°F and 115°F (35°C to 46°C). This temperature range helps preserve the nutrients and flavors of the leaves.
- Tray Arrangement: Lay the leaves in a single layer on the dehydrator trays, ensuring they are not overlapping.
- Drying Time: Dehydrate the leaves for 4-8 hours, depending on the thickness and moisture content. Check the leaves regularly, removing them from the dehydrator once they are brittle and crumbly.
Storing Dried Mulberry Leaves
Proper storage is crucial to maintaining the quality and shelf life of your dried mulberry leaves. Here are some tips for storing them:
- Airtight Containers: Store the dried leaves in airtight glass or plastic containers. Avoid using metal containers as they can react with the leaves’ natural oils.
- Dark Place: Keep the containers in a cool, dark place away from direct sunlight and heat sources.
- Moisture-Free: Ensure the containers are completely dry before storing the leaves to prevent moisture-related issues.
- Label and Date: Label the containers with the date of drying to keep track of freshness.
Using Dried Mulberry Leaves
Now that you have beautifully dried mulberry leaves, it’s time to enjoy their benefits. Here are some creative ways to use them:
- Tea: Brew a soothing tea by steeping a few dried leaves in hot water for 5-10 minutes. Sweeten with honey or lemon if desired.
- Herbal Remedies: Incorporate dried mulberry leaves into herbal remedies for their antioxidant and anti-inflammatory properties.
- Cooking: Add a handful of dried leaves to soups, stews, or stir-fries for a nutritious boost.
- Skincare: Use dried mulberry leaves to make a natural skin toner or exfoliant.
- Garden Compost: If you’re not planning to use the leaves, they can be composted to enrich your garden soil.
Conclusion
Making dried mulberry leaves is a rewarding process that allows you to harness the full potential of these nutritious and medicinal leaves. By following the steps outlined in this guide, you can ensure that your dried mulberry leaves are of the highest quality, ready to be enjoyed in various forms. Whether you’re looking to improve your health, add a unique flavor to your dishes, or create natural skincare products, dried mulberry leaves offer a versatile and sustainable solution. Happy drying!
Additional Tips and Considerations
While the basic steps outlined above will guide you through the process of making dried mulberry leaves, here are some additional tips and considerations to help you perfect your craft:
- Harvest Timing: As mentioned earlier, harvesting leaves during the peak growing season is crucial. However, it’s also important to consider the weather conditions. Avoid harvesting leaves during rainy or humid weather as this can increase the moisture content, making them harder to dry.
- Leaf Age: Younger leaves tend to be more tender and have a higher nutrient content than older leaves. If possible, prioritize harvesting younger leaves for drying.
- Drying Consistency: Achieving consistent drying is key to ensuring the quality of your dried mulberry leaves. This means monitoring the drying process regularly, adjusting the conditions as needed, and removing any leaves that don’t meet your standards.
- Storage Conditions: Proper storage is not just about keeping the leaves in an airtight container. It’s also about maintaining the right temperature and humidity levels. If possible, invest in a dehumidifier or desiccant packs to keep the storage area dry.
- Experimentation: Don’t be afraid to experiment with different drying methods, flavors, and uses for your dried mulberry leaves. The more you play around with them, the more you’ll discover their versatility and potential.
In conclusion, making dried mulberry leaves is a fulfilling endeavor that can provide you with a wealth of health benefits and culinary inspiration. By following the steps outlined in this guide and keeping the additional tips in mind, you’ll be well-equipped to create high-quality, nutritious dried mulberry leaves that you can enjoy for years to come.


0 comments