Introduction
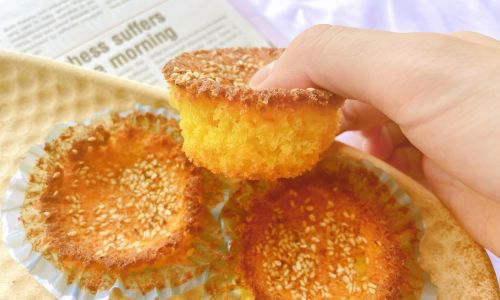
Crispy egg cakes, also known as “egg puffs” or “gyeran-bbang” in Korean cuisine, are a beloved street food snack cherished for their golden, crunchy exteriors and soft, fluffy interiors. These delightful treats combine the simplicity of basic pantry ingredients with the magic of high-heat cooking to achieve a texture contrast that keeps food enthusiasts coming back for more. Whether enjoyed as a breakfast indulgence, an afternoon pick-me-up, or a late-night snack, mastering the art of crispy egg cakes requires attention to detail, precise technique, and a dash of culinary creativity. This comprehensive guide will walk you through every step of the process, from selecting ingredients to troubleshooting common pitfalls, ensuring your egg cakes emerge from the pan with irresistible crispiness and a tender crumb.
The Science Behind Crispy Egg Cakes
Before diving into the recipe, it’s essential to understand the science that transforms humble ingredients into a crispy masterpiece. The crispiness of egg cakes hinges on two factors: Maillard reaction and steam ventilation. The Maillard reaction occurs when proteins and sugars in the batter are exposed to high heat, creating a golden-brown crust and complex flavors. Simultaneously, trapping steam within the batter during cooking allows the center to puff up, while releasing excess moisture through strategic venting holes prevents sogginess. Achieving the perfect balance between these elements is the key to success.
Ingredients: Quality Matters
To create egg cakes that shatter with a satisfying crunch, start with high-quality ingredients. Here’s a breakdown of what you’ll need:
-
Eggs (3 large, room temperature):
Fresh eggs with vibrant yolks contribute to a richer flavor and airier texture. Room-temperature eggs emulsify more easily with other ingredients, ensuring a smooth batter. -
All-Purpose Flour (1 cup):
Opt for unbleached flour for a neutral taste. For gluten-free variations, substitute with a 1:1 gluten-free baking blend. -
Granulated Sugar (2 tablespoons):
Adjust to taste; brown sugar adds caramel notes, while powdered sugar yields a finer crumb. -
Milk (¾ cup, whole or 2%):
Fat content affects richness. For dairy-free options, use almond or oat milk. -
Baking Powder (1 teaspoon):
Double-acting baking powder provides two leavening phases, ensuring the cakes rise evenly. -
Vanilla Extract (1 teaspoon):
Enhances aroma; substitute with almond or coconut extract for variation. -
Neutral Oil (2 tablespoons):
Vegetable or canola oil prevents sticking. For added flavor, use melted butter (but note it may reduce crispiness). -
Salt (¼ teaspoon):
Balances sweetness and amplifies flavors.
Optional Add-Ins:
- 1 tablespoon sesame seeds (toasted for nutty depth)
- ¼ teaspoon cinnamon (for warmth)
- 2 tablespoons chopped scallions or cheese (savory twists)
Equipment Checklist
- Non-stick skillet or cast-iron pan (8-inch diameter recommended)
- Mixing bowls (medium and large)
- Whisk or electric mixer
- Ice cream scoop or measuring cup (¼-cup capacity)
- Silicone spatula
- Cooling rack
Step-by-Step Recipe
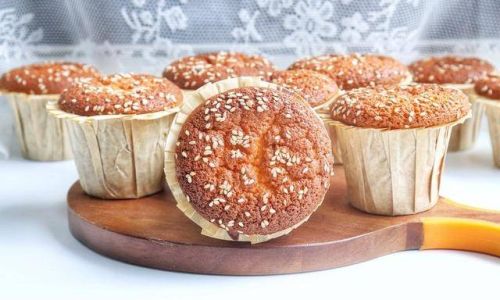
Preparing the Batter
-
Step 1: Dry Ingredients
In a medium bowl, whisk together flour, baking powder, and salt. Sifting is optional but ensures even leavening. -
Step 2: Wet Ingredients
In a large bowl, crack eggs and whisk until frothy. Add sugar, milk, oil, and vanilla extract. Whisk vigorously for 2–3 minutes until the mixture doubles in volume and turns pale yellow. This aerates the batter, crucial for lightness. -
Step 3: Combining
Create a well in the dry ingredients and pour in the wet mixture. Gently fold with a spatula until just combined—overmixing develops gluten, resulting in tough cakes. Lumps are okay; they’ll dissolve during resting.
Resting the Batter
Cover the bowl and let the batter rest for 15–20 minutes. This hydrates the flour, yielding a smoother texture and allowing baking powder to activate gradually. Resting also reduces shrinkage during cooking.
Preheating the Pan
Place the skillet over medium heat. Add a teaspoon of oil and swirl to coat. For ultra-crispy edges, use a paper towel to wipe off excess oil, leaving a micro-thin film.
Cooking the Egg Cakes
-
Step 1: Portioning
Using an ice cream scoop, pour ¼ cup of batter into the pan. Immediately create 3–4 small wells in the batter using the back of a spoon. These vents release steam, preventing a dense center. -
Step 2: Cooking Time
Cook for 2–3 minutes until bubbles form on the surface and the edges turn golden. Resist the urge to peek early, as this disrupts crust formation. -
Step 3: Flipping
Slide a thin spatula under the cake. If it releases easily, flip it. Cook for another 1–2 minutes until the second side achieves equal crispiness.
Finishing Touches
Transfer cooked cakes to a cooling rack. Avoid stacking, as this traps steam and softens the crust. Serve immediately for peak crispiness, or store in an airtight container at room temperature for up to 2 days.
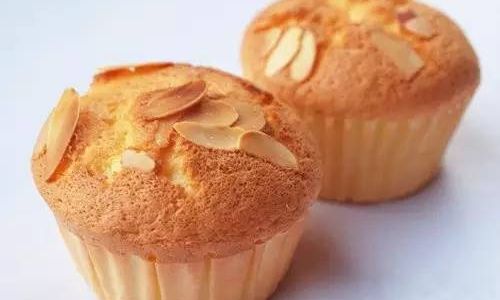
Expert Tips for Peak Crispiness
-
Temperature Control:
Maintain medium heat. High heat burns the exterior before the center cooks, while low heat steams the cake, eliminating crispness. -
Batter Consistency:
The batter should resemble thick pancake mix—thin enough to self-level but not runny. Adjust with 1–2 tablespoons of milk if needed. -
Venting Technique:
The wells in the batter are non-negotiable. Without them, steam gets trapped, leading to gummy interiors. -
Pan Material:
Cast-iron retains heat beautifully, but a non-stick pan ensures easy release. Avoid stainless steel unless seasoned properly. -
Resting Period:
Skipping resting leads to dense cakes. Use this time to prep toppings or preheat the pan.
Troubleshooting Guide
-
Soggy Centers:
Reduce heat slightly and extend cooking time by 1–2 minutes. Ensure vents are adequately sized. -
Uneven Browning:
Rotate the pan halfway through cooking. Use a consistent heat source. -
Sticking to Pan:
Ensure the pan is adequately preheated and lightly oiled. Avoid flipping prematurely. -
Flat, Deflated Cakes:
Check baking powder freshness. Overmixing or expired leaveners collapse the structure.
Creative Variations
-
Savory Egg Cakes:
Omit sugar and add ¼ cup grated cheese, diced ham, or chopped herbs. Serve with sour cream. -
Matcha-Infused:
Whisk 1 tablespoon matcha powder into the dry ingredients. Dust with powdered sugar before serving. -
Red Bean Paste:
Place 1 teaspoon of store-bought anko (sweet red bean paste) in the center before flipping. -
Gluten-Free:
Substitute flour with a 1:1 gluten-free blend. Add ¼ teaspoon xanthan gum for structure.
Serving Suggestions
- Pair with a dollop of whipped cream and fresh berries for dessert.
- Sandwich between two cakes with bacon and maple syrup for a breakfast sandwich.
- Dunk in chai tea or coffee for a cozy afternoon treat.
Cultural Context
Egg cakes have roots in Asian street food, particularly in Taiwanese and Korean cuisine. In Taiwan, they’re often sold from carts and stuffed with fillings like corn or cheese. Korean gyeran-bbang machines, featuring egg-shaped molds, became iconic in the 1980s. Today, home cooks worldwide adapt the recipe, proving that simplicity, when executed with precision, transcends borders.
Conclusion
Crafting perfectly crispy egg cakes is a testament to the alchemy of humble ingredients and mindful technique. By mastering the interplay of heat, steam, and leavening, you’ll reward yourself with treats that crackle with each bite. Experiment with flavors, share them with loved ones, and revel in the joy of creating a snack that bridges tradition and innovation. Whether you’re a novice cook or a seasoned chef, the crispy egg cake awaits—a small indulgence that delivers immense satisfaction.



0 comments