Table of content
Boiling eggs might seem like a straightforward task, but achieving the perfect consistency—whether you prefer a runny yolk, a creamy medium, or a fully set solid yolk—requires attention to detail and a bit of culinary finesse. In this comprehensive guide, we’ll delve into the nuances of boiling eggs, exploring techniques, timing, and tips to ensure your eggs turn out just as you envision. From selecting the right eggs to post-boiling care, every step is crucial in mastering the art of boiling eggs.
Choosing the Right Eggs
Before you even think about boiling, it’s essential to start with high-quality eggs. Freshness is key; older eggs tend to have thinner shells and air pockets that can make peeling more challenging. Here are a few pointers for selecting the best eggs:

- Check the Expiry Date: Look for eggs with a sell-by or best-before date that’s as far into the future as possible.
- Inspect the Shell: Fresh eggs have clean, matte shells without cracks or spots. Avoid eggs with rough textures or shiny surfaces, which may indicate they’ve been washed (removing the natural protective coating) or are old.
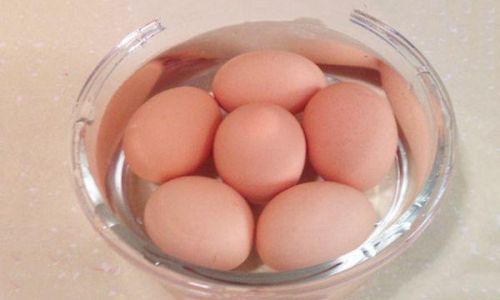
- Float Test: Place an egg in a bowl of water. If it sinks to the bottom and lays flat, it’s fresh. If it stands on one end or floats, it’s older and may have lost some moisture through the pores in the shell.
Preparing the Eggs
Once you’ve selected your eggs, it’s time to prepare them for boiling. This involves a few simple steps to ensure even cooking and easier peeling:
- Bring Eggs to Room Temperature: If your eggs are refrigerated, let them sit at room temperature for about 15-30 minutes before boiling. This helps prevent cracking during the cooking process.
- Gentle Handling: Handle eggs gently to avoid cracking the shells, which can let water seep in and alter the texture.
The Boiling Process
Now, let’s dive into the boiling process itself. There are various methods, each yielding slightly different results. We’ll explore three popular techniques: the classic rolling boil, the simmer method, and the steam method.
Classic Rolling Boil
- Fill a Pot with Water: Use enough water to fully submerge the eggs and then some. Aim for about 2-3 inches of water above the eggs.
- Add a Pinch of Salt: This isn’t necessary for cooking but can help prevent the eggs from cracking and make peeling easier.
- Bring Water to a Rolling Boil: Place the pot on high heat and bring the water to a rolling boil.
- Add Eggs: Carefully lower the eggs into the boiling water using a spoon or ladle to avoid cracking.
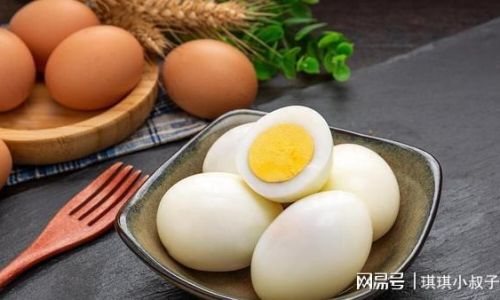
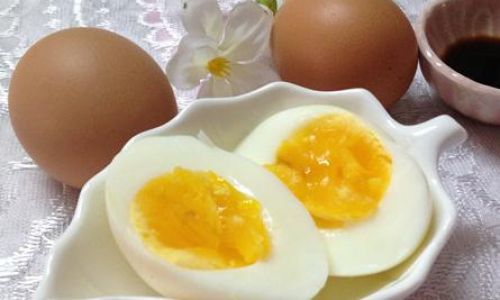
- Set the Timer: For a soft-boiled egg with a runny yolk, boil for about 4-5 minutes. For medium-boiled with a creamy yolk, aim for 6-7 minutes. For hard-boiled with a fully set yolk, boil for 9-12 minutes.
- Remove Eggs: Once the timer goes off, immediately remove the eggs using a slotted spoon and place them in an ice water bath to stop the cooking process.
Simmer Method
- Fill a Pot with Water: As with the rolling boil method, use enough water to fully submerge the eggs.
- Bring Water to a Simmer: Place the pot on medium-high heat and bring the water to a gentle simmer (small bubbles rising to the surface).
- Add Eggs: Carefully lower the eggs into the simmering water.
- Set the Timer: Follow the same timing guidelines as the rolling boil method for desired yolk consistency.
- Remove Eggs: Once done, transfer to an ice water bath.
Steam Method
- Set Up a Steamer: Fill a pot with a couple of inches of water and place a steamer basket inside. Bring the water to a boil.
- Place Eggs in Steamer Basket: Carefully arrange the eggs in the steamer basket, ensuring they don’t touch each other or the sides of the pot.
- Set the Timer: Steam for 6-7 minutes for soft-boiled, 8-9 minutes for medium, and 12-15 minutes for hard-boiled.
- Cool Down: Remove the eggs from the steamer and place them in an ice water bath.
Post-Boiling Care
Once your eggs are cooked to perfection, proper handling is crucial to maintain their texture and make peeling easier.

- Ice Water Bath: Always transfer boiled eggs to an ice water bath immediately after removing them from heat. This stops the cooking process and helps the proteins in the egg whites contract, making the shell easier to peel.
- Peeling Technique: After the eggs have cooled, crack the shell all over by gently tapping it on a hard surface. Roll the egg between your palms to loosen the shell, then peel it off starting at the larger end.
Storage and Reheating
If you’re not planning to eat your boiled eggs immediately, store them in an airtight container in the refrigerator. Hard-boiled eggs can be kept for up to a week, while peeled hard-boiled eggs should be consumed within a day or two due to the risk of bacterial growth.
To reheat boiled eggs, avoid microwaving them as this can cause them to explode. Instead, place them in a pot of simmering water for a couple of minutes until they reach your desired temperature.
Troubleshooting Common Issues
- Cracking: Cracks often occur due to rapid temperature changes or handling the eggs too roughly. Bring eggs to room temperature before boiling and use a spoon to lower them into the water gently.
- Green Ring Around the Yolk: This harmless discoloration occurs when the sulfur in the egg white reacts with iron in the egg yolk during overcooking. To avoid it, use the simmer method or keep boiling time to a minimum.
- Tough Whites: Overcooking can make egg whites tough and rubbery. Use a timer and an ice water bath to prevent this.
Conclusion
Boiling eggs might be a basic cooking skill, but perfecting it requires attention to detail and a bit of practice. By following the tips and techniques outlined in this guide, you’ll be able to achieve consistently delicious boiled eggs, whether you prefer them soft, medium, or hard. From selecting the right eggs to post-boiling care, every step plays a crucial role in ensuring your eggs turn out just as you envision. Happy boiling!


0 comments