Table of content
Introduction
Tapioca pudding, a delightful and creamy dessert enjoyed worldwide, offers a unique texture and mild sweetness that can satisfy any sweet tooth. Whether you’re a seasoned chef or a novice in the kitchen, mastering the art of cooking tapioca pearls to perfection can elevate your dessert-making skills. This guide will walk you through the process of making homemade tapioca pudding from scratch, ensuring you achieve a smooth, silky texture with every spoonful.
Understanding Tapioca
Before diving into the recipe, it’s essential to understand what tapioca is. Tapioca is derived from the cassava root, a starchy tuberous plant native to South America. The root is processed to extract a starch, which is then turned into small, pearl-like balls known as tapioca pearls. These pearls are gluten-free, making them an excellent choice for those with celiac disease or gluten sensitivities.
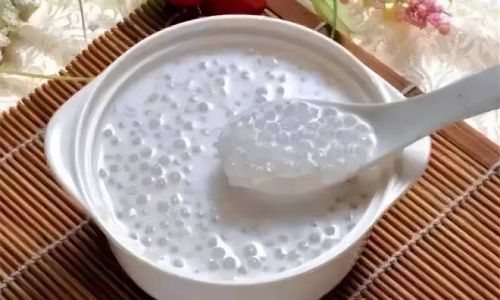
When cooked properly, tapioca pearls become translucent and slightly chewy, adding a delightful mouthfeel to desserts like pudding. They absorb liquid, so the cooking process requires careful monitoring to prevent them from becoming too mushy or undercooked.
Gathering Your Ingredients
Before starting, ensure you have all the necessary ingredients on hand. Here’s what you’ll need:
- Tapioca pearls: Small, medium, or large, depending on your preference. Small pearls are generally easier to cook and more commonly used in pudding.
- Milk: Whole milk, coconut milk, almond milk, or any other dairy or non-dairy alternative you prefer. Full-fat milk tends to produce a richer texture.
- Sugar: Granulated sugar, brown sugar, honey, or maple syrup can be used to taste.
- Vanilla extract: For flavor.
- Salt: A pinch to enhance the sweetness.
- Eggs (optional): For a thicker, custard-like consistency.
- Heavy cream (optional): Adds richness and creaminess.
- Spices or flavorings (optional): Cinnamon, nutmeg, or cardamom can add complexity to your pudding.
Preparing Your Equipment
- Saucepan: A heavy-bottomed saucepan distributes heat evenly, preventing scorching.
- Whisk: For mixing and preventing lumps.
- Spatula: Helps stir the mixture without scratching the pan.
- Measuring cups and spoons: For accuracy.
- Bowl: For serving or chilling the pudding.
- Strainer: To rinse the tapioca pearls, if necessary.
Step-by-Step Cooking Instructions
Step 1: Prepare the Tapioca Pearls
-
Rinse: Place the tapioca pearls in a strainer and rinse them under cold water to remove any starch dust. This helps prevent clumping during cooking.

-
Soak (optional): For a softer texture, soak the rinsed tapioca pearls in cold water for about 30 minutes before cooking. Drain well before proceeding.
Step 2: Cook the Tapioca
-
Boil Water: In a saucepan, bring a sufficient amount of water to a rolling boil. The ratio is generally 4 parts water to 1 part tapioca pearls. Add a pinch of salt to the water.
-
Add Tapioca: Stir in the tapioca pearls gently to prevent them from sticking together. Reduce the heat to medium-high and cook, stirring occasionally, until the pearls become translucent and most of the water is absorbed, about 10-15 minutes for small pearls. Medium and large pearls may take longer.
-
Test for Doneness: Remove a few pearls and let them cool slightly. They should be translucent with a slight chewiness in the center. If they are still opaque, continue cooking for a few more minutes.
Step 3: Make the Pudding Base
-
Heat Milk: In a clean saucepan, pour in the milk of your choice. Heat it over medium heat until it begins to steam but not boil.
-
Add Sugar: Stir in the sugar until it dissolves completely.

-
Flavorings: Add vanilla extract and any other spices or flavorings at this stage.
Step 4: Combine Ingredients
-
Temper the Tapioca: Gradually ladle hot milk into the cooked tapioca pearls, stirring constantly to prevent lumps. This process, known as tempering, helps blend the ingredients smoothly.
-
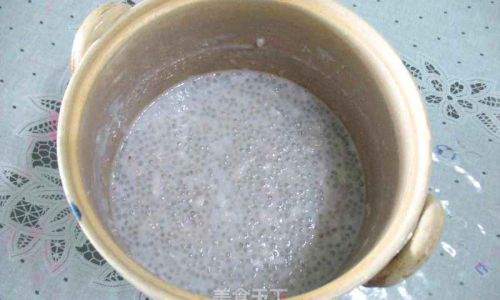
Combine: Once the tapioca mixture is warm enough, pour it back into the saucepan with the remaining milk. Stir continuously over low heat until the mixture thickens slightly, about 5-7 minutes. Be careful not to overcook, as this can make the pudding grainy.
Step 5: (Optional) Add Eggs and Cream
-
Temper Eggs: If using eggs for a thicker pudding, whisk them with a bit of the hot milk mixture until smooth. Gradually add this egg mixture back into the saucepan, stirring constantly, until the pudding thickens further.
-
Add Cream: Stir in heavy cream if using, and cook for an additional minute until well combined.
Step 6: Finish and Serve
-
Remove from Heat: Once the pudding reaches your desired consistency, remove it from the heat.

-
Cool: Let it cool slightly before pouring into serving bowls. You can chill it in the refrigerator for a few hours to set further.
-
Garnish: Serve with a dollop of whipped cream, a sprinkle of cinnamon, or fresh berries for added flavor and presentation.
Troubleshooting Tips
- Lumpy Pudding: Ensure you stir constantly when adding the tapioca to the milk and when tempering eggs.
- Sticky Pearls: Overcooked tapioca can become sticky. Test for doneness early and remove from heat once they are translucent.
- Thin Pudding: If your pudding is too thin, you can cook it a little longer or add a cornstarch slurry (mixed with a little water) to thicken it.
Conclusion
Making homemade tapioca pudding is a rewarding culinary endeavor that yields a comforting, delicious dessert. By following these steps and tips, you can achieve a perfect balance of texture and flavor, making your tapioca pudding a hit at any gathering. Whether you enjoy it warm or chilled, with classic vanilla or infused with exotic spices, the versatility of this dessert ensures there’s always something new to explore. Happy cooking!


0 comments