Table of content
Cooking glutinous rice balls, also known as yuanxiao in Chinese, is a delightful culinary tradition especially cherished during the Lantern Festival. These sweet, chewy treats symbolize unity and completeness, making them a perfect addition to festive celebrations. Whether you’re a seasoned chef or a novice in the kitchen, learning how to cook glutinous rice balls can be both fun and rewarding. This comprehensive guide will walk you through the process, from selecting the right ingredients to mastering the cooking technique, ensuring perfect results every time.
Understanding the Basics
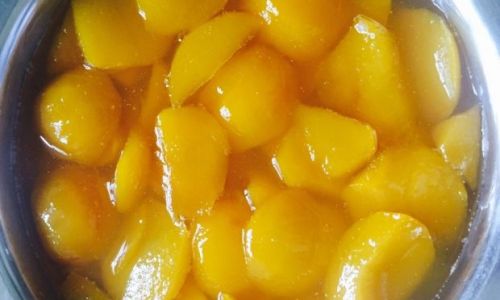
Before diving into the recipe, it’s essential to understand the fundamental components of glutinous rice balls. As the name suggests, these balls are primarily made from glutinous rice flour, which gives them their unique sticky texture. Fillings can vary widely, ranging from sweetened red bean paste and peanut butter to creative flavors like chocolate and mango. The outer layer, once cooked, should be soft and slightly translucent, encasing a flavorful filling that melts in your mouth.

Ingredients and Tools
Ingredients:
- Glutinous Rice Flour: The star ingredient, available in most Asian grocery stores or online.
- Water: For mixing and shaping the dough.
- Fillings: Choose your favorite, whether it’s traditional sweetened red bean paste, sesame paste, or modern twists like cream cheese or fruit jams.
- Powdered Sugar (optional): For dusting the cooked balls to enhance their appearance and taste.
Tools:
- Mixing Bowl: Large enough to comfortably knead the dough.
- Spatula or Wooden Spoon: For mixing the dough.
- Small Bowl: For preparing water if needed.
- Rice Flour for Dusting: To prevent sticking.
- Pot: Filled with enough water for boiling.
- Slotted Spoon: For transferring the cooked balls from the pot to a serving dish.
- Plate or Tray: Lined with parchment paper for placing the cooked balls.
Step-by-Step Guide
Step 1: Prepare the Dough
-
Measure the Flour: Begin by measuring out the required amount of glutinous rice flour. A standard recipe might call for around 200 grams (about 1.5 cups) for a moderate batch.
-
Add Water Gradually: Pour in a small amount of water, typically around 150 milliliters (about ⅔ cup), and start mixing with a spatula or your hands. The exact amount of water may vary depending on the absorbency of the flour, so it’s best to add it in small increments until you achieve a soft, pliable dough.
-
Knead the Dough: Once the mixture starts to come together, transfer it to a clean surface lightly dusted with glutinous rice flour to prevent sticking. Knead the dough for about 5 minutes until it becomes smooth and elastic. If it feels too sticky, add a bit more flour; if it’s too dry, add a teaspoon of water.
Step 2: Prepare the Fillings
-
Choose Your Filling: If using store-bought fillings, ensure they are at room temperature or slightly chilled to make handling easier. For homemade fillings, prepare them according to your recipe and let them cool before use.
-
Shape the Fillings: Roll each portion of filling into small, even balls. This will make it easier to wrap them in the dough later.

Step 3: Wrap the Dough Around the Fillings
-
Divide the Dough: Divide the dough into smaller portions, each slightly larger than the filling balls to ensure proper encapsulation.
-
Flatten and Wrap: Flatten each dough portion into a disc using your palm. Place a filling ball in the center and gently pull the dough edges up around it, pinching and sealing to form a smooth ball without any cracks.
-
Lightly Dust: Dust the wrapped balls with a bit of glutinous rice flour to prevent them from sticking to each other or the surface.
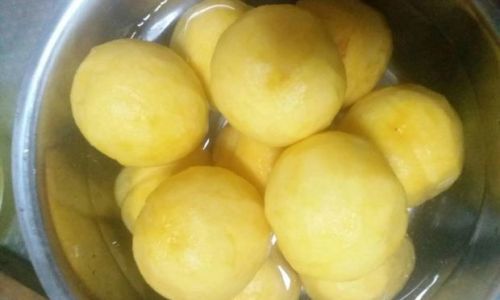
Step 4: Boil the Glutinous Rice Balls
-
Fill the Pot: Bring a large pot of water to a rolling boil. Use plenty of water to ensure the balls have enough space to move around freely, preventing them from sticking to each other or the pot bottom.
-
Add the Balls: Carefully drop the wrapped glutinous rice balls into the boiling water. Do not overcrowd the pot; cooking in batches may be necessary.

-
Cook Until Done: Cook the balls for about 5-7 minutes, or until they float to the surface and turn slightly translucent. Use a slotted spoon to gently stir them occasionally to prevent sticking.
-
Check for Doneness: Once they float, cook for an additional 2-3 minutes to ensure the centers are fully cooked. Remove one ball, let it cool slightly, and cut it open to check if the filling is warm and the dough is cooked through.
Step 5: Serve and Enjoy
-
Drain and Serve: Use the slotted spoon to transfer the cooked glutinous rice balls to a plate or tray lined with parchment paper. Let them drain excess water for a moment.
-
Optional Dusting: Lightly dust the balls with powdered sugar for added sweetness and a beautiful finish.
-
Serve Warm: Serve the glutinous rice balls immediately while they are still warm. They can be enjoyed plain or with a drizzle of honey, syrup, or a scoop of ice cream for added indulgence.

Tips for Perfect Results
- Temperature Control: Work with ingredients at room temperature to ensure smoother handling.
- Patience with Dough: Kneading the dough thoroughly ensures a soft, elastic texture.
- Consistent Sizing: Uniform-sized balls cook more evenly.
- Boiling Water: Always use boiling water to start cooking, as this helps the dough set quickly and prevents sticking.
- Don’t Overcrowd: Boiling in batches ensures even cooking and prevents the balls from breaking apart.
Conclusion
Cooking glutinous rice balls may seem like a daunting task at first, but with practice and attention to detail, you’ll soon master this traditional art. The joy of creating these sweet treats from scratch, wrapping them with love, and sharing them with family and friends makes the process all the more rewarding. Whether you stick to classic flavors or experiment with innovative fillings, the end result is always a delightful, chewy, and sweet treat that brings a smile to everyone’s face. So, gather your ingredients, roll up your sleeves, and embark on a culinary journey that celebrates tradition and creativity. Happy cooking!


0 comments