Table of content
Introduction
Homemade butter is a delightful culinary treat that can elevate your baking, cooking, and even your breakfast table. While store-bought butter is convenient, there’s something uniquely satisfying about crafting your own butter at home. The process is not only rewarding but also educational, as it gives you a deeper understanding of the dairy products you consume daily. In this comprehensive guide, we’ll walk you through the entire process of making homemade butter, from selecting the right ingredients to storing your finished product. By the end, you’ll be equipped with the knowledge and skills to produce creamy, delicious butter that rivals any you’ve bought from the store.
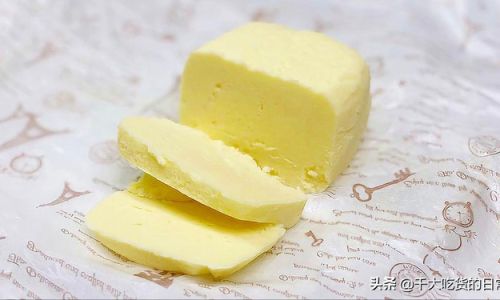
Understanding the Basics
Before diving into the recipe, it’s essential to understand the fundamentals of butter-making. Butter is essentially a dairy product made by churning cream or milk until it separates into solid fats (butter) and liquid buttermilk. The quality of your final butter largely depends on the quality of the cream you start with. Here are a few key points to consider:
-
Cream Fat Content: The higher the fat content in your cream, the richer and creamier your butter will be. Heavy cream, which typically has a fat content of around 36%, is ideal for making butter. If you can’t find heavy cream, you can use whipping cream but expect a slightly lower yield.
-
Pasteurized vs. Raw Cream: Pasteurized cream is safer to use as it has been treated to kill harmful bacteria. Raw cream, while it may offer a unique flavor, carries the risk of contamination. If you choose to use raw cream, ensure your dairy sources are trusted and free from disease.
-
Homogenization: Homogenized cream has been processed to prevent the fat from separating from the milk. While it can still be used to make butter, it might require a bit more churning time.
-
Temperature: The temperature of your cream plays a crucial role. It should be chilled before churning to ensure the butter forms smoothly. Room temperature or warm cream can lead to a softer, less structured butter.
Equipment Needed
Making butter at home doesn’t require fancy equipment. Here’s a list of what you’ll need:
- A large mixing bowl
- A whisk or an electric mixer
- A fine-mesh strainer (optional)
- Cheesecloth or a clean kitchen towel
- A bowl for collecting buttermilk
- A small container or jar for storing the butter
- Salt (optional, for salted butter)
- A butter paddle or knife (optional, for shaping)
Step-by-Step Guide to Making Homemade Butter
Step 1: Preparation
-
Chill Your Ingredients and Equipment: Start by chilling your mixing bowl, whisk, and any other utensils you’ll use. This helps maintain a lower temperature during the churning process, ensuring your butter forms correctly.
-
Measure the Cream: Pour your chilled heavy cream into the chilled mixing bowl. The amount of cream you use will determine how much butter you yield. As a general guideline, 1 cup of heavy cream will yield about ½ cup of butter.
Step 2: Churning the Cream
-
Whipping: Begin whipping the cream using a whisk or an electric mixer on medium speed. Initially, the cream will thicken and form soft peaks,类似制作鲜奶油的过程. Continue whipping until the cream starts to look grainy and separate.
-
Churning: As you keep whipping, you’ll notice the mixture becoming denser and the grains coalescing into small clumps. This is the butter forming. At this point, you can switch to a lower speed or continue hand-whipping if using a whisk. The goal is to separate the solid fats (butter) from the liquid buttermilk.
-
Recognition of Separation: Once the butter has fully separated, you’ll see a distinct separation between the solid butter and the liquid buttermilk. The butter will form into a cohesive mass at the bottom or side of the bowl, while the buttermilk will pool at the top.
Step 3: Draining and Rinsing
-
Straining: Carefully pour the mixture through a fine-mesh strainer or cheesecloth set over a bowl to collect the buttermilk. Squeeze the cheesecloth gently to extract as much buttermilk as possible.
-
Rinsing: Place the butter in a bowl of cold water and knead it gently with your hands. This helps remove any remaining buttermilk, which can make your butter too tangy. Rinse and knead until the water runs clear. Be careful not to overwork the butter, as this can make it too soft.
-
Draining Again: Once the butter is rinsed, place it on a clean kitchen towel or cheesecloth and let it drain for a few minutes. Pat it gently to remove excess water.
Step 4: Shaping and Seasoning
-
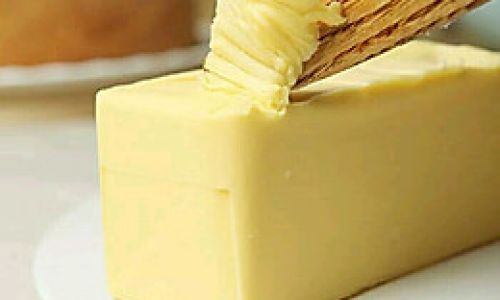
Shaping: Transfer the butter to a clean bowl or container. Use a butter paddle, knife, or the back of a spoon to press and shape the butter into a smooth, cohesive block. This helps remove any remaining liquid and gives your butter a professional look.
-
Seasoning: If you prefer salted butter, sprinkle a pinch of fine sea salt over the butter and gently knead it in. Taste a small piece to adjust the seasoning as needed.
Step 5: Storing Your Butter
-
Wrapping: Wrap your butter tightly in plastic wrap or store it in an airtight container. This prevents it from drying out or absorbing odors from other foods.
-
Refrigeration: Store your homemade butter in the refrigerator. It will keep for about a week. For longer storage, you can freeze it for up to a few months. To use frozen butter, thaw it in the refrigerator overnight.
Tips for Perfect Homemade Butter
-
Temperature Control: Maintaining a cold environment throughout the process is crucial. If the butter becomes too warm, it will be softer and more difficult to work with.
-
Patience: The churning process can take some time, especially if you’re doing it manually. Be patient and let the cream go through its natural stages of whipping and separating.
-
Quality Ingredients: As with any homemade food, the quality of your ingredients will directly affect the outcome. Use the best heavy cream you can find for the best results.
-
Experimentation: Once you’ve mastered the basic technique, feel free to experiment with different flavors. You can add herbs, spices, or even infused oils to create unique butter varieties.
Uses for Your Homemade Butter
Homemade butter is incredibly versatile and can be used in a myriad of ways:
- Baking: Use it in cookies, cakes, and pastries for a richer flavor and texture.
- Cooking: Sauté vegetables, sear meats, or make compound butters for grilling and roasting.
- Spread: Enjoy it on toast, bagels, or pancakes for breakfast.
- Frosting: Use it to make buttercream frosting for cakes and cupcakes.
- Mashed Potatoes: Add a dollop to your mashed potatoes for a creamy, indulgent touch.
Conclusion
Making homemade butter is a rewarding culinary endeavor that brings a sense of accomplishment and joy. With just a few simple ingredients and basic equipment, you can create a delicious, high-quality butter that enhances your cooking and baking. Whether you’re a seasoned chef or a home cook looking to try something new, the process of making butter is both educational and enjoyable. So, why wait? Gather your ingredients, follow the steps outlined in this guide, and start crafting your own homemade butter today. You’ll be delighted by the results and the sense of pride that comes from creating something delicious from scratch. Happy butter-making!
This guide provides a comprehensive look at how to make homemade butter, from understanding the basics and gathering the necessary equipment to the step-by-step process and tips for perfect results. By following these instructions, you’ll be able to produce creamy, delicious butter that you can enjoy in various ways. Happy cooking!
0 comments