Growing sprouts at home is a rewarding and nutritious endeavor that anyone can undertake, regardless of gardening experience. Sprouts are young, tender plants that are harvested just after germination. They are packed with vitamins, minerals, and antioxidants, making them an excellent addition to any diet. Plus, growing sprouts is incredibly cost-effective and environmentally friendly, as it reduces food waste and transportation emissions. In this guide, we’ll walk you through the step-by-step process of how to grow your own sprouts at home, from selecting seeds to harvesting and storing your fresh produce.
Understanding Sprouts
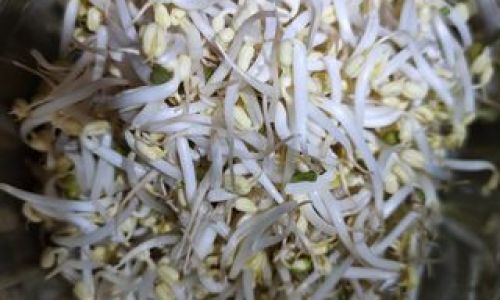
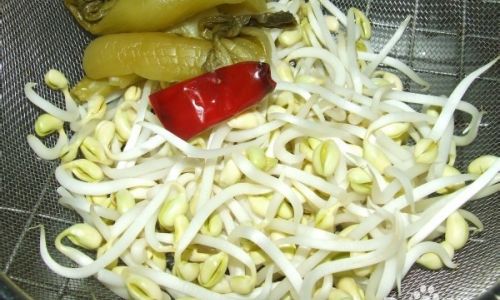
Before diving into the sprouting process, it’s essential to understand what sprouts are and why they are beneficial. Sprouts are the initial growth stage of various seeds, legumes, grains, and nuts. They are rich in essential nutrients like vitamins A, C, E, and K, as well as minerals such as iron, calcium, and magnesium. Sprouting increases the bioavailability of these nutrients, making them easier for the body to absorb. Additionally, sprouts are low in calories and high in fiber, aiding in digestion and weight management.
Choosing the Right Seeds
The first step in growing sprouts is selecting the right seeds. Not all seeds are suitable for sprouting, so it’s crucial to choose seeds that are specifically meant for sprouting. Common sprouting seeds include alfalfa, broccoli, radish, lentils, chickpeas, mung beans, and sunflower seeds. When purchasing seeds, look for organic, non-GMO options to ensure you’re getting the highest quality and avoiding potentially harmful pesticides and genetic modifications.

Preparing Your Equipment
You don’t need fancy equipment to grow sprouts. However, having the right tools can make the process more efficient and enjoyable. Here’s a list of essential sprouting equipment:
- Sprouting Jars: Wide-mouth glass jars with lids are ideal for sprouting. You can also use mason jars with cheesecloth or a sprouting lid.
- Rinsing and Draining Tools: A colander or sprouting tray with holes for draining excess water.
- Spray Bottle: For misting the sprouts if you’re using a sprouting tray.
- Dark Cloth or Towel: To cover the jars and keep out light, which can promote mold growth.
- Measuring Cups and Spoons: For accurately measuring seeds and water.
Preparing the Seeds
Before sprouting, it’s important to prepare the seeds by rinsing them thoroughly under cold running water. This removes any debris, dust, or chemicals that may be on the seeds. Once rinsed, soak the seeds in clean water for a few hours or overnight, depending on the type of seed. Soaking helps soften the seed coat and initiate the germination process.
Sprouting Process
Once the seeds have soaked, drain the water and place the seeds in your sprouting jars or trays. Here’s a detailed step-by-step guide for the sprouting process:
Day 1: Soaking and Draining
- After soaking, drain the water completely from the jars or trays.
- Place the jars or trays in a dark, cool location. A kitchen cabinet or pantry works well.
- Use a dark cloth or towel to cover the jars if they are not in a dark space.
Days 2-4: Rinsing and Draining Daily
- Each day, rinse the sprouts thoroughly with cold water. This removes any built-up moisture and provides fresh oxygen for the growing sprouts.
- Drain the water completely after rinsing.
- Continue to keep the sprouts in a dark, cool location.
- Repeat the rinsing and draining process daily until the sprouts reach your desired length. This usually takes 3-5 days, depending on the type of seed.
Monitoring for Mold
Throughout the sprouting process, it’s crucial to monitor the sprouts for signs of mold. Mold can develop if the sprouts are not rinsed and drained properly or if they are exposed to too much light or heat. If you notice any mold, discard the sprouts immediately to prevent contamination.

Harvesting Your Sprouts
Once the sprouts have reached your desired length and appearance, it’s time to harvest them. Harvesting is simple:
- Rinse the sprouts thoroughly under cold water.
- Drain the water completely.
- Pat the sprouts dry with a clean paper towel or cloth.
- Transfer the sprouts to a storage container or eat them immediately.
Storing Sprouts
Properly stored sprouts can last for several days in the refrigerator. Here’s how to store them:
- Place the sprouts in an airtight container lined with a paper towel to absorb any excess moisture.
- Store the container in the refrigerator’s crisper drawer, where it’s cool and humid.
- Eat the sprouts within 3-5 days for the best flavor and nutrition.
Using Sprouts in Your Diet
Sprouts are incredibly versatile and can be used in a variety of dishes. Here are some creative ways to incorporate sprouts into your diet:
- Salads: Add sprouts to your favorite salad greens for a nutrient-packed boost.
- Sandwiches and Wraps: Use sprouts as a filling in sandwiches, wraps, and burritos.
- Smoothies: Blend sprouts into smoothies for an extra dose of greens.
- Soups and Stir-Fries: Add sprouts to soups, stir-fries, and other cooked dishes at the end of cooking to preserve their texture and nutrients.
- Raw Snacks: Enjoy sprouts as a crunchy, raw snack on their own or with a dip.
Troubleshooting Common Issues
Even with the best intentions, sprouting can sometimes go awry. Here are some common issues and how to troubleshoot them:

- Mold: Ensure proper rinsing and draining, and keep sprouts in a dark, cool location.
- Slow Growth: Check the seeds’ freshness and make sure they are getting enough water and oxygen.
- Strong Odors: This can indicate that the sprouts are not being rinsed and drained properly. Increase the rinsing frequency.
Conclusion
Growing sprouts at home is a simple, rewarding, and nutritious endeavor that anyone can do. With the right seeds, equipment, and knowledge, you can enjoy fresh, organic sprouts year-round. Not only are sprouts packed with essential nutrients, but they are also cost-effective and environmentally friendly. So, why wait? Start your sprouting journey today and enjoy the many benefits of homegrown sprouts!


0 comments