Table of content
Creating sugar roses is an art form that combines precision, patience, and creativity. These delicate, edible flowers are a staple in cake design and pastry decoration, adding a touch of elegance and sophistication to any dessert. Whether you’re a professional baker or an enthusiastic home baker, mastering the art of sugar rose crafting can elevate your baking skills to new heights. In this comprehensive guide, we’ll walk you through the step-by-step process of how to make stunning sugar rose decorations using fondant, a type of sugar paste that is ideal for sculpting intricate designs.
Understanding Fondant and Its Role in Sugar Rose Creation
Before diving into the specifics of making sugar roses, it’s crucial to understand the basics of fondant. Fondant, also known as sugar paste, is a smooth, pliable dough made primarily from sugar, corn syrup (or glucose syrup), and gelatin or glycerin. It’s available in various colors and can be easily manipulated into different shapes and sizes, making it perfect for creating detailed decorations.
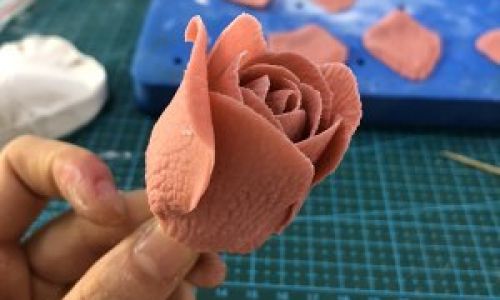
When working with fondant, it’s essential to keep your workspace clean and dust-free. Use a silicone mat or a lightly powdered surface to prevent sticking. Additionally, ensure your hands are dry and free of any oils, as moisture and grease can compromise the fondant’s structure.
Gathering Your Materials
Before starting, you’ll need to gather the following materials:
- White fondant (you can color it later if desired)
- Edible food coloring (gel or paste colors work best)
- Rolling pin
- Fondant smoother or a small ball tool
- Paring knife or fondant cutter
- Veining tool or a toothpick
- Edible glue or a bit of water to help with adhering pieces
- Soft brush (optional, for dusting with powdered sugar)
- Styrofoam block or a similar surface for shaping and drying your roses
Step-by-Step Guide to Making Sugar Roses
Preparing the Fondant
Begin by kneading your fondant until it’s soft and pliable. If you’re using colored fondant, add a few drops of gel food coloring and knead until the color is evenly distributed. Remember, a little color goes a long way, so start with less and add more gradually if needed.
Rolling Out the Fondant
Lightly dust your work surface with powdered sugar to prevent sticking. Roll out the fondant to about 1/8 inch (3mm) thickness using a rolling pin. This thickness is ideal for creating petals that are neither too fragile nor too bulky.
Creating the Petals
Using a fondant cutter or a sharp paring knife, cut out petal shapes. For classic rose petals, aim for a teardrop or oval shape with a slightly pointed end. The size of the petals will vary depending on whether you’re making the outer, middle, or inner layers of the rose. Generally, outer petals should be larger, while inner petals should be smaller and more delicate.
Shaping the Petals
Once you have your petals cut out, use a fondant smoother or the ball end of a fondant tool to thin the edges slightly. This will give the petals a more natural, ruffled appearance. You can also use a veining tool or a toothpick to create delicate lines and veins on the petals, mimicking the texture of real rose petals.
Assembling the Rose
Start by taking a small ball of fondant (about the size of a pea) and shaping it into a cone to form the rose’s center or bud. This will be the base upon which you’ll build the petals.
-
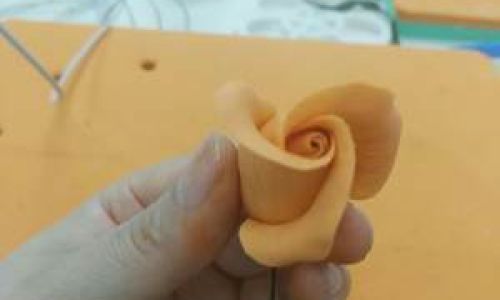
Inner Petals: Begin by adding the smallest, innermost petals first. Wrap these around the cone, slightly overlapping and pleating them as you go. Use a tiny bit of edible glue or water to help adhere the petals if necessary.
-
Middle Petals: Next, add the middle-sized petals, continuing the pleating and overlapping process. These petals should be slightly larger and more flared than the inner ones.
-
Outer Petals: Finally, add the largest petals, creating the outer layer of the rose. These petals should be the most flared and ruffled, giving the rose its full, voluminous appearance.
As you work, rotate the rose slightly after adding each layer of petals to ensure even coverage and a balanced look.
Adding Detail and Finishing Touches
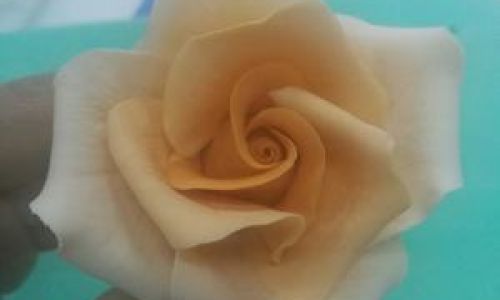
Once you’ve assembled the basic structure of your rose, take a step back and examine it from different angles. Use your veining tool or toothpick to add more detail to the petals, enhancing their natural look. You can also use a soft brush to dust the edges of the petals with a bit of powdered sugar for a frosted effect.
Drying and Storing Your Roses
Once you’re satisfied with your rose, place it on a Styrofoam block or a similar surface to dry. This will help it maintain its shape as it sets. Allow the rose to dry completely, which can take several hours depending on the humidity and temperature in your workspace.
Once dry, your sugar roses can be gently handled and arranged on cakes, cupcakes, or other desserts. If you’re not using them immediately, store them in an airtight container layered with parchment paper to prevent sticking and to maintain their freshness.
Advanced Techniques and Tips
Creating Multi-Colored Roses
To create multi-colored roses, you can use fondant of different colors and layer the petals accordingly. For instance, you might start with a deep pink center and gradually add lighter pink and white petals to create a gradient effect.
Adding Texture and Dimension
For added texture and dimension, you can incorporate other fondant elements such as leaves, buds, or even tiny thorns. These can be made using similar techniques and attached to the rose using edible glue or water.
Using Molds
Fondant molds can be a great tool for achieving more intricate and uniform petal shapes. Simply press your fondant into the mold, release, and then shape the petals as described above.
Practice Makes Perfect
Like any art form, creating sugar roses takes practice and patience. Don’t be discouraged if your first attempts don’t look perfect. With time and repetition, you’ll develop a feel for the fondant and become more confident in your ability to shape and assemble the petals.
Inspiration and Creativity
Don’t be afraid to experiment and let your creativity shine. Sugar roses can be customized in countless ways to match the theme, color scheme, or occasion for which they’re being created. Consider incorporating elements like edible glitter, pearls, or even tiny fondant flowers to add a unique touch to your designs.
Conclusion
Making sugar roses is a rewarding endeavor that combines the precision of baking with the creativity of art. By following the steps outlined in this guide and practicing regularly, you’ll soon be able to create stunning sugar rose decorations that will elevate your desserts to new levels of elegance and sophistication. Whether you’re a seasoned professional or a beginner, the joy of crafting these delicate edible flowers lies in the process itself—discovering your unique style, perfecting your techniques, and bringing your visions to life.
Remember, the beauty of sugar roses lies not just in their appearance but also in the love and care that goes into making each one. As you continue to refine your skills, you’ll find that these edible works of art become a cherished part of your baking repertoire, delighting friends, family, and clients alike. Happy crafting!



0 comments