Introduction
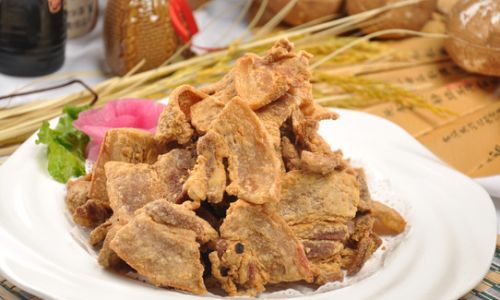
In the vast culinary landscape, where dishes from around the globe compete for our taste buds’ attention, dry-fried pork belly stands out as a delightful fusion of simplicity and indulgence. This timeless dish, often found in various forms across Asian cuisines, particularly in China, combines the crispy texture of deep-fried food with the rich, savory flavors of pork belly. Known for its golden crust and tender interior, dry-fried pork belly is a perfect balance of fat and lean, offering a mouthwatering experience that satisfies both the heart and the soul.
In this comprehensive guide, we will delve into the art of preparing dry-fried pork belly, from selecting the right ingredients to mastering the frying technique. By following these steps, you’ll be able to create a dish that is not only visually appealing but also bursting with flavor, making it an instant hit at any gathering or family dinner.
Section 1: Understanding the Ingredients

Before diving into the cooking process, it’s crucial to understand the key ingredients and their roles in creating the perfect dry-fried pork belly.
1 Pork Belly Selection
The foundation of any great dish is its ingredients, and for dry-fried pork belly, the star is undoubtedly the pork belly itself. Look for a piece that has a good balance of fat and lean meat. The ideal pork belly should have layers of fat and meat that are evenly distributed, ensuring a juicy and flavorful bite with every mouthful.
2 Marinades and Seasonings
Marinating the pork belly is essential to infuse it with flavors that will carry through the frying process. Common marinade ingredients include soy sauce, rice vinegar, Shaoxing wine (or dry sherry as a substitute), garlic, ginger, and five-spice powder. These ingredients work together to create a harmonious blend of sweet, savory, and aromatic flavors.
3 Breading and Binding Agents
While traditional dry-fried pork belly doesn’t involve a thick coating of breadcrumbs or flour, a light dusting of cornstarch or potato starch can help achieve a crisper exterior. This step is optional but highly recommended for those seeking an extra layer of crunch.
Section 2: Preparation Techniques

With the ingredients in place, it’s time to focus on the preparation techniques that will transform raw pork belly into a culinary masterpiece.
1 Slicing the Pork Belly
Start by slicing the pork belly into thin, even pieces. The thickness of each slice is crucial; too thick will result in an undercooked interior, while too thin can lead to overcooking and a dry texture. Aim for slices that are about 1/4 to 1/2 inch thick.
2 Marinating
In a large bowl or marinating container, combine the soy sauce, rice vinegar, Shaoxing wine, minced garlic, grated ginger, and five-spice powder. Add the pork belly slices, ensuring they are fully submerged in the marinade. Cover and refrigerate for at least 2 hours, preferably overnight, to allow the flavors to penetrate deeply into the meat.
3 Drying the Pork Belly
After marinating, remove the pork belly slices from the marinade and pat them dry using paper towels. Removing excess moisture is vital as it helps achieve a crisper exterior during frying.
Section 3: The Frying Process

Now, we arrive at the most critical step – frying the pork belly to perfection. This requires attention to detail and a good understanding of cooking temperatures.
1 Preparing the Oil
Choose a neutral-flavored oil with a high smoking point, such as peanut oil or canola oil, for frying. Pour enough oil into a deep frying pan or wok to fully submerge the pork belly slices. Heat the oil over medium-high heat until it reaches around 350°F (175°C).
2 Frying the Pork Belly
Carefully place a few slices of pork belly into the hot oil, being mindful not to overcrowd the pan. Fry for about 3-4 minutes on each side, or until they turn a deep golden brown. The key to achieving a crispy exterior without overcooking the interior is maintaining a consistent oil temperature and flipping the slices frequently.
3 Draining and Cooling
Once the pork belly slices are evenly browned and crispy, use a slotted spoon or frying basket to remove them from the oil and let them drain on paper towels. Allow the slices to cool slightly before serving, as the heat from the oil will continue to cook the meat slightly.
Section 4: Serving and Enjoying

With the dry-fried pork belly ready, it’s time to plate and enjoy this culinary delight.
1 Garnishing and Accompaniments
While dry-fried pork belly is delicious on its own, a few garnishes and accompaniments can elevate the dish to new heights. Consider sprinkling it with chopped green onions, sesame seeds, or a light dusting of chili flakes for an added kick.
2 Pairing with Side Dishes
Serve your dry-fried pork belly with sides that complement its rich flavors. Steamed rice is a classic choice, soaking up the delicious juices and flavors. Other options include stir-fried vegetables, pickled vegetables, or a refreshing cucumber salad.
3 Presentation
Don’t overlook the importance of presentation. Arrange the pork belly slices on a platter, garnish generously, and drizzle with a bit of the reserved marinade or a homemade dipping sauce for an extra layer of flavor.
Conclusion

Mastering the art of dry-fried pork belly is a rewarding culinary journey that combines precision, patience, and a love for food. By carefully selecting your ingredients, meticulously preparing the pork belly, and perfectly frying it to a golden crisp, you’ll create a dish that is not only visually stunning but also bursting with layers of flavor.
Whether you’re serving it as a main course for a special occasion or a simple yet indulgent weeknight meal, dry-fried pork belly is sure to impress and delight your guests. Remember, the key to success lies in attention to detail and a willingness to experiment with different marinades, seasonings, and cooking techniques until you find the perfect balance that suits your taste.
So, gather your ingredients, roll up your sleeves, and embark on this culinary adventure. With practice and passion, you’ll soon be crafting batches of dry-fried pork belly that will have everyone coming back for seconds – and maybe even thirds. Happy cooking!


0 comments