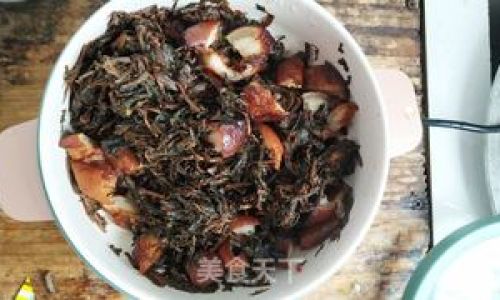
Introduction: The Art and Science of Kimchi Making
Kimchi, a traditional Korean fermented vegetable dish, is more than just a side; it’s a cultural staple that has been enjoyed for centuries. Its tangy, savory, and slightly spicy flavor profile is a testament to the intricate balance of ingredients and the meticulous fermentation process. Making kimchi at home may seem daunting, but with the right guidance, you can create an authentic batch that rivals any you’ve tasted in Korean restaurants. This comprehensive guide will walk you through every step of the kimchi-making process, from selecting the perfect vegetables to achieving the perfect fermentation environment.

Understanding the Basics: Ingredients and Tools
Before diving into the recipe, let’s familiarize ourselves with the essential ingredients and tools you’ll need:
Ingredients:
- Napa Cabbage (Baechu): The cornerstone of kimchi, this crisp, juicy cabbage is ideal for fermentation.
- Salt: Used to draw out moisture from the cabbage, aiding in the fermentation process.
- Daikon Radish (Mu): Adds crunch and a subtle sweetness.
- Scallions (Pa): For a fresh, mild onion flavor.
- Garlic and Ginger: Essential for depth and complexity in flavor.
- Red Pepper Flakes (Gochugaru): Provide the signature heat and color.
- Fish Sauce (Jeotgal): Adds umami and a savory depth.
- Sugar or Honey: A small amount helps balance the acidity and heat.
- Rice Vinegar (Maesil-cheong): Optional, for a hint of tanginess.
- Sesame Oil: Adds richness and a nutty aroma.
- Korean Chili Paste (Gochujang): Optional, for an extra layer of flavor.
- Salted Shrimp (Saewoojeot): Optional, for an enhanced seafood flavor.
- Water Kimchi Paste (Ssukgat): Optional, for a more liquidy texture.
- Fermentation Starter (optional): Can help speed up and control the fermentation process.
Tools:

- Large Mixing Bowls: For preparing and mixing the ingredients.
- Knives and a Cutting Board: Sharp knives are crucial for precise chopping.
- Large Glass Jar or Ceramic Crock: Ideal for fermentation, as they won’t react with the acidic environment.
- Weights: To keep the vegetables submerged under the brine during fermentation. You can use a clean stone, a smaller jar filled with water, or a kimchi weight specifically designed for this purpose.
- Clean Cloth and Rubber Band: To cover the jar and allow gases to escape while preventing contaminants from entering.
- Gloves: To protect your hands from the heat of the pepper flakes and the salt.
Step-by-Step Guide: Making Authentic Korean Kimchi
Step 1: Preparing the Cabbage
- Select Fresh Cabbage: Choose firm, fresh heads of napa cabbage with tight, crisp leaves. Avoid cabbages with brown spots or soft spots.
- Cut the Cabbage: Cut the cabbage lengthwise into quarters, keeping the root end intact to help hold the leaves together.
- Salt the Cabbage: Sprinkle salt evenly between each layer of the cabbage. You’ll need about 2-3 tablespoons of salt per head of cabbage. Place the salted cabbage in a large mixing bowl or a clean sink.
- Let It Sit: Cover the cabbage with a clean cloth or plastic wrap and let it sit for about 4-6 hours, occasionally turning it to ensure even distribution of the salt. The cabbage will release liquid, known as brine.
Step 2: Preparing the Seasoning Paste
- Prepare the Vegetables: Grate the daikon radish and chop the scallions into 2-inch pieces. You can also add carrots, cucumbers, or other vegetables if desired.
- Blend the Aromatics: In a food processor or blender, combine garlic, ginger, and a small amount of water to form a paste. If you prefer a chunkier texture, you can mince these ingredients by hand.
- Combine Ingredients: In a large mixing bowl, combine the grated daikon, chopped scallions, garlic-ginger paste, red pepper flakes, fish sauce, sugar or honey, rice vinegar (if using), sesame oil, and any optional ingredients like chili paste or salted shrimp. Mix well until a thick paste forms.
Step 3: Assembling the Kimchi

- Rinse and Drain the Cabbage: After the cabbage has sat for the required time, rinse it under cold water to remove excess salt. Let it drain in a colander for about 10-15 minutes, shaking off excess water but not drying it completely.
- Apply the Paste: Working with one cabbage quarter at a time, gently pull apart the leaves and apply a generous amount of the seasoning paste between each layer, ensuring it reaches the core. You can also use your hands to massage the paste into the cabbage for better flavor penetration.
Step 4: Packing the Kimchi
- Transfer to Fermentation Jar: Tightly pack the seasoned cabbage quarters into your fermentation jar or crock, pressing down firmly to remove air pockets and ensure the cabbage is submerged in its own juices. It’s okay if some of the paste falls out; it will add flavor to the brine.
- Add Weights: Place a weight on top of the kimchi to keep it submerged. This is crucial to prevent mold and ensure proper fermentation.
- Cover and Secure: Cover the jar with a clean cloth and secure it with a rubber band. This allows gases to escape while preventing contaminants from entering.
Step 5: Fermentation
- Initial Fermentation: Place the jar in a cool, dark place where the temperature remains consistent, ideally between 60-75°F (15-24°C). Kimchi will begin to ferment within 24 hours, and you may notice bubbles forming and a pleasant aroma developing.
- Taste Testing: After 2-3 days, start tasting your kimchi daily to monitor its progress. The flavor will continue to develop, becoming more tangy and sour as it ferments.
- Refrigeration: Once you reach your desired level of tanginess and flavor, transfer the jar to the refrigerator to slow down the fermentation process. This will help preserve your kimchi and prevent it from becoming too sour.
Step 6: Serving and Storage

- Serving: Kimchi can be served immediately after refrigeration or allowed to sit for a few more days for additional flavor development. It pairs beautifully with rice, grilled meats, soups, and stir-fries.
- Storage: Properly stored in an airtight container in the refrigerator, kimchi can last for several weeks to months. Over time, its flavor will continue to evolve, becoming more complex and sour.
Troubleshooting and Tips
- Too Salty: If your kimchi tastes too salty, rinse it under cold water before serving and adjust the seasoning with a bit more sugar or honey.
- Not Enough Tang: If your kimchi lacks tanginess, allow it to ferment for a few more days before refrigerating.
- Mold Prevention: If you notice mold forming on the surface of your kimchi, it’s usually due to improper submersion. Scoop out the moldy part and ensure the remaining kimchi is fully submerged. If mold persists, discard the batch and start anew.
- Burping the Jar: During active fermentation, you may need to “burp” your jar daily to release built-up gases. Simply loosen the cloth covering and let the gases escape before resealing.
Conclusion: Preserving Tradition, One Jar at a Time
Making kimchi is not just about creating a delicious dish; it’s about preserving a cultural tradition that has been handed down through generations. By following these steps and tips, you can create your own batch of authentic Korean kimchi, enjoying its unique flavors and the satisfaction of crafting something truly special. Whether you’re a seasoned fermenter or a beginner, the joy of kimchi-making lies in the process, the anticipation, and the final, tangy reward. So, gather your ingredients, roll up your sleeves, and embark on this culinary journey—one jar of kimchi at a time.


0 comments