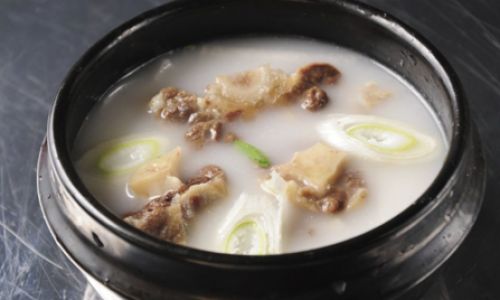
Bone broth, a staple in kitchens worldwide, is revered for its rich flavor, nutritional depth, and comforting warmth. Yet, one of the most coveted traits of a superior bone broth is its opaque, milky-white appearance—a visual cue of culinary expertise. Achieving this hue is not merely aesthetic; it reflects the mastery of emulsification, protein extraction, and heat control. This article delves into the scientific principles and practical techniques to transform a clear broth into a velvety, cloud-like elixir.
Understanding the Chemistry of White Broth
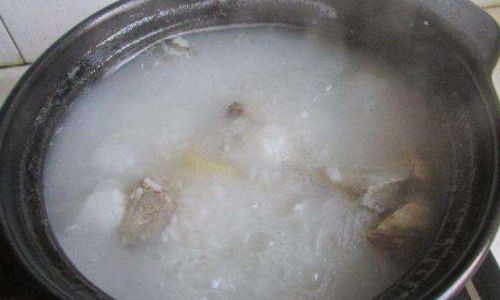
The milky-white color in bone broth arises from the emulsification of fat and proteins. When bones are simmered, collagen breaks down into gelatin, while marrow and connective tissues release fat. These fat globules, when properly dispersed, create a stable suspension in the liquid, scattering light to produce the characteristic opacity. Achieving this requires a delicate balance of heat, time, and ingredient interaction.
Selecting the Right Bones
The foundation of a white broth begins with bone selection. Bones rich in collagen and marrow are paramount:
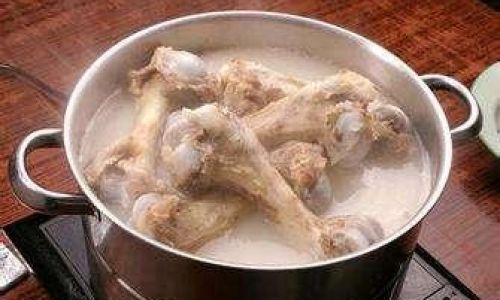
- Knucklebones and Joint Bones: These contain high concentrations of collagen, which converts to gelatin during cooking. Gelatin acts as a natural thickener, aiding in fat emulsification.
- Marrow Bones: Femur and tibia bones from cattle or pigs house fatty marrow, a critical fat source for emulsification.
- Oxtail or Chicken Feet: These add extra collagen and connective tissue, enhancing gelatin production.
Avoid lean bones like shin bones without marrow, as they lack the fat necessary for opacity.
Pre-Treatment: Roasting vs. Blanching
The initial preparation of bones significantly impacts broth color:
- Roasting: Toasting bones in an oven (200–220°C/400–425°F) caramelizes sugars and proteins, yielding a deep flavor. However, excessive roasting can denature proteins, reducing their ability to emulsify fat. Aim for a golden-brown hue, not charred.
- Blanching: Parboiling bones in cold water for 10–15 minutes removes impurities (blood, scum) that cloud the broth. This step ensures clarity before simmering, allowing proteins to focus on emulsification rather than coagulating impurities.
The Simmering Process: Low and Slow
Simmering is the heart of broth-making. Aggressive boiling disrupts emulsification:
- Heat Control: Maintain a gentle simmer (85–95°C/185–203°F). Rapid boiling breaks fat globules into smaller particles, which may coalesce and rise to the surface as a greasy film.
- Time: A minimum of 6–8 hours for poultry bones and 12–24 hours for beef or pork bones allows complete collagen breakdown. Overcooking beyond 24 hours may degrade gelatin, reducing viscosity.
The Role of Acid
Adding acid (vinegar, lemon juice, or tomato) accelerates collagen breakdown but requires caution:
- Mechanism: Acid lowers the pH, denaturing collagen and exposing more protein strands for gelatinization.
- Risks: Excessive acid can curdle proteins, creating a grainy texture. Use 1–2 tablespoons of acid per 2 liters of water and add it after blanching to prevent inhibiting initial protein coagulation.
Skimming Fat Strategically
Fat management is a balancing act:
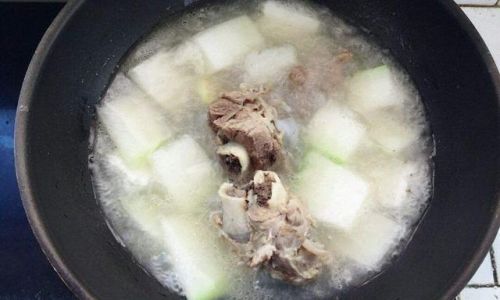
- Initial Skim: Remove scum during the first 30 minutes of simmering to eliminate impurities.
- Late Skim: After 4–6 hours, gently skim excess fat from the surface. Retain a thin layer (1–2 mm) to aid emulsification; removing all fat prevents opacity.
Adding Milk or Dairy (Optional)
For an instant white hue, some traditions incorporate milk or cream. However, this alters flavor and may reduce shelf life:
- Technique: Add 1/4 cup of milk per liter of broth during the final 30 minutes. Stir gently to avoid curdling.
- Science: Milk proteins (casein) bind with fat, enhancing emulsion stability.
Using Tomatoes or Tomato Paste
Acidic tomatoes can contribute to whiteness through a different mechanism:
- Protein Coagulation: Tomatoes’ acid denatures proteins, causing them to coagulate and trap fat droplets.
- Application: Add 1–2 tablespoons of tomato paste during the last hour of simmering. The result is a subtle pinkish tint but enhanced opacity.
Stirring Techniques
Stirring influences fat distribution:
- Occasional Stirring: Gentle agitation (every 30 minutes) prevents fat from pooling but avoid overstirring, which can break emulsions.
- Wooden Spoon Use: A wooden spoon’s porous surface helps release trapped fat particles into the broth.
Cooling and Reheating
Post-cooking steps affect final texture:
- Natural Cooling: Allow broth to cool slowly. Rapid chilling (e.g., placing hot pot in cold water) can cause fat to solidify in clumps.
- Reheating: Gently reheat without boiling to preserve emulsion.
Avoiding Common Pitfalls
- High Heat: Boiling breaks fat globules, leading to a greasy film.
- Adding Salt Too Early: Salt dehydrates proteins, reducing their emulsifying capacity. Add salt only after simmering.
- Using Lean Bones: Insufficient fat yields a clear broth.
- Overcrowding the Pot: Overfilled pots lower simmering temperatures, prolonging cooking and risking protein degradation.
Advanced Techniques for Professional Results
For commercial-quality broth, combine these methods:
- Double Boiling: Simmer bones in a pot placed inside a larger pot of water (bain-marie). This ensures gentle, even heat.
- Enzymatic Pretreatment: Marinate bones in pineapple or papaya juice (rich in proteolytic enzymes) for 1 hour before cooking. This breaks down proteins, accelerating gelatin release.
- Centrifugation: In industrial settings, broth is spun to separate fat, which is then reintroduced as an emulsion. Home cooks can mimic this by blending cooled broth with an immersion blender to homogenize fat.
Troubleshooting Guide
- Broth Too Clear:
- Insufficient collagen: Add knucklebones or chicken feet.
- Inadequate fat: Include marrow bones or a splash of milk.
- Broth Greasy:
- Overheating: Reduce simmering temperature.
- Excess fat: Skim more aggressively next time.
- Bitter Aftertaste:
- Over-roasting bones: Roast until golden, not charred.
- Acid overuse: Reduce vinegar or lemon juice.
Cultural Variations in White Broth
- Chinese Master Stock: Uses a blend of soy sauce, rock sugar, and spices, simmered with pork bones and chicken. The broth achieves opacity through prolonged simmering and repeated use (a technique called “lao chou” or aged broth).
- French Consommé: While typically clear, a “consommé blanc” uses a white roux (flour and butter) to thicken and whiten the broth.
- Japanese Tonkotsu Ramen: Boiled pork bones for 12+ hours under high pressure, creating a milky broth from emulsified collagen and fat.
Nutritional Benefits of White Bone Broth
The opaque hue signifies more than culinary prowess—it indicates bioavailable nutrients:
- Gelatin: Aids gut health and joint mobility.
- Glycine: An amino acid supporting detoxification and sleep.
- Calcium and Phosphorus: From bone marrow, essential for bone density.
Conclusion: The Alchemy of Patience
Crafting a milky-white bone broth is a dance of science and artistry. It demands precision in ingredient selection, meticulous heat control, and an understanding of emulsification dynamics. While shortcuts exist (milk, blenders), the traditional method—a symphony of simmering bones over hours—yields not just opacity but depth of flavor and nutrition. Whether you’re a home cook or aspiring chef, mastering this technique elevates broth from mundane to magical, a testament to the transformative power of patience and knowledge.
Final Tip: Experiment with bone ratios and simmering times. Keep a cooking journal to track variables (e.g., “4 lbs beef bones + 1 lb chicken feet, simmered 18 hours, added 1 tbsp vinegar at 2 hours”). Over time, you’ll develop a signature broth—golden, white, and undeniably yours.
0 comments