Introduction
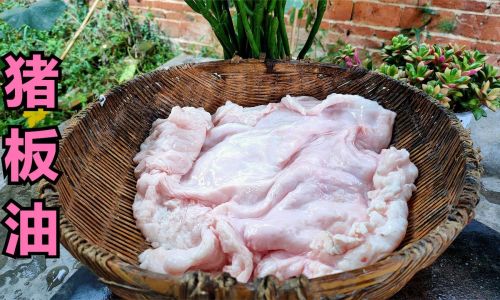
Pork lard, a staple in traditional cuisines worldwide, has experienced a resurgence in modern kitchens as home cooks and chefs rediscover its unparalleled flavor and versatility. Rendering pork lard—the process of melting solid fat into a smooth, golden liquid—is a culinary art that transforms a humble ingredient into a kitchen essential. This article delves into the meticulous process of rendering pork lard from pig fat, often referred to as “pork board fat” or “leaf lard,” a prized fat known for its mild taste and high smoke point. Whether you seek to elevate your baking, frying, or sautéing, mastering this technique opens doors to richer flavors and textures. Join us as we explore the tools, techniques, and secrets to achieving lard that rivals even the finest artisanal products.
Understanding Pork Fat: Types and Selection
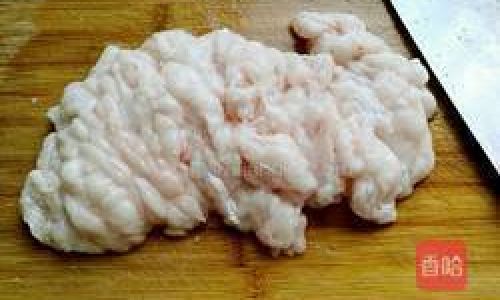
Before diving into the rendering process, it’s crucial to recognize the varieties of pork fat. The most prized for lard is leaf lard, derived from the visceral fat surrounding the pig’s kidneys. Renowned for its delicate, almost buttery flavor, leaf lard is ideal for pastries and dishes where a neutral taste is desired. Back fat, the layer of fat beneath the pig’s skin, is another excellent option, offering a slightly stronger pork essence. When selecting fat, opt for fresh, high-quality cuts from reputable butchers or farmers. Avoid overly processed or pre-ground fats, as they may contain additives or impurities that compromise the final product.
Tools and Ingredients: Equipping Your Kitchen
Rendering lard requires minimal equipment but demands attention to detail. Gather the following:
- A heavy-bottomed stainless steel pot or Dutch oven: This distributes heat evenly, preventing hotspots that could scorch the fat.
- A sharp chef’s knife and cutting board: For trimming and dicing the fat.
- A fine-mesh strainer or cheesecloth: To separate the liquid lard from solid residues.
- Heat-resistant containers: Glass jars or ceramic bowls for storing the rendered lard.
- Ingredients:
- 2–3 pounds of pork fat (leaf lard or back fat).
- ¼ cup of water (optional, to prevent initial burning).
- Kosher salt or herbs (optional, for seasoning).
Step-by-Step Rendering Process
Preparing the Pork Fat
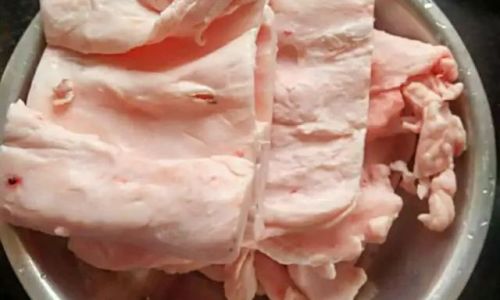
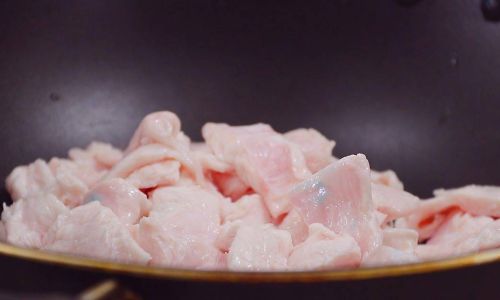
Begin by trimming any residual meat, blood vessels, or connective tissue from the fat. These parts can impart off-flavors if left intact. Using a sharp knife, cut the fat into ½-inch cubes. Uniformity ensures even melting. For larger batches, consider partially freezing the fat beforehand to make cutting easier.
Initial Cooking: The Water Method
Place the diced fat into your pot and add the water. This technique, often debated among purists, serves a critical purpose: the water regulates the initial temperature, preventing the fat from browning too quickly. As the mixture heats, the water evaporates, leaving the fat to melt gently. Cook over low heat—never exceed medium-low. Stir occasionally to prevent sticking.
The Slow Rendering Phase
As the water evaporates (typically after 15–20 minutes), the fat will begin to liquefy. Reduce the heat to its lowest setting. This phase demands patience; rushing it risks burning the lard. Stir every 10–15 minutes to ensure even melting. You’ll notice the fat cubes shrinking and turning golden brown as they release their oil.
Monitoring the Process
The rendering time varies (1–2 hours) depending on the fat’s quantity and freshness. Key indicators of doneness:
- Color: The liquid transitions from milky white to a clear, golden hue.
- Cracklings: The solid residues (known as “cracklings” or “gratons”) will float to the surface, crispy and golden.
- Sizzle: The lard will emit a gentle sizzle rather than a vigorous bubble, signaling most moisture has evaporated.
Straining the Lard
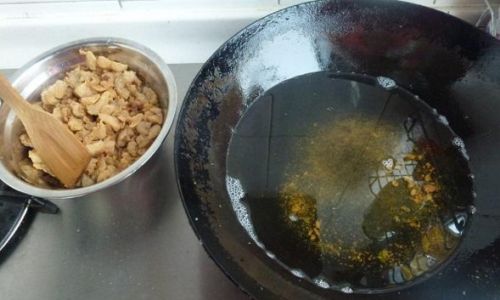
Once the cracklings are uniformly golden, remove the pot from heat. Allow the mixture to cool slightly (5–10 minutes) to prevent splattering. Line a strainer with cheesecloth or a fine-mesh sieve and position it over a heat-resistant bowl. Carefully pour the lard through the strainer, separating the liquid from the cracklings. Reserve the cracklings for crispy snacks or garnishes.
Clarifying and Final Touches
For pristine lard, repeat the straining process to remove impurities. Some cooks prefer adding a pinch of salt or a sprig of rosemary during straining to infuse subtle flavor. However, traditionalists advocate for unadulterated lard to preserve its neutrality.
Cooling and Storing
Pour the strained lard into clean, dry jars. As it cools, the lard will solidify into a creamy white solid. Store in the refrigerator for up to three months or the freezer for six months. For everyday use, keep a small jar at room temperature (away from sunlight) for spreadable consistency.
Expert Tips for Flawless Lard
- Temperature Control: Never leave the pot unattended. High heat ruins lard’s flavor and texture.
- Avoid Overcooking: Burnt lard develops a bitter aftertaste. Remove cracklings once they’re golden, not browned.
- Saving Cracklings: Pat them dry with paper towels and season with salt or spices for a crunchy snack.
- Reusing Lard: Strained lard can be reused for frying; simply filter through cheesecloth after each use.
Troubleshooting Common Issues
- Cloudy Lard: Caused by residual moisture or impurities. Strain again through fresh cheesecloth.
- Off-Flavors: Ensure the fat is fresh and properly trimmed. Avoid mixing fat types (e.g., combining leaf lard with back fat).
- Separated Lard: If stored lard develops a layer of liquid, gently reheat and remix before solidifying.
Culinary Applications: Beyond the Basics
Rendered pork lard’s high smoke point (around 370°F/188°C) makes it ideal for high-heat cooking. Applications include:
- Baking: Flaky pie crusts, tender biscuits, and authentic tamale dough.
- Frying: Crispy french fries, fried chicken, and plantains.
- Sautéing: Vegetables, garlic, and aromatics gain depth without bitterness.
- Confit: Submerge duck or pork in lard for unparalleled tenderness.
The Cultural Resurgence of Lard
Once vilified by dietary trends, lard is reclaiming its place as a wholesome fat. Rich in monounsaturated fats and vitamin D, it offers a healthier alternative to processed vegetable oils when consumed in moderation. Artisanal lard has even graced Michelin-starred menus, celebrated for its ability to enhance umami and texture.
Conclusion: A Labor of Love
Rendering pork lard is a meditative act, bridging generations through the alchemy of fire and fat. While store-bought lard pales in comparison, the homemade version rewards effort with unmatched purity and flavor. Whether you’re a baker seeking flakier crusts or a home cook craving authentic taste, this ancient technique deserves a place in your culinary repertoire. So gather your ingredients, embrace the slow dance of heat and time, and savor the golden elixir that has nourished civilizations for millennia. Your future dishes—and your guests—will thank you.


0 comments