Introduction
Rendering lard, the process of transforming raw pork fat into a versatile cooking ingredient, has been a culinary tradition for centuries. Once a staple in kitchens worldwide, lard fell out of favor with the rise of processed vegetable oils but is now experiencing a resurgence as home cooks and chefs rediscover its unparalleled flavor and functionality. Unlike store-bought versions, which may contain additives or hydrogenated fats, homemade lard is a pure, natural product that elevates dishes from pies to fried chicken. This article explores the time-honored method of rendering lard, offering tips, tricks, and scientific insights to help you master this age-old skill. Whether you’re a seasoned home cook or a curious novice, this guide will equip you with the knowledge to create golden, aromatic lard that rivals even the finest artisanal products.
Why Render Lard at Home?
Before diving into the process, it’s essential to understand why lard remains a beloved ingredient. Lard’s high smoke point (around 370°F/188°C) makes it ideal for frying, while its neutral flavor allows other ingredients to shine. In baking, it produces flaky, tender pastries and biscuits that butter or shortening can’t replicate. Additionally, lard is a source of vitamin D and monounsaturated fats, which studies suggest may support heart health when consumed in moderation. By rendering lard at home, you gain control over the quality of the fat, avoid preservatives, and reduce waste by utilizing every part of the animal.
Ingredients and Tools
To render lard, you’ll need minimal equipment and ingredients:
- Pork Fat: Opt for high-quality fatback (the hard, white fat from the pig’s back) or leaf lard (the fat surrounding the kidneys). Leaf lard is prized for its mild flavor and is ideal for baking.
- Water: A small amount (1–2 cups per 5 pounds of fat) to prevent scorching during the initial stages.
- Optional Additions: A few peppercorns, bay leaves, or garlic cloves can infuse subtle flavor, though purists often prefer to keep it unadulterated.
Tools:
- A heavy-bottomed stainless steel or enameled cast-iron pot (to distribute heat evenly).
- A fine-mesh strainer or cheesecloth.
- Glass jars or containers with airtight lids for storage.
- A thermometer (optional but helpful for monitoring temperature).
The Rendering Process: Step-by-Step
Preparing the Fat
Start by trimming any residual meat or blood vessels from the pork fat. Chop the fat into small, uniform pieces (about 1-inch cubes) to expedite rendering. Smaller pieces expose more surface area to heat, accelerating the melting process. If the fat is frozen, partially thaw it for easier cutting.
Initial Cooking: The Wet Method
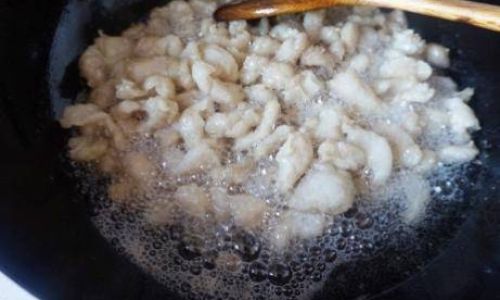
Place the chopped fat and water into the pot. The water acts as a buffer, preventing the fat from browning too quickly and ensuring even heat distribution. Set the stove to low heat—too high, and the fat may scorch, imparting an off-flavor. Stir occasionally to prevent sticking.
As the mixture heats, the fat will begin to melt, and the water will evaporate. This stage can take 1–2 hours, depending on the quantity and stove strength. Patience is key here; rushing the process risks burning the fat.
Monitoring Progress
Once the water has evaporated, the fat will start to simmer gently. At this point, maintain low heat (around 225–250°F/107–121°C). The fat will gradually clarify, turning from opaque to translucent. Small, crispy bits called cracklings will form as the proteins and connective tissues cook. These can be strained out later and used as a crunchy snack or topping.
Skimming Impurities
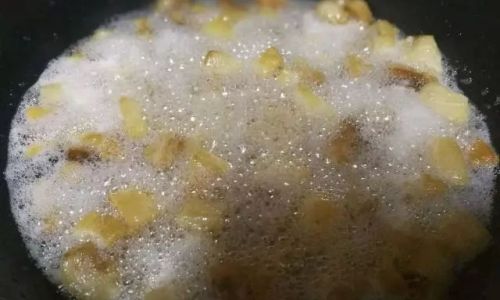
As the lard renders, foam or impurities may rise to the surface. Use a spoon to skim these off periodically. This step ensures a cleaner, clearer final product.
Straining the Lard
When the cracklings turn golden brown and sink to the bottom (typically after 2–3 hours), the lard is ready. Remove the pot from heat and let it cool slightly. Line a strainer with cheesecloth or a fine-mesh sieve and place it over a heatproof container. Carefully pour the hot lard through the strainer, separating the liquid fat from the solids.
Final Clarification
For exceptionally clear lard, repeat the straining process or let the rendered fat settle overnight in the refrigerator. Any remaining impurities will sink to the bottom, allowing you to decant the pristine lard from the top.
Tips for Perfect Lard
- Temperature Control: Avoid letting the lard exceed 275°F (135°C), as high heat can degrade its quality and flavor.
- Storage: Pour the hot lard into sterilized jars, leaving 1 inch of headspace to allow for expansion. Lard solidifies as it cools, turning from golden liquid to opaque white.
- Flavor Variations: Experiment with herbs or spices during rendering. Rosemary, thyme, or smoked paprika can add unique nuances.
Storing and Using Rendered Lard
Properly rendered lard has a long shelf life. Store it in a cool, dark place (like a pantry) for up to six months, or refrigerate it for a year. Frozen lard can last indefinitely, though its quality may diminish over time.
Culinary Applications
- Baking: Use lard in pie crusts, biscuits, or tamales for unmatched flakiness.
- Frying: Its high smoke point makes it perfect for french fries, chicken, or doughnuts.
- Savory Dishes: Incorporate lard into refried beans, sautéed greens, or roasted potatoes for richness.
Health Considerations
While lard is higher in saturated fat than some oils, it’s free of trans fats and contains oleic acid, a monounsaturated fat linked to heart health. As with any dietary fat, moderation is key. Balance lard with plant-based oils and lean proteins for a well-rounded diet.
Cultural Significance of Lard
Lard has deep roots in global cuisines. In Mexican cooking, it’s used to fry tortillas for chilaquiles; in Chinese cuisine, it’s essential for crispy duck. Southern American kitchens rely on it for biscuits and gravy, while European pastries often feature lard’s tenderizing properties. During wartime rationing, lard was a precious resource, underscoring its historical importance.
Troubleshooting Common Issues
- Burnt Flavor: If the lard tastes bitter, the heat was too high. Discard the batch and start over.
- Cloudy Lard: Impurities weren’t strained thoroughly. Next time, use a finer mesh or cheesecloth.
- Soft Texture: The lard wasn’t rendered long enough. Ensure cracklings are golden before straining.
Conclusion
Rendering lard at home is a rewarding endeavor that connects us to culinary traditions while yielding a superior ingredient. By mastering this technique, you’ll gain a deeper appreciation for the alchemy of transforming simple fat into golden liquid gold. Whether you’re frying, baking, or sautéing, homemade lard adds a layer of depth and authenticity that store-bought alternatives can’t match. So, grab your pot, some pork fat, and embark on a journey to elevate your cooking—one spoonful of lard at a time.


0 comments