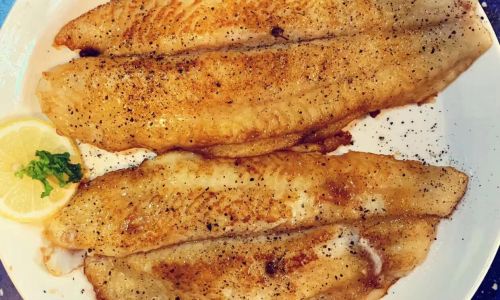
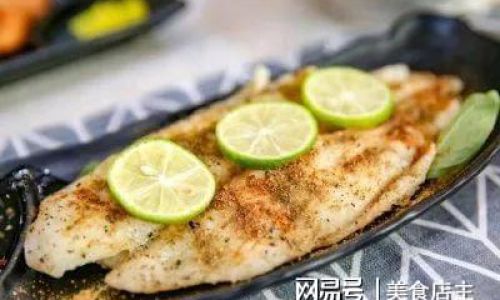
Basa fish, a mild-flavored white fish native to Southeast Asia, has become a staple in kitchens worldwide due to its delicate texture, affordability, and versatility. Whether you’re a seasoned home cook or a novice in the kitchen, mastering the technique of pan-searing basa fish can elevate your meals to restaurant-quality standards. This guide will walk you through every step, from selecting the freshest fish to achieving that coveted golden-brown crust, while sharing tips to troubleshoot common pitfalls. Let’s dive into the science and art of pan-searing basa fish to perfection.
Understanding Basa Fish: Why It’s Ideal for Pan-Searing
Basa fish (Pangasius bocourti) is a member of the catfish family, prized for its moist, flaky flesh and subtle flavor. Unlike stronger-tasting fish like salmon or mackerel, basa absorbs seasonings and marinades readily, making it a blank canvas for culinary creativity. Its low fat content means it cooks quickly, but this also requires careful handling to prevent drying out. Pan-searing is an ideal method because it creates a crispy exterior while keeping the interior tender—a contrast that defines gourmet seafood dishes.

Step 1: Selecting and Preparing the Basa Fish
1 Choosing the Right Fish
- Fresh vs. Frozen: Opt for fresh basa fillets if available—look for firm, translucent flesh with no discoloration or fishy odor. Frozen fillets are equally viable; thaw them slowly in the refrigerator overnight to prevent moisture loss.
- Fillet Size: Aim for fillets of uniform thickness (1–1.5 inches) to ensure even cooking. Thicker fillets may require lower heat to cook through without burning the exterior.
2 Prepping the Fillets
- Pat Dry Thoroughly: Use paper towels to remove excess moisture. This step is critical—dry fish sears better, as moisture creates steam and prevents browning.
- Trimming: Remove any residual scales, bones, or dark bloodlines using tweezers or a sharp knife. Run your finger along the flesh to detect stray pin bones.
- Optional Marinating: While basa’s mild flavor benefits from marinades, keep it brief (15–30 minutes) to avoid breaking down the flesh. Try olive oil, lemon zest, garlic, and herbs like dill or parsley.
Step 2: Seasoning for Maximum Flavor
1 Simple Seasoning Blend
- Kosher Salt & Freshly Ground Pepper: The basics. Season both sides generously just before cooking.
- Advanced Options:
- Cajun Spice Rub: Smoked paprika, garlic powder, onion powder, cayenne, and thyme.
- Lemon-Herb: Grated lemon zest, dried oregano, and a pinch of red pepper flakes.
- Asian-Inspired: Ginger powder, five-spice blend, and a drizzle of sesame oil post-searing.
2 Dredging (Optional)
For an extra-crispy coating, lightly dust the fillets in seasoned flour (all-purpose flour mixed with salt and pepper). Shake off excess to prevent a gummy texture.

Step 3: Mastering the Pan-Searing Technique
1 Choosing the Right Pan
- Stainless Steel or Cast Iron: These retain heat well and create a superior crust. Nonstick pans work but may not achieve the same caramelization.
- Size Matters: Use a pan large enough to accommodate fillets without overcrowding. Overcrowding lowers the oil temperature, leading to steaming instead of searing.
2 Heating the Oil
- Oil Selection: Use neutral oils with high smoke points (e.g., canola, grapeseed, or avocado oil). Avoid olive oil for searing, as it burns at high temperatures.
- Temperature Test: Heat the pan over medium-high heat until the oil shimmers but doesn’t smoke. A drop of water should sizzle vigorously upon contact.
3 The Searing Process
- Place Fillets Skin-Side Down First: If the fillet has skin, start with the skin side to render fat and crisp it up. For skinless fillets, lay them presentation-side down.
- Resist the Urge to Fiddle: Let the fillets cook undisturbed for 3–4 minutes. Lifting too soon tears the crust.
- Flip with Confidence: Use a thin spatula (fish spatulas are ideal) to slide under the fillet. If it resists, cook for another 30 seconds.
- Second Side Cooking: Sear the second side for 2–3 minutes until golden. Thinner fillets may need less time.
4 Finishing Touches

- Basting with Butter: For added richness, add a knob of butter to the pan during the last minute of cooking. Tilt the pan and spoon the foaming butter over the fillets.
- Aromatics: Toss in minced garlic, thyme sprigs, or lemon slices during the butter-basting phase for a fragrant finish.
Step 4: Testing for Doneness
- Visual Cues: The flesh should be opaque and flake easily with a fork. Avoid overcooking—basa dries out quickly.
- Thermometer Method: Insert an instant-read thermometer into the thickest part; 145°F (63°C) is the safe internal temperature.
Step 5: Resting and Serving
- Rest the Fillets: Transfer to a plate and tent with foil for 2–3 minutes. This allows juices to redistribute, ensuring moistness.
- Sauce Pairings:
- Lemon-Caper Butter Sauce: Melt butter, add lemon juice, capers, and parsley.
- Dill Yogurt Sauce: Mix Greek yogurt, dill, garlic, and a squeeze of lemon.
- Soy-Ginger Glaze: Reduce soy sauce, honey, ginger, and garlic until syrupy.
- Side Dishes: Serve with lemon wedges, roasted asparagus, garlic mashed potatoes, or a crisp green salad.
Troubleshooting Common Issues
Fish Sticking to the Pan
- Cause: Insufficiently heated pan or excess moisture.
- Fix: Ensure the pan is hot before adding oil. Use a paper towel to blot fish thoroughly.
Uneven Cooking
- Cause: Fillets of varying thickness or overcrowding.
- Fix: Use fillets of uniform size. Cook in batches if needed.
Burnt Exterior but Raw Interior
- Cause: High heat without adjusting for thickness.
- Fix: Reduce heat to medium after searing the first side. For thick fillets, finish in a 350°F (175°C) oven for 3–5 minutes.
Fishy Aftertaste

- Cause: Poor-quality fish or inadequate rinsing.
- Fix: Soak fillets in milk for 15 minutes before cooking to neutralize odors. Rinse and pat dry.
Advanced Techniques for Enthusiasts
En Papillote (Parchment Packet)
- Place seasoned fillets on parchment with vegetables, herbs, and a splash of wine. Seal and bake for a moist, flavorful dish.
Crispy Skin Hack
- Score the skin lightly with a knife to prevent curling. Press gently with a spatula during searing for even contact.
Gluten-Free Coating
- Replace flour with almond meal or rice flour for a crunchy, keto-friendly crust.
Nutritional Benefits of Basa Fish
Basa is a lean protein source, rich in omega-3 fatty acids, vitamin B12, and selenium. A 3.5-ounce (100g) serving provides:

- Calories: 90
- Protein: 17g
- Fat: 2g (primarily healthy unsaturated fats)
- Vitamins/Minerals: B12, phosphorus, potassium
Its low calorie and high protein content make it ideal for weight-management diets.
Conclusion: Elevate Your Dinner Routine
Pan-searing basa fish is a skill that rewards patience and practice. By mastering heat control, seasoning, and timing, you’ll transform a simple fillet into a culinary masterpiece. Experiment with global flavor profiles—think Thai red curry glaze, Mediterranean herb crusts, or Latin-inspired mojo sauce. Whether served atop a bed of sautéed greens or nestled in a warm tortilla, perfectly seared basa fish promises a meal that’s both elegant and effortless. So grab your pan, preheat that stove, and let the sizzle begin!


0 comments