Dried daikon radish, known for its versatility and ability to absorb flavors, has been a staple in Asian cuisines for centuries. When pickled correctly, it transforms into a crunchy, tangy, and slightly sweet delight that elevates meals. However, achieving the ideal balance of texture and taste requires precision, patience, and a deep understanding of the pickling process. This article delves into the step-by-step method of pickling dried daikon radish, ensuring a result that is both delicious and crisp.
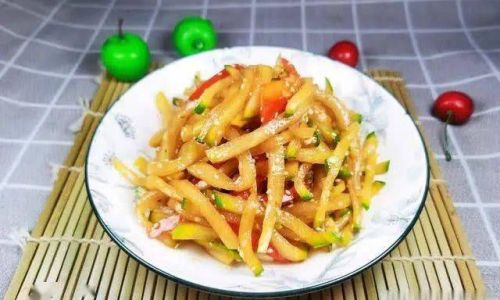
Understanding Dried Daikon Radish
Before diving into the pickling process, it’s essential to grasp why dried daikon radish is a preferred ingredient. Fresh daikon radish, a large white root vegetable, is sliced into thin strips and sun-dried or air-dried to remove moisture. This drying process concentrates its natural sugars and flavors, creating a chewy texture that softens when rehydrated. When pickled, the dried radish absorbs the brine’s seasonings, resulting in a harmonious blend of sour, salty, and sweet notes.
Selecting the Right Daikon Radish
The foundation of exceptional pickled daikon lies in selecting high-quality radishes. Opt for fresh, firm daikons with smooth skin and vibrant white flesh. Avoid specimens with soft spots, blemishes, or a spongy texture, as these indicate age or improper storage. The size of the radish matters too—larger ones yield thicker strips, which retain their crunch better after pickling.
Preparing the Daikon for Drying
Step 1: Cleaning and Peeling
Wash the daikon thoroughly under cold water to remove dirt. Use a vegetable peeler to strip off the outer layer, which can be fibrous. Some recipes retain the skin for added texture, but peeling ensures a smoother finished product.
Step 2: Slicing
Cut the radish into uniform strips, approximately ¼-inch thick. Consistency in size guarantees even drying and pickling. Thinner strips dry faster but may become brittle, while thicker ones retain more moisture, affecting the final texture.
Step 3: Initial Blanching (Optional)
For a milder flavor, blanch the strips in boiling water for 1–2 minutes before drying. This step softens the radish slightly and reduces its natural bitterness.
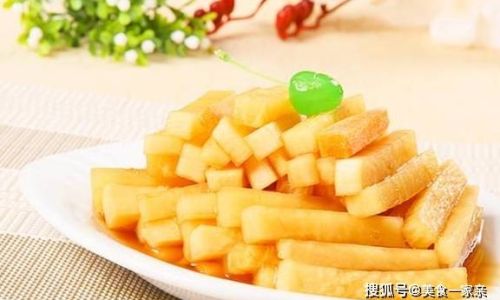
Drying Techniques
Sun-Drying
The traditional method involves spreading the strips on bamboo trays under direct sunlight for 3–5 days. Ensure the strips are in a single layer and protected from insects. Sun-dried radish develops a deeper, caramelized flavor but requires dry, sunny weather.
Air-Drying
Hang the strips in a well-ventilated area away from moisture. This method takes 7–10 days and preserves more of the radish’s natural enzymes, which contribute to fermentation during pickling.
Oven-Drying
For a quicker alternative, bake the strips at the lowest oven setting (around 150°F/65°C) for 4–6 hours. Stir occasionally to prevent burning. Oven-dried radish is less flavorful but ideal for impatient cooks.
Rehydrating the Dried Daikon
Before pickling, rehydrate the dried strips in cold water for 30–60 minutes. This restores pliability and ensures the brine penetrates evenly. Drain thoroughly and pat dry with a clean towel to remove excess moisture.
Crafting the Perfect Pickling Brine
The brine is the soul of the pickle. A balanced blend of acidity, saltiness, and sweetness is key. Here’s a classic recipe:
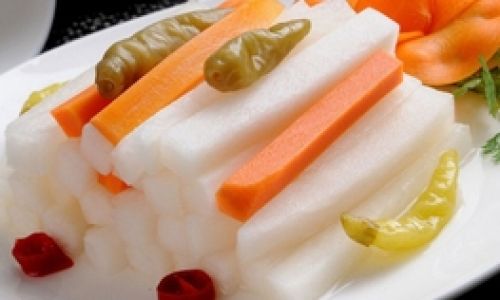
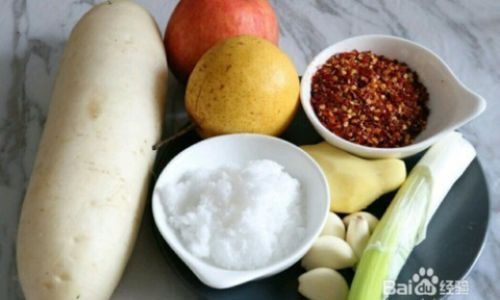
- Ingredients (for 1 lb/450g rehydrated daikon):
- 1½ cups rice vinegar (or apple cider vinegar for a milder tang)
- ½ cup granulated sugar
- 3 tbsp coarse sea salt
- 1 cup water
- 2–3 garlic cloves, sliced
- 1 tbsp chili flakes (adjust to taste)
- 1 tsp whole peppercorns
- 1 bay leaf (optional)
Step 1: Simmer the Brine
Combine vinegar, sugar, salt, and water in a saucepan. Bring to a simmer over medium heat, stirring until the sugar and salt dissolve. Add garlic, chili flakes, peppercorns, and bay leaf. Simmer for 2–3 minutes to infuse flavors, then remove from heat and let cool to room temperature.
Step 2: Adjusting Flavors
Taste the brine before adding the daikon. For a sweeter profile, increase sugar by 1–2 tbsp. For more heat, add extra chili flakes. The brine should taste slightly stronger than desired, as the daikon will absorb the seasonings.
The Pickling Process
Step 1: Sterilize Jars
Wash glass jars and lids in hot soapy water, then rinse and dry. Alternatively, run them through a dishwasher’s sterilize cycle. This prevents bacterial growth.
Step 2: Pack the Jars
Tightly pack the rehydrated daikon strips into the jars, leaving ½ inch of headspace. Add any additional flavorings, such as sliced ginger or carrot sticks, for variety.
Step 3: Pour the Brine
Pour the cooled brine over the daikon, ensuring the strips are fully submerged. Use a clean spoon to press out air bubbles. Seal the jars tightly.
Step 4: Fermentation vs. Quick Pickling
-
Fermentation: Leave the jars at room temperature (65–75°F/18–24°C) for 3–7 days. This method encourages beneficial bacteria to grow, resulting in a tangier, more complex flavor. Burp the jars daily to release pressure.
-
Quick Pickling: Refrigerate the jars immediately for 24–48 hours. This skips fermentation but yields a fresher, crisper texture.
Achieving the Perfect Crunch
The crunchiness of pickled daikon depends on two factors: the drying process and the pickling time. Over-pickling softens the texture, so adhere to the recommended durations. For extra crispness, add a pinch of calcium chloride (pickling crisp) to the brine. This food-safe additive strengthens cell walls, preserving texture.
Storage and Shelf Life
Store fermented pickles in a cool, dark place for up to 6 months. Quick-pickled versions last 2–3 weeks in the refrigerator. Always use clean utensils to avoid contamination. Discard pickles if they develop off-odors, mold, or a slimy texture.
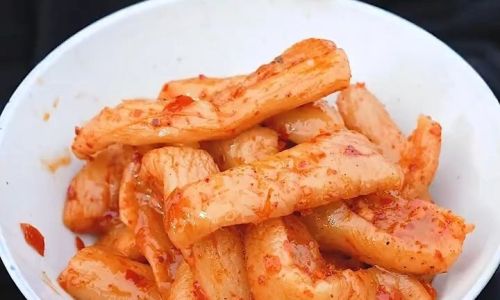
Serving Suggestions
Pickled daikon radish is incredibly versatile:
- Salads: Toss with thinly sliced cucumbers, carrots, and a sesame-soy dressing.
- Rice Bowls: Add to bibimbap or poke bowls for a tangy contrast.
- Sandwiches: Layer with grilled meats and fresh herbs.
- Appetizers: Serve alongside dumplings or spring rolls.
Troubleshooting Common Issues
- Mushy Texture: Over-pickling or insufficient drying. Reduce pickling time next batch.
- Too Salty: Soak the pickles in fresh water for 30 minutes before serving.
- Bland Flavor: Increase brine strength or add more seasonings during pickling.
Experimenting with Flavors
Customize your pickles with these variations:
- Spicy: Add fresh bird’s eye chilies or Sichuan peppercorns.
- Fruity: Include slices of apple or pear in the brine.
- Aromatic: Toss in star anise, cinnamon sticks, or orange peel.
Conclusion
Pickling dried daikon radish is both an art and a science. By mastering the drying process, balancing brine flavors, and respecting pickling timelines, you can create a condiment that delights the senses. Whether enjoyed as a snack, side dish, or ingredient, homemade pickled daikon radish offers a rewarding culinary experience. So, embrace the process, experiment with flavors, and savor the crunch!


0 comments