Table of content
Chestnuts, with their sweet, nutty flavor and versatile culinary applications, have been a beloved ingredient in kitchens across the globe for centuries. From roasted chestnuts sold on street corners during autumn festivals to their integration into soups, stuffings, and desserts, these nuts offer a unique texture and taste that elevate countless dishes. However, achieving the ideal balance between tender, creamy interiors and a slightly crisp exterior can be a culinary challenge, especially for home cooks navigating the nuances of pressure cooking. This article delves into the science and art of cooking chestnuts in a pressure cooker, exploring optimal timing, preparation techniques, and troubleshooting tips to ensure consistently delicious results.
The Science Behind Pressure Cooking Chestnuts
Pressure cooking operates on the principle of trapped steam, which increases the internal temperature of the cooker beyond the boiling point of water (212°F or 100°C at sea level). This elevated temperature accelerates the cooking process by breaking down tough fibers and starches more efficiently than conventional methods like roasting or boiling. For chestnuts, which are encased in a hard, inedible shell and a protective inner skin (known as the pellicle), pressure cooking offers a dual advantage: it softens the shell for easier removal while gently cooking the flesh to avoid dryness or mushiness.
The key to perfect pressure-cooked chestnuts lies in understanding the interplay between time, temperature, and the chestnuts’ inherent properties. Factors such as size, age, and moisture content can significantly impact cooking duration. Fresh chestnuts, harvested in late autumn, tend to have higher moisture levels and may require slightly less time compared to older, drier nuts. Similarly, larger chestnuts (often labeled “jumbo” or “colossal”) demand longer cooking periods to ensure even heat penetration.
Preparation: The Foundation of Success
Before even considering cooking time, proper preparation is non-negotiable. Chestnuts have a notoriously slippery outer shell and a bitter inner pellicle that must be addressed to unlock their full potential. Here’s a step-by-step guide to preparing chestnuts for pressure cooking:
-
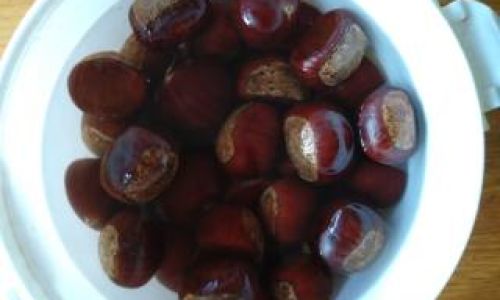
Washing and Sorting: Rinse the chestnuts under cool water to remove dirt or debris. Discard any nuts with visible cracks, mold, or holes, as these may be spoiled or insect-infested.
-
Scoring: Using a sharp paring knife or chestnut cutter, score an “X” or straight line on the flat side of each chestnut. This step is critical—it allows steam to escape during cooking, preventing explosions and facilitating easier peeling. Be cautious not to cut too deeply, as this may slice into the flesh and cause it to disintegrate.
-
Soaking (Optional): Some chefs swear by soaking scored chestnuts in warm water for 15–30 minutes before cooking. This hydrates the shells, making them easier to peel post-cooking. However, this step is optional and may slightly increase total cooking time.
Cooking Time: The Golden Question
The million-dollar question remains: How long should chestnuts be pressure-cooked to achieve perfection? The answer hinges on several variables, including the pressure cooker’s settings, altitude, and the chestnuts’ characteristics. Below is a breakdown of recommended cooking times under high pressure (12–15 PSI), the standard for most electric and stovetop models:
- Small to Medium Chestnuts (1–1.5 inches in diameter): 8–10 minutes
- Large Chestnuts (1.5–2 inches): 12–15 minutes
- Extra-Large or Aged Chestnuts: 15–18 minutes
These timings assume the chestnuts are fully submerged in liquid (water, broth, or a flavored mixture) and that the cooker is brought to high pressure before timing begins. After cooking, allow the pressure to release naturally for 5–10 minutes to prevent sudden temperature changes that could toughen the flesh.
Altitude Adjustments
At higher elevations, atmospheric pressure decreases, lowering the boiling point of water. This means pressure cookers may take longer to reach high pressure, and cooking times should be extended by 5–10% for every 1,000 feet above sea level. For example, at 5,000 feet, add 2–3 minutes to the base cooking time.
Electric vs. Stovetop Pressure Cookers
Electric models often have slower heat-up times compared to stovetop counterparts. To compensate, add 2–3 minutes to the cooking time if using an electric pressure cooker. Conversely, stovetop users should monitor the heat carefully to maintain consistent pressure without overcooking.
Testing for Doneness: The Touch Test
While timing provides a reliable guideline, visual and tactile cues are equally important. Perfectly cooked chestnuts should:
- Yield to Gentle Pressure: Insert a paring knife or toothpick into the flesh. It should glide in with minimal resistance.
- Peel Easily: The scored shell should separate from the flesh without shredding or sticking.
- Have a Creamy Texture: The interior should be soft but not chalky, with no raw or starchy patches.
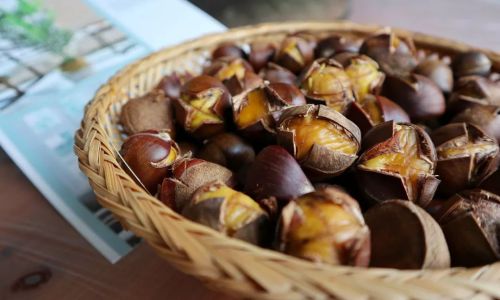
If the chestnuts are undercooked, return them to the pressure cooker for an additional 2–3 minutes under high pressure. Overcooked nuts will appear dry, crumbly, or hollow—a sign that moisture has evaporated excessively.
Post-Cooking Techniques: Peeling and Enhancing Flavor
Peeling chestnuts while they’re still warm is crucial, as the shells harden as they cool. Use a kitchen towel to protect your hands, and gently squeeze each nut to loosen the shell. The pellicle (inner skin) may cling stubbornly; to remove it, briefly soak the chestnuts in hot water (190–200°F) for 2–3 minutes, then rub gently with a cloth.
For added flavor, consider incorporating aromatics into the cooking liquid. A splash of vanilla extract, a cinnamon stick, or a star anise pod can infuse the chestnuts with subtle warmth. Alternatively, toss the cooked nuts in melted butter, honey, or maple syrup before roasting them in the oven for a caramelized finish.
Common Pitfalls and How to Avoid Them
-
Uneven Scoring: Inconsistent cuts can lead to uneven cooking. Use a steady hand and ensure each chestnut has a clean, 1/4-inch-deep score.
-
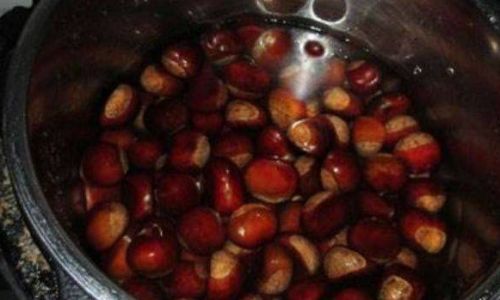
Overcrowding the Cooker: Stacking chestnuts prevents steam circulation, resulting in uneven doneness. Cook in batches if necessary, ensuring a single layer.
-
Skipping the Natural Release: Releasing pressure immediately after cooking causes rapid moisture loss, yielding dry chestnuts. Allow the cooker to depressurize naturally for 5–10 minutes.
-
Ignoring Altitude: High-altitude cooks must adjust times to compensate for lower boiling points. Use a reliable thermometer to gauge liquid temperature if unsure.
Creative Applications Beyond the Basics
Pressure-cooked chestnuts are a blank canvas for culinary innovation. Beyond the classic roasted preparation, consider:
- Chestnut Soup: Purée cooked chestnuts with vegetable broth, onions, and cream for a velvety, autumnal soup.
- Stuffing or Dressing: Mix chopped chestnuts into bread-based stuffing for a sweet, nutty contrast.
- Desserts: Fold chestnut purée into brownie batter, use it as a layer in cakes, or swirl it into ice cream for depth.
- Vegan Cheese: Blend cooked chestnuts with nutritional yeast, garlic, and miso for a rich, dairy-free spread.
Storage and Reheating
Cooked chestnuts can be stored in an airtight container in the refrigerator for up to 5 days. To reheat, spread them on a baking sheet and warm at 350°F (175°C) for 5–7 minutes, or until heated through. Avoid microwaving, as this can make them rubbery.
Conclusion: The Journey to Chestnut Mastery
Pressure cooking chestnuts is a marriage of precision and flexibility. While timings provide a roadmap, the true art lies in adapting to variables like chestnut size, altitude, and equipment. By mastering scoring techniques, adjusting for environmental factors, and embracing post-cooking creativity, home cooks can transform this humble nut into a star ingredient. Whether enjoyed straight from the shell or incorporated into a gourmet dish, perfectly pressure-cooked chestnuts offer a taste of autumn that lingers long after the last bite.
In closing, remember that practice is the greatest teacher. Experiment with cooking times, flavors, and applications to discover what works best for your palate. With patience and attention to detail, you’ll soon join the ranks of chefs who have celebrated the chestnut’s culinary magic for generations.
0 comments