Table of content
Pound cake, a dessert staple cherished across generations, is a testament to the beauty of simplicity in baking. With its buttery richness, tender crumb, and versatility, this classic treat has earned its place in kitchens worldwide. Whether served plain, dusted with powdered sugar, or adorned with fresh berries and cream, a well-made pound cake is a crowd-pleaser. This article delves into the history, science, and step-by-step process of crafting the perfect homemade pound cake, ensuring even novice bakers can achieve bakery-quality results.
A Brief History of Pound Cake
The origins of pound cake trace back to 18th-century Europe, where it was known as quatre quarts in France, meaning “four quarters.” The name referred to its original recipe: equal parts butter, sugar, eggs, and flour, each weighing one pound. This formula created a dense, moist cake that was both affordable and easy to remember. Over time, bakers began experimenting with leavening agents like baking powder and flavorings such as vanilla, lemon zest, or almond extract, evolving the cake into the lighter, more nuanced dessert we know today. Despite these adaptations, the essence of pound cake remains rooted in its humble, balanced beginnings.
The Science Behind the Perfect Pound Cake
Baking is as much a science as it is an art, and pound cake is no exception. Understanding the role of each ingredient ensures consistent success:
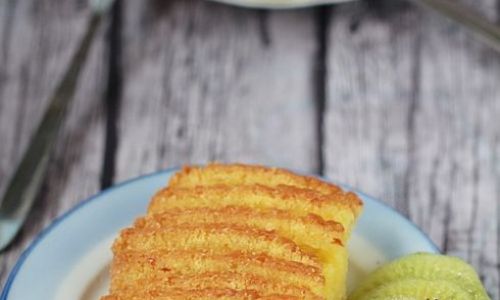
- Butter: The backbone of flavor and texture, butter contributes richness and moisture. Room-temperature butter should be creamed with sugar to incorporate air, creating a light, tender crumb.
- Sugar: Beyond sweetness, sugar aids in tenderizing the cake by weakening gluten strands. It also caramelizes during baking, contributing to the cake’s golden crust.
- Eggs: Whole eggs add structure, moisture, and fat. Beating them into the batter one at a time ensures even emulsification, preventing separation.
- Flour: All-purpose flour provides structure. Overmixing after adding flour can overdevelop gluten, resulting in a tough cake.
- Leavening Agents (Optional): While traditional recipes rely solely on air incorporation, modern versions often include baking powder for a gentler rise.
- Flavorings: Vanilla extract, citrus zest, or liquor elevate the cake’s profile without overwhelming its delicate balance.
Ingredients and Tools You’ll Need
Before diving into the recipe, gather these essentials:
-
Ingredients:
- 1 cup (226g) unsalted butter, softened
- 1½ cups (300g) granulated sugar
- 4 large eggs, room temperature
- 2 cups (240g) all-purpose flour
- 1 tsp baking powder (optional)
- ½ tsp salt
- 1 tsp vanilla extract
- ¼ cup milk (or buttermilk for added tang)
-
Tools:
- 9×5-inch loaf pan
- Electric mixer (stand or handheld)
- Rubber spatula
- Cooling rack
- Parchment paper (optional, for easy removal)
Step-by-Step Instructions
Preparing the Pan
Preheat your oven to 325°F (163°C). Grease the loaf pan generously with butter or non-stick spray, then line the bottom with parchment paper. This ensures effortless release and a pristine crust.
Creaming Butter and Sugar
In a large mixing bowl, beat the softened butter on medium speed until creamy (about 1 minute). Gradually add the sugar, increasing the speed to medium-high. Cream for 4–5 minutes until the mixture is pale, fluffy, and doubled in volume. This step is critical for aerating the batter, resulting in a tender crumb.
Incorporating Eggs
Reduce the mixer speed to medium. Add the eggs one at a time, beating well after each addition (about 30 seconds per egg). Scrape down the bowl’s sides occasionally to ensure even mixing. If the batter appears curdled, don’t panic—this is normal and will resolve once dry ingredients are added.
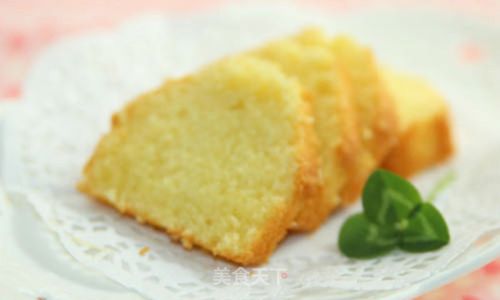
Combining Dry Ingredients
In a separate bowl, whisk together the flour, baking powder (if using), and salt. This aerates the dry ingredients and ensures even distribution.
Alternating Wet and Dry Ingredients
With the mixer on low speed, add the dry ingredients in three additions, alternating with the milk (or buttermilk) in two additions. Begin and end with the dry mixture. For example: dry → milk → dry → milk → dry. This method prevents overmixing and guarantees a smooth batter.
Adding Flavor
Stir in the vanilla extract (or other flavorings) by hand using a rubber spatula. Avoid overmixing at this stage to prevent toughening the cake.
Baking
Pour the batter into the prepared pan, smoothing the top with a spatula. Bake for 60–70 minutes, or until a skewer inserted into the center emerges clean. Resist opening the oven door during the first 45 minutes to prevent drastic temperature changes, which can cause the cake to sink.
Cooling
Once baked, transfer the pan to a cooling rack and let the cake rest for 15 minutes. Gently run a knife around the edges, then invert the cake onto the rack. Remove the parchment paper and allow it to cool completely (about 2 hours) before slicing. This resting period ensures the crumb sets properly, preventing gumminess.
Variations to Elevate Your Pound Cake
While the classic recipe is divine, experimentation is half the fun. Try these twists:
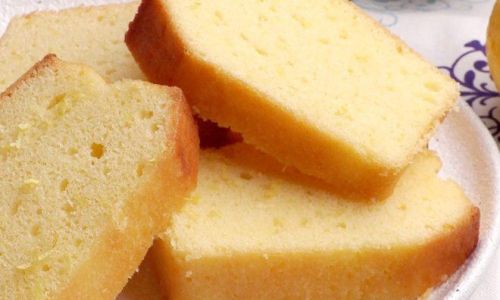
- Lemon-Blueberry: Fold 1 cup fresh blueberries and 1 tbsp lemon zest into the batter.
- Chocolate Swirl: Marbleize melted chocolate through the batter before baking.
- Almond Joy: Add 1 tsp almond extract and top with toasted coconut and sliced almonds post-bake.
- Spiced: Incorporate 1 tsp cinnamon, ½ tsp nutmeg, and a pinch of cloves for a holiday-inspired twist.
Tips for Pound Cake Perfection
- Room Temperature Ingredients: Cold butter or eggs can seize the batter, leading to a dense texture. Allow them to sit at room temperature for 30–60 minutes before baking.
- Measure Accurately: Baking is a science, so use a kitchen scale for precision. If measuring cups are your only option, spoon flour into the cup and level with a knife to avoid packing.
- Oven Calibration: Invest in an oven thermometer to ensure accurate baking temperatures. A too-hot oven can cause domed, cracked tops, while a cool oven leads to greasy, underbaked cakes.
- Patience is Key: Rushing the cooling process often results in a gummy texture. Let the cake cool completely before slicing.
Troubleshooting Common Issues
- Dry Crumb: Overbaking is the primary culprit. Start checking for doneness 5–10 minutes early.
- Sunken Middle: This can occur from underbaking, an expired leavening agent, or opening the oven door too soon.
- Greasy Texture: Ensure the butter is fully creamed with sugar. If the mixture looks separated, the butter may have been too cold.
- Tough Texture: Overmixing after adding flour develops gluten. Mix until just combined.
Serving and Storing Your Pound Cake
Pound cake is incredibly versatile. Serve it:
- Sliced and toasted with a pat of butter for breakfast.
- Layered with whipped cream and strawberries for a trifle.
- Drizzled with lemon glaze (½ cup powdered sugar + 1–2 tbsp lemon juice).
- Grilled and topped with ice cream for a decadent dessert.
Store cooled cake wrapped tightly in plastic wrap at room temperature for up to 3 days. For longer storage, refrigerate for up to a week or freeze for 3 months. Thaw frozen cake in the refrigerator overnight before serving.
The Joy of Homemade Pound Cake
There’s a meditative satisfaction in baking from scratch—the rhythm of creaming butter, the aroma of vanilla filling the kitchen, and the pride of serving a dessert made with love. Pound cake, with its unassuming elegance, is a canvas for creativity and a reminder that sometimes, simplicity reigns supreme. Whether you’re a seasoned baker or a curious newcomer, this recipe invites you to slow down, savor the process, and delight in the timeless pleasure of homemade goodness.
Conclusion
Mastering pound cake is a rite of passage for any home baker. By understanding its history, honing your technique, and embracing experimentation, you’ll create a dessert that transcends occasions. So preheat your oven, gather your ingredients, and let the dance of flour, sugar, and butter begin. Your future self—and lucky guests—will thank you.



0 comments