Introduction
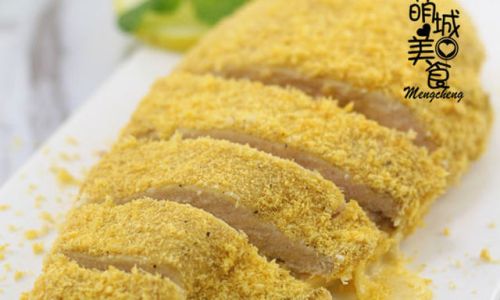
Imagine biting into a golden, crispy chicken cutlet that crunches with satisfaction, only to be met by a surge of molten, gooey cheese that spills out with every slice. This is the magic of oozing cheese chicken cutlet, a dish that has taken the culinary world by storm. Originating from Asian street food culture, this recipe combines tender chicken, melted cheese, and a perfectly crunchy coating to create a texture and flavor explosion. Whether you’re hosting a dinner party, craving a comforting meal, or simply want to impress your loved ones, mastering this dish will elevate your cooking repertoire. In this guide, we’ll dive deep into the techniques, ingredients, and secrets behind creating the ultimate oozing cheese chicken cutlet at home.

Ingredients: The Foundation of Flavor
Before you begin, gather your ingredients. Quality matters here—fresh chicken, high-quality cheese, and the right breading will make or break your dish.
- 4 boneless, skinless chicken breasts (about 6–8 ounces each)
- 8 slices of cheese (cheddar, mozzarella, or a blend of your choice; avoid pre-shredded cheese for better melt)
- 1 cup all-purpose flour (for dredging)
- 2 large eggs (whisked with 2 tablespoons of milk or water)
- 2 cups panko breadcrumbs (or regular breadcrumbs, but panko yields a crunchier texture)
- 1 teaspoon salt
- 1 teaspoon black pepper
- 1 teaspoon garlic powder
- 1 teaspoon paprika (smoked or sweet, depending on preference)
- Vegetable oil (for frying; enough to submerge the cutlets halfway)
- Optional additions: Fresh herbs (parsley, cilantro), lemon wedges, or your favorite dipping sauce (e.g., sweet chili, mayo, or honey mustard).
Equipment You’ll Need
- A meat mallet or rolling pin (to pound the chicken)
- Three shallow bowls (for dredging station)
- A large skillet or frying pan
- Kitchen tongs
- Paper towels (for draining excess oil)
- A thermometer (to monitor oil temperature)
Step-by-Step Instructions
Preparing the Chicken
The key to a tender, evenly cooked chicken cutlet lies in proper preparation.

- Butterfly the chicken breasts: Place each chicken breast on a cutting board and slice horizontally through the center, but not all the way through. Open it like a book to create a pocket. This ensures even thickness and allows room for the cheese filling.
- Pound to even thickness: Cover the chicken with plastic wrap to prevent splattering, then use a meat mallet or rolling pin to gently pound the meat to about ¼-inch thickness. This step tenderizes the chicken and ensures it cooks evenly.
- Season generously: Rub both sides of each chicken breast with salt, pepper, garlic powder, and paprika. Let them sit for 10–15 minutes to absorb the flavors.
Stuffing with Cheese
The cheese is the star of the show—choose wisely and stuff carefully to prevent leaks.
- Layer the cheese: Place two slices of cheese (or a generous handful of shredded cheese) on one side of each butterflied chicken breast. Fold the other side over to seal the cheese inside. Press the edges firmly to seal.
- Secure with toothpicks: If needed, use toothpicks to hold the chicken together during cooking. Remove them before serving to avoid accidents.
Setting Up the Breading Station
A three-step breading process ensures a crispy, golden coating that locks in moisture.
- Flour mixture: In the first bowl, combine all-purpose flour with a pinch of salt and pepper.
- Egg wash: Whisk the eggs with milk or water in the second bowl.
- Breadcrumbs: In the third bowl, mix panko breadcrumbs with a pinch of salt, pepper, and paprika for extra flavor.
Breading the Chicken
Follow this sequence for even coating:
- Dredge in flour: Coat each stuffed chicken breast in flour, shaking off excess.
- Dip in egg wash: Submerge the chicken in the egg mixture, ensuring all sides are coated.
- Coat in breadcrumbs: Press the chicken into the breadcrumbs, patting gently to adhere.
Frying to Perfection
Achieving a crispy exterior without overcooking the chicken requires precision.

- Heat the oil: Pour vegetable oil into a large skillet until it’s about ½ inch deep. Heat over medium-high heat until the oil reaches 350°F (175°C). Use a thermometer to avoid guesswork.
- Fry in batches: Place the breaded chicken cutlets in the hot oil, being careful not to overcrowd the pan. Cook for 4–5 minutes per side, or until golden brown and cooked through (internal temperature should reach 165°F/74°C).
- Adjust heat as needed: If the oil gets too hot, reduce the heat to prevent burning. If it cools too much, increase slightly.
Resting and Serving
Resist the urge to slice immediately—resting is crucial for oozing cheese.
- Drain excess oil: Transfer the cooked cutlets to a wire rack or paper towels to drain.
- Let them rest: Allow the chicken to rest for 3–5 minutes. This step ensures the cheese solidifies slightly, preventing it from spilling out too quickly when cut.
- Slice and serve: Cut the cutlets diagonally to showcase the cheese pull. Serve hot with lemon wedges, fresh herbs, or your favorite dipping sauce.
Tips for Success
- Cheese Selection: Opt for cheeses with low melting points, like mozzarella or cheddar. Avoid hard cheeses like Parmesan, which won’t ooze.
- Breading Technique: For extra crunch, double-bread the chicken: dip in flour, egg, breadcrumbs, then repeat the egg and breadcrumb step.
- Oil Temperature: Maintaining the correct oil temperature prevents sogginess. If the oil is too hot, the exterior will burn before the chicken cooks; too cool, and the coating will absorb oil.
- Pounding Technique: Pound the chicken evenly to avoid uneven cooking. Thicker areas may remain raw, while thinner spots could overcook.
- Resting Time: Never skip resting—it’s the difference between a messy cheese spill and a perfect, oozing center.
Serving Suggestions
- Pair with Sides: Serve with crispy fries, coleslaw, or a light salad to balance the richness.
- Sauces: Elevate the dish with a tangy sweet chili sauce, creamy garlic mayo, or a drizzle of honey mustard.
- Garnish: Fresh herbs like parsley or cilantro add a pop of color and freshness.
Variations and Customizations

- Spicy Kick: Add a pinch of cayenne pepper or red chili flakes to the breadcrumbs.
- Herb-Infused: Mix dried herbs (oregano, thyme, rosemary) into the flour or breadcrumbs.
- Bacon-Wrapped: Wrap the breaded cutlet in bacon before frying for added smokiness.
- Gluten-Free: Substitute all-purpose flour with rice flour and use gluten-free breadcrumbs.
Troubleshooting Common Issues
- Cheese Leakage: If the cheese oozes out during frying, ensure the chicken is sealed tightly. Use toothpicks if necessary.
- Soggy Coating: Check the oil temperature and avoid overcrowding the pan.
- Dry Chicken: Overcooking is the culprit. Use a thermometer and remove the chicken once it reaches 165°F.
- Burnt Exterior: Reduce the heat if the breadcrumbs brown too quickly.
Safety Precautions
- Hot Oil Handling: Never leave hot oil unattended. Use a splatter screen if needed.
- Knife Safety: When butterflying the chicken, use a sharp knife and steady hands to avoid accidents.
- Children: Keep small children away from the stove during frying.
Conclusion
Mastering the oozing cheese chicken cutlet is a rewarding culinary achievement that combines technique, patience, and a love for indulgent flavors. From selecting the right cheese to nailing the frying temperature, every step contributes to the final masterpiece. Whether you’re a seasoned home cook or a beginner, this dish offers a playful challenge and a delicious payoff. So, fire up your stove, gather your ingredients, and prepare to create a meal that will have everyone asking for seconds. The joy of biting into that crispy, cheesy perfection is worth every moment of effort—happy cooking!


0 comments