Introduction
Snow skin mooncakes, also known as ice skin mooncakes, have emerged as a refreshing alternative to traditional baked mooncakes, particularly in regions with warm climates. Their delicate, translucent outer layer and soft, chewy texture have made them a beloved treat during festivals like Mid-Autumn. The secret to their unique appeal lies in the snow skin powder—a specialized blend of flours and starches that creates a pliable, melt-in-your-mouth coating. This article delves into the science and craft of making snow skin mooncake powder from scratch, offering detailed instructions, expert tips, and creative variations to elevate your homemade mooncakes.
Understanding the Basics of Snow Skin Powder
Snow skin powder is a non-baked mixture primarily composed of glutinous rice flour, rice flour, and wheat starch. These ingredients work synergistically to achieve the signature soft, stretchy texture. Glutinous rice flour, derived from sticky rice, provides elasticity, while rice flour adds a subtle graininess. Wheat starch, a refined carbohydrate, contributes to the translucent appearance and prevents the dough from becoming overly sticky. When combined with sugar, milk powder, and oil, these components create a dough that can be steamed or microwaved to achieve a smooth, pliable consistency.
Ingredients and Their Roles
-
Glutinous Rice Flour (Sweet Rice Flour):
The backbone of snow skin powder, this flour is milled from glutinous rice and contains high amylopectin content, which gives the dough its chewiness. Avoid confusing it with regular rice flour, as the two have distinct textures. -
Rice Flour:
Also known as sticky rice flour, this adds a light, airy quality to the dough and prevents it from becoming too dense. -
Wheat Starch (Tung Mein Fun):
A critical ingredient for achieving the desired translucency, wheat starch helps stabilize the dough and reduces stickiness. It is often labeled as “wheat starch” or “Hong Kong flour” in Asian grocery stores. -
Powdered Sugar (Icing Sugar):
Sweetens the dough and dissolves easily, ensuring a lump-free mixture. -
Milk Powder (Non-Fat Dry Milk):
Enhances flavor and richness. Optional but recommended for a creamy taste. -
Vegetable Oil (or Shortening):
Adds moisture and prevents the dough from drying out. Neutral oils like canola or grapeseed work best.
Step-by-Step Guide to Making Snow Skin Powder
Step 1: Measuring and Mixing Dry Ingredients
In a large mixing bowl, combine the following:
- 100g glutinous rice flour
- 50g rice flour
- 30g wheat starch
- 80g powdered sugar
- 20g milk powder (optional)
Use a whisk to sift the ingredients thoroughly. Sifting eliminates lumps and ensures even distribution of sugar and starch. This step is crucial for achieving a smooth, uniform dough.
Step 2: Incorporating Wet Ingredients
Create a well in the center of the dry mixture and gradually add:
- 180ml milk (dairy or plant-based)
- 30ml vegetable oil
- ½ tsp vanilla extract (for flavor)
Stir gently with a spatula until the mixture forms a thick, paste-like consistency. Avoid overmixing, as this can lead to a tough texture.
Step 3: Steaming the Dough
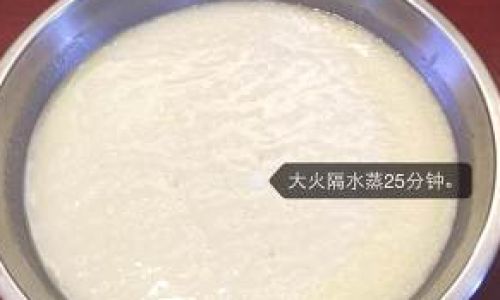
Transfer the batter to a heatproof dish (e.g., a glass or ceramic bowl) and cover tightly with aluminum foil or a lid. Steam over medium heat for 20–25 minutes. The dough is ready when it turns translucent and pulls away from the sides of the dish.
Alternative Method: Microwaving
For a quicker option, microwave the batter in short bursts (1 minute intervals, stirring between each) until it forms a glossy, cohesive mass. This method requires careful monitoring to prevent overcooking.
Step 4: Kneading and Cooling
Once steamed, allow the dough to cool slightly until it’s safe to handle. Lightly grease your hands and a clean work surface with oil to prevent sticking. Knead the dough for 5–7 minutes until it becomes smooth, elastic, and stretchy. Over-kneading can make the dough greasy, so stop once it reaches a Play-Doh-like consistency.
Step 5: Color and Flavor Customization
Divide the dough into portions and knead in food-grade coloring or flavorings. Popular options include:
- Matcha powder (2–3 tsp for a vibrant green hue)
- Cocoa powder (1–2 tbsp for chocolate notes)
- Purple sweet potato powder (for natural color)
- Fruit extracts (e.g., strawberry, mango)
Ensure the additions are fully incorporated to avoid streaks.
Step 6: Resting the Dough
Wrap the dough tightly in plastic wrap and refrigerate for at least 1 hour. Chilling firms it up, making it easier to handle and shape.
Crafting the Mooncakes
-
Preparing Fillings:
Traditional fillings include lotus seed paste, red bean paste, or salted egg yolks. For modern twists, try durian, custard, or fruit jellies. Ensure fillings are chilled and firm before use. -
Shaping the Mooncakes:
- Divide the dough into 25g portions (for a 50g mooncake).
- Flatten each portion into a thin disc.
- Place 25g of filling in the center and gently seal the dough around it.
- Dust a mooncake mold with cornstarch or glutinous rice flour to prevent sticking. Press the filled dough into the mold, then tap gently to release.
-
Finishing Touches:
Brush off excess flour with a soft brush. For a glossy finish, lightly coat the mooncakes with melted coconut oil or a spritz of water before serving.
Expert Tips for Perfect Snow Skin
- Humidity Control: High humidity can make the dough sticky. Add 1–2 tsp of wheat starch if the dough feels tacky.
- Storage: Unused dough can be wrapped and refrigerated for up to 3 days. Freeze for longer storage (thaw in the fridge before use).
- Troubleshooting Sticky Dough: If the dough is too wet after steaming, knead in 1 tsp of glutinous rice flour at a time until it reaches the desired consistency.
- Texture Adjustments: For a softer skin, increase the milk powder by 10g. For a firmer texture, add an extra 5g of wheat starch.
Creative Variations and Dietary Adaptations
- Gluten-Free Option: Substitute wheat starch with tapioca starch and ensure all flours are certified gluten-free.
- Vegan-Friendly: Use coconut oil and plant-based milk.
- Low-Sugar Version: Replace powdered sugar with a sugar substitute like erythritol.
- Savory Twist: Experiment with fillings like black sesame, roasted nuts, or cheese for a unique appetizer.
Pairing and Presentation
Snow skin mooncakes are best enjoyed chilled. Pair them with unsweetened tea, such as jasmine or oolong, to balance their sweetness. For gift-giving, package them in individual paper liners within decorative boxes. Freeze-dried fruit powders or edible gold leaf can elevate their visual appeal.
Common Mistakes to Avoid
- Overcooking the Dough: This results in a dry, crumbly texture. Steam just until the dough turns translucent.
- Skipping the Resting Period: Chilling firms the dough, making it easier to mold.
- Using Cold Ingredients: Ensure milk and oil are at room temperature to prevent lumps.
- Overfilling the Molds: Overstuffing can cause the mooncakes to lose their shape. Stick to the recommended dough-to-filling ratio.
The Science Behind Snow Skin Texture
The interplay between glutinous rice flour’s amylopectin and wheat starch’s gelatinization during steaming creates a gel-like matrix. This structure traps moisture, giving snow skin its characteristic softness. The addition of oil coats the starch molecules, reducing retrogradation (staling) and extending shelf life.
Cultural Significance and Modern Trends
Snow skin mooncakes originated in Hong Kong during the 1980s as a lighter alternative to traditional baked varieties. Today, they symbolize innovation in Asian pastry arts, with chefs experimenting with flavors like yuzu, matcha-red bean, and even savory options like truffle-mushroom. Their rise in popularity reflects broader trends toward health-conscious and visually striking desserts.
Conclusion
Mastering snow skin mooncake powder opens a world of culinary creativity. By understanding the role of each ingredient and refining your technique, you can craft mooncakes that rival artisanal bakeries. Whether adhering to tradition or embracing bold flavors, the versatility of snow skin powder ensures endless possibilities. With practice, you’ll achieve the perfect balance of chewiness, sweetness, and elegance—a testament to the art of Asian pastry-making.
Final Thoughts
Experimentation is key to honing your snow skin skills. Keep a journal of ingredient ratios and outcomes to refine your recipes. Share your creations with friends and family, and don’t hesitate to incorporate seasonal ingredients or local flavors. The joy of snow skin mooncakes lies not just in their taste but in the joy of crafting something beautiful from scratch.



0 comments