Introduction
In an era where convenience meets culinary demand, the microwave oven has become an indispensable tool for reheating refrigerated meals. Whether you’re a busy professional, a student, or a parent juggling multiple responsibilities, the ability to transform a chilled lunch box into a steaming meal within minutes is a modern marvel. However, the simplicity of microwave use often belies the complexity of achieving consistent, safe, and delicious results. The question “How long should I heat this in the microwave?” is one that resonates across kitchens worldwide. This article delves into the science and practicality of reheating refrigerated meals in lunch containers, exploring variables such as food type, container material, microwave wattage, and portion size. By understanding these factors, you can optimize reheating times, avoid culinary pitfalls, and ensure every meal is both safe and satisfying.

The Science of Microwave Heating
Microwaves operate by emitting electromagnetic waves that excite water molecules within food, generating heat through friction. This process, known as dielectric heating, is not uniform across all materials. Foods with higher moisture content, such as soups or stews, heat faster than dry items like bread or rice. Similarly, dense foods like meats require longer heating times compared to lighter vegetables. The challenge lies in balancing efficiency with quality—overheating can lead to rubbery textures or nutrient loss, while underheating poses food safety risks.
Food Type: The Primary Determinant
The composition of your meal dictates the reheating strategy. Below is a breakdown of common food categories and their ideal microwave durations:
1 Proteins (Meat, Poultry, Fish)
- Chicken Breast: 2–3 minutes on high (700–900W). Thicker cuts may require an additional 30 seconds.
- Ground Beef: 1.5–2.5 minutes, stirring halfway to prevent cold spots.
- Fish Fillets: 1–2 minutes, depending on thickness. Overheating can cause dryness.
2 Carbohydrates (Rice, Pasta, Potatoes)
- Cooked Rice: 1–2 minutes, covered to retain moisture.
- Pasta (Al Dente): 2–3 minutes, adding a splash of water if dry.
- Baked Potatoes: 3–4 minutes, pierced to release steam.
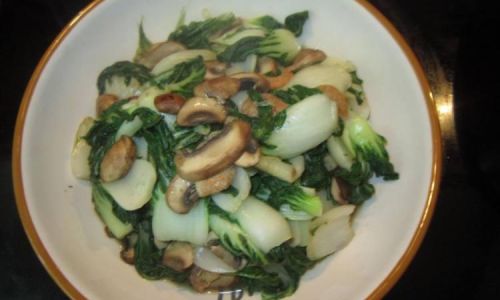
3 Vegetables
- Leafy Greens: 1–1.5 minutes, covered to prevent wilting.
- Root Vegetables (Carrots, Potatoes): 2–3 minutes, sliced for even heating.
4 Mixed Meals (Casseroles, Stir-Fries)
- Layered Dishes: 3–5 minutes, stirring every 2 minutes to distribute heat.
- Frozen Prepared Meals: Follow package instructions, typically 5–7 minutes.
Container Material: A Silent Influencer
The lunch box you choose affects heating efficiency and safety. Common materials include:
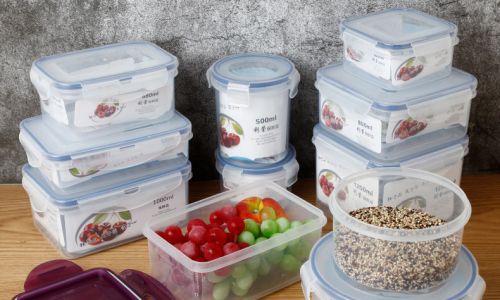
1 Glass
- Pros: Heat-resistant, non-porous, and distributes heat evenly.
- Cons: Heavier than plastic, risk of breakage.
- Reheating Time: Reduce power by 20% (e.g., 800W → 640W) to prevent cracking. Add 1–2 minutes for thick-walled containers.
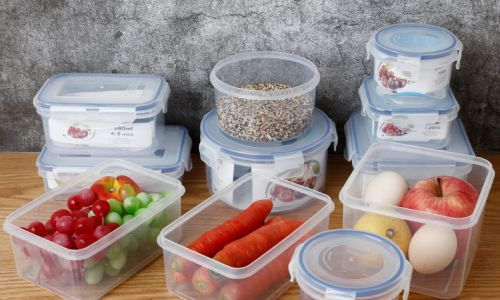
2 Plastic
- Pros: Lightweight, shatterproof, and often microwave-safe.
- Cons: May warp at high temperatures; avoid polycarbonate (BPA-containing) plastics.
- Reheating Time: Use medium power (50–70%) to prevent melting. Add 30–60 seconds for thicker plastics.
3 Ceramic
- Pros: Excellent heat retention, aesthetically pleasing.
- Cons: Poor heat conductivity; may crack if heated empty.
- Reheating Time: Preheat for 30 seconds before adding food. Add 2–3 minutes to standard times.
Microwave Wattage: The Power Variable
Most microwaves operate between 700–1200 watts. Lower wattage models require longer heating times. For example:
- 700W: Add 1–2 minutes to standard times.
- 900W: Standard reheating durations apply.
- 1200W: Reduce time by 20–30% to avoid overcooking.
Portion Size and Shape: The Geometry of Heat
The way food is arranged in the container impacts reheating uniformity:
- Thickness: A 2-inch-thick lasagna layer requires 4–5 minutes, while a 1-inch layer needs 2–3 minutes.
- Shape: Circular containers heat more evenly than rectangular ones.
- Quantity: Double portions may need 50% more time, not double.
Safety Precautions: Avoiding Pitfalls
- Standing Time: Let food rest for 1–2 minutes post-heating to allow residual heat to distribute.
- Stirring/Rotating: Agitate food every 1–2 minutes to eliminate cold spots.
- Temperature Check: Use a food thermometer to ensure internal temps reach 165°F (74°C) for meats.
Advanced Techniques for Perfect Results
- Damp Paper Towel: Covering food traps steam, speeding up heating by 20–30%.
- Microwave Crisper Pans: Elevate food for crispier textures (e.g., reheating pizza).
- Defrosting First: Thaw frozen meals in the refrigerator overnight to reduce reheating time by 50%.
Troubleshooting Common Issues

- Cold Spots: Arrange food in a ring shape, with the center empty.
- Soggy Food: Use vented containers or microwave-safe lids.
- Overheating: Lower power settings (e.g., 50%) and shorter intervals.
Eco-Friendly Tips
- Batch Cooking: Prepare meals in single-serve containers to minimize reheating cycles.
- Energy-Efficient Models: Invest in inverter microwaves that adjust power output continuously.
The Cultural Context: Global Reheating Practices
In Japan, bentō boxes are designed with compartmentalized layers to ensure even heating. In India, tiffin carriers made of stainless steel require longer reheating times but retain heat for hours. Understanding these cultural nuances can inspire better lunch box choices.
Conclusion
Reheating refrigerated meals is both an art and a science. By considering food type, container material, microwave wattage, and portion dynamics, you can master the delicate balance between efficiency and quality. Remember that patience—in the form of standing time and periodic stirring—is as crucial as the microwave’s power. Whether you’re savoring a hearty stew or a delicate piece of salmon, the right approach ensures your meal emerges from the microwave as a testament to culinary care. So the next time you unpack your lunch box, arm yourself with knowledge and let the microwave work its magic—your taste buds will thank you.





0 comments