Introduction
Pineapple jam, with its vibrant tropical flavor and golden hue, is a versatile preserve that elevates breakfast toast, pastries, and desserts. Unlike store-bought versions, which often contain artificial additives, homemade pineapple jam allows you to control sweetness, texture, and ingredients. This guide will walk you through the process of transforming fresh pineapples into a luscious, spreadable jam. Whether you’re a seasoned preserver or a novice in the kitchen, this recipe prioritizes simplicity while delivering exceptional results. By the end, you’ll have a batch of jam that captures the essence of summer, ready to be enjoyed year-round or gifted to loved ones.
Ingredients and Equipment
Before diving into the cooking process, gather the following ingredients and tools:
-
Ingredients:
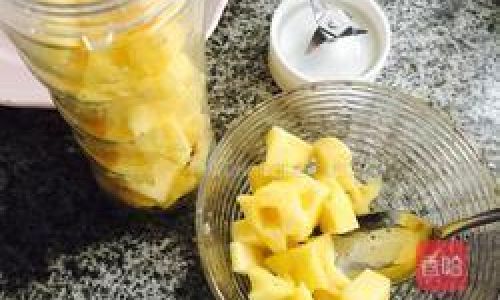
- 4 cups fresh pineapple (approximately 1 medium pineapple, peeled, cored, and finely chopped)
- 1½ cups granulated sugar (adjust to taste)
- 2 tablespoons lemon juice (freshly squeezed for natural pectin and acidity)
- Optional: 1 cinnamon stick, 1 vanilla bean, or 1 teaspoon grated ginger (for added complexity)
-
Equipment:
- Cutting board and sharp knife
- Blender or food processor (for smooth jam) or potato masher (for chunky texture)
- Large, heavy-bottomed pot (to prevent burning)
- Wooden spoon or silicone spatula
- Candy thermometer (optional, for precision)
- Sterilized glass jars with lids (for canning)
Step 1: Preparing the Pineapple
- Selecting the Pineapple: Choose a ripe pineapple with fragrant, golden-yellow skin and vibrant green leaves. Avoid fruit that is overly soft or has brown spots, as it may be overripe.
- Peeling and Coring:
- Lay the pineapple horizontally on the cutting board. Slice off the top and bottom.
- Stand the pineapple upright and use a sharp knife to shave off the spiky skin in downward strokes, following the fruit’s contour.
- Remove any remaining “eyes” with a paring knife.
- Slice the pineapple into quarters lengthwise. Use a small knife to carve out the tough core from each quarter.
- Chopping: Dice the pineapple flesh into small, uniform pieces (¼ to ½ inch). For a smoother jam, pulse the diced fruit in a blender or food processor until it reaches your desired consistency. Leave some texture for a rustic jam or blend until silky.
Step 2: Cooking the Jam
- Initial Simmer:
- In the heavy-bottomed pot, combine the chopped pineapple, sugar, and lemon juice. Stir gently to coat the fruit.
- Place the pot over medium heat and bring the mixture to a gentle simmer. Stir occasionally to prevent sticking.
- Skimming Foam: As the mixture heats, a foamy scum may rise to the surface. Skim this off with a spoon and discard it to ensure a clear, glossy jam.
- Adding Flavors (Optional):
- For a warm, aromatic twist, add a cinnamon stick or split vanilla bean.
- For a zesty kick, incorporate grated ginger.
- Remove these additions before canning if you prefer a pure pineapple flavor.
Step 3: Reducing and Thickening
- Adjusting Heat: Once the mixture simmers, reduce the heat to low. Maintain a gentle bubble to avoid scorching.
- Stirring Frequently: Stir every 5–7 minutes to prevent the jam from sticking to the pot’s bottom. Scrape the sides to integrate any stray fruit particles.
- Testing for Doneness:
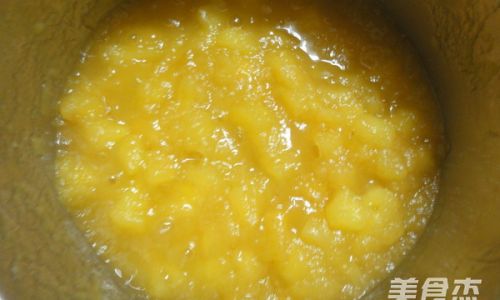
- Visual Cue: The jam will darken slightly and thicken as water evaporates.
- Spoon Test: Dip a spoon into the jam. When lifted, the mixture should cling to the spoon and slide off slowly in a thick sheet.
- Freezer Test: Place a small dollop of jam on a chilled plate. Return it to the freezer for 2 minutes. If it wrinkles when pushed with your finger, it’s ready.
- Thermometer Method: Cook until the temperature reaches 220°F (104°C) at sea level (adjust for altitude).
Step 4: Canning and Storage
- Sterilizing Jars:
- Wash jars and lids in hot, soapy water. Rinse thoroughly.
- Submerge jars in a large pot of boiling water for 10 minutes. Keep them submerged until ready to use.
- Filling Jars:
- Ladle the hot jam into sterilized jars, leaving ¼ inch of headspace.
- Wipe the rims with a clean, damp cloth to ensure a proper seal.
- Sealing:
- Center the lids on the jars and screw on the bands until fingertip-tight.
- Process the jars in a boiling water bath for 10 minutes (adjust for altitude).
- Cooling and Storing:
- Allow the jars to cool undisturbed for 12–24 hours. Check seals by pressing the centers of the lids—they should not flex.
- Store unopened jars in a cool, dark place for up to 1 year. Refrigerate after opening and consume within 3 weeks.
Tips for Perfect Pineapple Jam
- Sweetness Balance: Taste the mixture mid-cook and adjust sugar if the pineapple is tart. Overly sweet fruit may require less sugar.
- Texture Control: For a chunkier jam, reduce blending time. For a spreadable consistency, cook longer to evaporate more moisture.
- Pectin-Free Option: Pineapples contain natural pectin, but lemon juice aids in gelling. Avoid substituting lemon juice with other acids, as they may affect setting.
- Flavor Variations: Experiment with additions like toasted coconut, star anise, or a splash of rum during cooking.
Troubleshooting Common Issues
- Jam Doesn’t Set: If the mixture remains runny, continue cooking until it reaches the desired consistency. For a quicker fix, mix 1 tablespoon powdered pectin with 2 tablespoons sugar and whisk it into the jam.
- Sugar Crystallization: Stir gently to dissolve sugar without incorporating air, which can cause crystallization.
- Burnt Flavor: Use a heavy-bottomed pot and stir regularly. If burning occurs, transfer the jam to a clean pot and continue cooking.
Creative Uses for Pineapple Jam
- Baking: Fill thumbprint cookies, swirl into cheesecake batter, or layer between cake sponges.
- Breakfast: Spread on scones, pancakes, or yogurt parfaits.
- Gifting: Decorate jars with fabric lids and ribbons for a homemade touch.
Conclusion
Crafting pineapple jam is a labor of love that rewards you with a taste of sunshine in every jar. By starting with fresh fruit and minimal ingredients, you create a preserve free from additives and brimming with natural flavor. Whether enjoyed immediately or stored for later, this jam invites creativity in the kitchen and joy at the table. So, the next time you spot a ripe pineapple, seize the opportunity to transform it into something extraordinary—one spoonful at a time.
0 comments