Table of content
Pineapple bread, also known as boluo bao in Chinese or boroh peng in Japanese, is a beloved pastry cherished for its golden, crisp topping and soft, slightly sweet interior. Despite its name, this treat does not contain pineapple fruit; instead, its distinctive appearance—a cracked, diamond-patterned crust resembling the skin of a pineapple—earned it its moniker. Originating in Taiwan, this bread has become a staple in bakeries across Asia and beyond, captivating taste buds with its buttery aroma and delicate texture. Crafting pineapple bread at home may seem intimidating, but with patience and precision, anyone can master this delightful recipe. This comprehensive guide will walk you through every step, from assembling ingredients to achieving that coveted golden-brown finish.
The Allure of Pineapple Bread: A Brief History
Before diving into the recipe, it’s fascinating to explore the cultural roots of pineapple bread. Its creation dates back to the 1950s in Taiwan, a period when Western baking techniques began merging with local flavors. Bakers sought to innovate by combining a soft, milk-enriched bread dough with a cookie-like topping, creating a contrast of textures that became an instant hit. The name “pineapple bread” emerged from the topping’s resemblance to the fruit’s exterior, though modern variations sometimes incorporate pineapple jam fillings for an extra layer of sweetness. Today, this bread symbolizes comfort and nostalgia, often enjoyed with a cup of tea or coffee.
Ingredients: Assembling Your Pantry Essentials
To create authentic pineapple bread, you’ll need two primary components: the bread dough and the signature topping. Below is a detailed list of ingredients, along with substitutions for common allergens or dietary preferences.
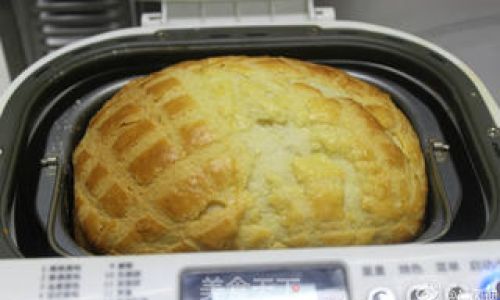
For the Bread Dough:
- All-Purpose Flour (500g): The backbone of the dough, providing structure and softness. For a richer flavor, substitute 50g with bread flour.
- Instant Dry Yeast (7g): Ensures the dough rises properly. Active dry yeast can be used but requires proofing in warm liquid first.
- Granulated Sugar (60g): Balances the mild savory notes of the dough. Adjust to taste for less sweetness.
- Whole Milk (240ml): Adds moisture and richness. Lactose-free milk or oat milk works as a dairy-free alternative.
- Unsalted Butter (50g): Contributes tenderness and flavor. Melted coconut oil can replace butter for a vegan version.
- Large Egg (1): Enhances texture and color. Use a flaxseed egg (1 tbsp flaxseed meal + 3 tbsp water) for a vegan substitution.
- Salt (1 tsp): Elevates the overall flavor profile.
For the Pineapple Crust Topping:
- All-Purpose Flour (120g): Creates the cookie-like layer.
- Powdered Sugar (80g): Ensures a smooth, sweet topping. Confectioners’ sugar is ideal, but granulated sugar blended into a fine powder can suffice.
- Unsalted Butter (80g, softened): The fat source for a melt-in-your-mouth texture. Vegan butter or shortening are acceptable alternatives.
- Egg Yolk (1): Brushed atop the topping for a golden sheen. Reserve the white for glazing the dough or discard.
- Baking Powder (½ tsp): Leavens the topping slightly, preventing density.
- Optional: A pinch of salt or vanilla extract for depth.
Tools You’ll Need:
- Stand mixer or mixing bowls with a dough hook attachment.
- Baking sheets lined with parchment paper.
- Plastic wrap or a damp towel for proofing dough.
- Pastry brush for egg wash.
- Pizza cutter or sharp knife for scoring patterns.
Step-by-Step Instructions: Crafting Pineapple Bread Perfection
Preparing the Bread Dough
- Activate the Yeast: In a small bowl, combine warm milk (105–115°F or 40–46°C), 1 tsp sugar, and yeast. Let it sit for 5–10 minutes until frothy. This step ensures the yeast is active.
- Mix Dry Ingredients: In a large bowl, whisk together flour, remaining sugar, and salt.
- Combine Wet and Dry: Create a well in the center of the dry ingredients. Pour in the activated yeast mixture, melted butter, and egg. Mix until a shaggy dough forms.
- Knead the Dough: Transfer to a lightly floured surface and knead for 8–10 minutes (or 5–7 minutes in a stand mixer) until smooth and elastic. The dough should spring back when pressed.
- First Rise: Place the dough in a greased bowl, cover with plastic wrap, and let it rise in a warm spot for 1–1.5 hours, or until doubled in size.
Crafting the Pineapple Crust Topping
While the dough rises, prepare the topping:
- Cream Butter and Sugar: In a bowl, beat softened butter and powdered sugar until light and fluffy.
- Incorporate Flour and Baking Powder: Gradually add flour and baking powder, mixing until a crumbly dough forms. Avoid overmixing.
- Shape and Chill: Form the topping into a disc, wrap in plastic, and refrigerate for 30 minutes. This firms the mixture, making it easier to handle.
Assembling the Bread
- Portion the Dough: Once risen, punch down the dough and divide it into 12 equal pieces (about 75g each). Roll each into a smooth ball.
- Prepare the Topping: Divide the chilled topping into 12 portions (about 20g each). Flatten each portion into a 3-inch disc.
- Encase the Dough: Place a dough ball on top of a topping disc. Gently press and gather the edges of the topping around the dough, sealing it like a purse. Flip the bundle over so the topping faces upward.
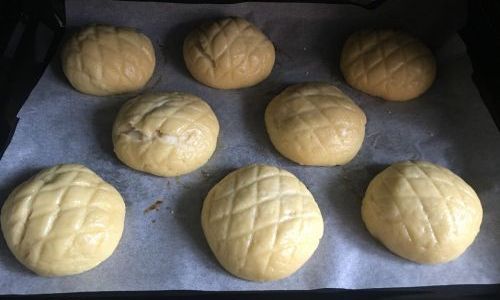
- Score the Design: Using a pizza cutter or knife, lightly score a diamond pattern on the topping. Be careful not to cut through to the dough.
Final Proof and Bake
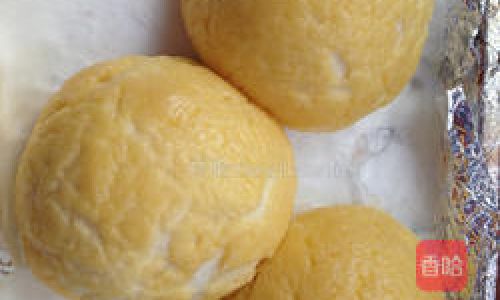
- Second Rise: Arrange the assembled buns on baking sheets, leaving 2 inches between each. Cover loosely and let rise for 30–45 minutes until puffy.
- Preheat the Oven: Set to 350°F (175°C) 15 minutes before baking.
- Egg Wash: Brush the tops with egg yolk for a golden hue.
- Bake: Bake for 15–18 minutes, rotating the tray halfway, until the crust is golden and the buns sound hollow when tapped.
Cooling and Serving
Transfer the buns to a wire rack and let them cool for 10–15 minutes. Serve warm or at room temperature. Pineapple bread pairs wonderfully with butter, jam, or a spread of your choice.
Tips for Success: Avoiding Common Pitfalls
- Dough Not Rising? Ensure your yeast is fresh and the liquid used to activate it is warm, not hot. Cold environments can slow proofing; place the dough in an oven with the light on for a cozy environment.
- Crust Cracking Excessively? Chill the topping thoroughly before assembling. If the topping feels sticky, dust with a pinch of flour.
- Adjusting Sweetness: Reduce sugar in the dough for a less sweet bun, or increase it for a dessert-like treat.
- Storage: Store cooled buns in an airtight container at room temperature for 2–3 days. Freeze for up to a month; reheat in a 300°F (150°C) oven for 5 minutes.
Creative Variations to Experiment With
- Filled Pineapple Bread: After portioning the dough, flatten each piece, add a teaspoon of custard, red bean paste, or Nutella, then seal and proceed.
- Matcha Twist: Incorporate 1 tbsp matcha powder into the topping for a vibrant green hue and earthy flavor.
- Cheese-Stuffed Buns: Hide a cube of cheddar or mozzarella inside the dough for a gooey surprise.
- Gluten-Free Adaptation: Use a 1:1 gluten-free flour blend and add 1 tsp xanthan gum to the dough for structure.
Troubleshooting Guide
- Dense Texture: Overkneading or insufficient rising time can result in heavy buns. Let the dough rise until puffy, not rushed.
- Soggy Crust: Avoid over-brushing with egg wash; a thin layer suffices. Ensure the oven is preheated to lock in crispness.
- Uneven Baking: Rotate trays halfway through baking for even heat distribution. Use convection mode if available.
The Cultural Significance of Pineapple Bread
In Taiwan, pineapple bread is more than a snack—it’s a symbol of hospitality and tradition. Sold in bustling night markets and quaint bakeries, it’s often gifted during holidays or shared at family gatherings. The act of making pineapple bread at home connects bakers to generations of culinary heritage, blending innovation with time-honored techniques.
Conclusion: A Labor of Love
Crafting pineapple bread is a rewarding endeavor that marries science and artistry. From the delicate balance of ingredients to the satisfaction of scoring that perfect pattern, each step invites creativity and precision. Whether enjoyed fresh from the oven or as a midday treat, this bread embodies the joy of homemade baking. Experiment with fillings, toppings, and shapes to make the recipe your own—and don’t forget to share the warmth of this iconic pastry with loved ones.
With this guide in hand, you’re equipped to embark on a baking adventure that transcends borders and seasons. So preheat your oven, gather your ingredients, and let the aroma of freshly baked pineapple bread fill your kitchen. Happy baking!
0 comments