Introduction
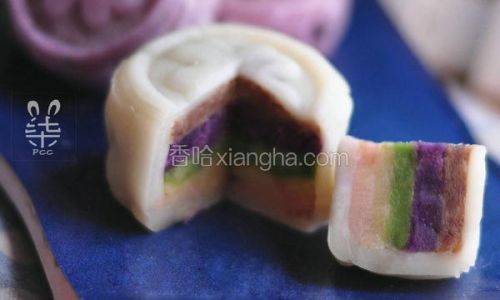
The Mid-Autumn Festival, a cherished tradition in many Asian cultures, is synonymous with family gatherings, lantern-lit skies, and, of course, mooncakes. These delicate pastries, often filled with sweet lotus seed or red bean paste, have evolved over centuries, blending tradition with modern creativity. Today, we introduce a twist on the classic: rainbow ice skin mooncakes. Unlike their baked counterparts, ice skin mooncakes boast a translucent, chewy outer layer made from glutinous rice flour, offering a refreshing contrast to the rich fillings inside. The rainbow variation adds a burst of color, making these treats as visually stunning as they are delicious. This guide will walk you through crafting these vibrant delights at home, using simple ingredients and techniques. Whether you’re a seasoned baker or a novice in the kitchen, this recipe promises joyful results.
The Appeal of Ice Skin Mooncakes
Ice skin mooncakes, also known as “snow skin” mooncakes, originated in Hong Kong and quickly gained popularity for their light, almost jelly-like texture. Unlike traditional mooncakes, which are baked and have a dense, flaky crust, ice skin mooncakes are steamed or chilled, resulting in a soft, pliable exterior. This method preserves the ingredients’ natural flavors and colors, making them ideal for creative adaptations like the rainbow design. The “skin” is made from a mixture of glutinous rice flour, rice flour, wheat starch, sugar, and milk, creating a dough that’s both stretchy and easy to mold. The fillings can vary widely, from classic sweet pastes to modern options like fruit compotes, nut butters, or even chocolate ganache.
Why Rainbow?
The rainbow trend has swept the culinary world, transforming everyday dishes into feasts for the eyes. Rainbow ice skin mooncakes are no exception. By dividing the dough into sections and coloring each with natural or food-safe dyes, you can create layers of hues that resemble a miniature sky. This not only delights children but also adds a playful touch to festive celebrations. The best part? You control the ingredients, ensuring no artificial additives or preservatives.
Ingredients You’ll Need
Before diving into the recipe, gather your ingredients. For simplicity, we’ll use store-bought fillings, but feel free to experiment with homemade versions if time permits.
For the Ice Skin Dough:
- 100g glutinous rice flour (sticky rice flour)
- 30g rice flour
- 20g wheat starch (or cornstarch as a substitute)
- 60g granulated sugar
- 180ml whole milk (or any plant-based milk for a dairy-free option)
- 30ml coconut oil (or any neutral-flavored oil)
- Food coloring gel (red, orange, yellow, green, blue, purple)
For the Filling:
- 400g store-bought sweet red bean paste (or lotus seed paste)
- Optional: 50g melted white chocolate for added richness
For the Coating:
- 20g cooked glutinous rice flour (for dusting)
Tools Required:
- Steamer basket or microwave-safe bowl
- Silicone spatula
- Mixing bowls
- Mooncake mold (50g or 75g size)
- Plastic wrap
- Food-safe gloves (to prevent sticking)
Step 1: Preparing the Ice Skin Dough
- Combine Dry Ingredients: In a large mixing bowl, whisk together the glutinous rice flour, rice flour, wheat starch, and sugar. Ensure no lumps remain.
- Add Wet Ingredients: Pour in the milk and coconut oil. Stir until the mixture forms a smooth, lump-free batter. The consistency should resemble thick pancake batter.
- Steam or Microwave:
- Steaming Method: Pour the batter into a heatproof dish, cover with plastic wrap, and steam for 20–25 minutes over medium heat. Stir halfway through to prevent clumping.
- Microwave Method: Cook the batter in a microwave-safe bowl on high for 1 minute. Remove, stir, and microwave in 30-second intervals until the dough becomes translucent and stretchy.
- Knead the Dough: Once cooked, transfer the dough to a clean surface dusted with cooked glutinous rice flour. Knead until smooth and elastic, about 5 minutes. This step develops the dough’s chewiness.
Step 2: Coloring the Dough
- Divide the Dough: Separate the dough into six equal portions (approximately 60g each).
- Add Color: Wearing gloves, knead each portion with a drop of food coloring gel. Start with a small amount and add more until you achieve the desired shade. For pastel hues, use 1–2 drops; for vibrant colors, use 3–4 drops.
- Pro Tip: Natural dyes like beetroot powder (pink), turmeric (yellow), or spirulina (green) can be used, but they may alter the dough’s texture slightly.
- Wrap and Rest: Cover each colored dough ball with plastic wrap to prevent drying. Let them rest for 15 minutes.
Step 3: Assembling the Mooncakes
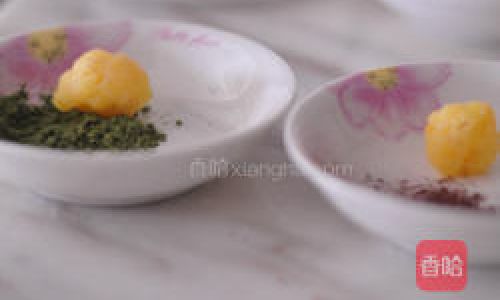
- Prepare the Filling: Divide the red bean paste (or chosen filling) into 12 equal portions (about 30g each). Roll each into a smooth ball.
- Optional: For a marbled effect, mix a small amount of melted white chocolate into the filling.
- Layer the Dough: Take one colored dough ball and flatten it into a thin circle using your fingertips. Place a filling ball in the center.
- Wrap and Seal: Gently stretch the dough up and around the filling, pinching the edges to seal. Roll between your palms to smooth out any seams.
- Repeat for All Colors: Follow the same process with the remaining dough and fillings. You should have 12 colored dough balls, each encasing a filling.
Step 4: Molding the Mooncakes
- Dust the Mold: Lightly coat the mooncake mold with cooked glutinous rice flour to prevent sticking. Tap out any excess.
- Press the Dough: Place a colored dough ball into the mold, seam-side up. Press firmly but gently to shape it.
- Unmold: Tap the mold lightly on the counter to release the mooncake. If it sticks, gently wiggle the mold or use a toothpick to loosen the edges.
- Repeat: Continue molding until all mooncakes are shaped. For a rainbow effect, layer multiple colors in the mold before pressing.
Step 5: Chilling and Serving
- Chill: Arrange the mooncakes on a plate lined with parchment paper. Cover with plastic wrap and refrigerate for at least 2 hours. Chilling firms up the dough and enhances the flavors.
- Serve: Remove from the fridge 10–15 minutes before serving to soften slightly. Pair with Chinese tea, like jasmine or oolong, for an authentic experience.
Tips for Perfect Rainbow Ice Skin Mooncakes
- Consistency is Key: Ensure the dough is smooth and free of lumps before coloring. Uneven dough may lead to tears during wrapping.
- Color Blending: For a gradient effect, blend two adjacent colors (e.g., red and orange) by lightly kneading them together before molding.
- Storage: Store mooncakes in an airtight container in the refrigerator for up to 3 days. Do not freeze, as this may alter the texture.
- Troubleshooting: If the dough becomes too sticky, knead in a pinch of cooked glutinous rice flour. If it’s too dry, add a drop of coconut oil.
Creative Variations
- Flavor Infusions: Add 1–2 teaspoons of matcha powder, cocoa powder, or freeze-dried fruit powder to the dough for unique flavors.
- Gourmet Fillings: Experiment with savory options like salted egg yolk, black sesame paste, or even Nutella.
- Gluten-Free Option: Substitute wheat starch with an additional 20g of rice flour for a gluten-free version.
- Edible Decorations: After molding, brush the mooncakes with a thin layer of diluted honey and sprinkle with edible glitter or dried rose petals.
The Cultural Significance
While rainbow ice skin mooncakes are a modern invention, they honor the Mid-Autumn Festival’s spirit of unity and celebration. The festival’s origins trace back over 3,000 years to ancient China, where it marked the harvest moon. Today, it’s a time to honor family, express gratitude, and enjoy symbolic foods. Mooncakes, with their round shape, symbolize completeness and togetherness—a sentiment echoed in the act of sharing these colorful treats.
Conclusion
Crafting rainbow ice skin mooncakes at home is a rewarding endeavor that marries tradition with creativity. The process allows for endless experimentation, from flavor combinations to artistic designs. Whether you’re hosting a festival gathering or simply craving a sweet project, these mooncakes are sure to impress. Remember, the key to success lies in patience and playfulness—don’t be afraid to let your imagination shine through each vibrant layer. So gather your ingredients, embrace the colors of the rainbow, and embark on a culinary adventure that’s as delightful to create as it is to savor. Happy baking!




0 comments