Table of content
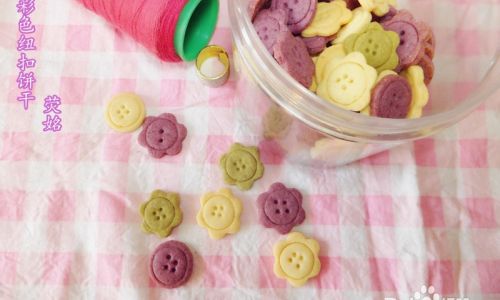
Baking is an art form that combines creativity, precision, and a pinch of magic. Among the countless treats that grace kitchen counters and party tables, colorful button cookies stand out as a charming, whimsical delight. These tiny, vibrant treats resemble miniature fabric buttons, complete with “buttonholes” and a rainbow of hues. Perfect for birthday parties, baby showers, or simply as a cheerful afternoon snack, these cookies are as fun to make as they are to eat. This comprehensive guide will walk you through every step of creating these adorable confections, from selecting ingredients to adding the finishing decorative touches.
Ingredients: Assembling Your Creative Palette
Before diving into the baking process, gather your ingredients. The beauty of button cookies lies in their customizability, so feel free to adjust quantities or swap components based on dietary preferences or flavor inspirations.
For the Cookie Dough:
- 2 ½ cups (300g) all-purpose flour (sifted)
- 1 cup (226g) unsalted butter (softened to room temperature)
- ¾ cup (150g) granulated sugar
- 1 large egg (room temperature)
- 1 teaspoon vanilla extract (or almond, lemon, or coconut extract for variation)
- ¼ teaspoon salt
- Gel food coloring (assorted colors: pink, blue, yellow, green, etc.)
For the Decorative “Buttonholes”:
- ½ cup (60g) powdered sugar (for icing)
- 1-2 tablespoons milk or water (for icing consistency)
- Rainbow nonpareils, sanding sugar, or small candy beads (for texture)
Optional Additions:

- Lemon zest, cocoa powder, or matcha powder (for flavor variation)
- Edible glitter or luster dust (for sparkle)
Step-by-Step Instructions: Bringing Buttons to Life
Preparing the Dough Base
In a large mixing bowl, cream the softened butter and granulated sugar until light and fluffy, approximately 3-4 minutes using an electric mixer. This step incorporates air into the mixture, ensuring a tender cookie texture. Add the egg and vanilla extract, blending until fully combined.
In a separate bowl, whisk together the sifted flour and salt. Gradually add the dry ingredients to the wet mixture, mixing on low speed until a cohesive dough forms. Avoid overmixing, as this can result in tough cookies.
Coloring the Dough
Divide the dough into equal portions based on the number of colors you wish to use. For example, if creating five colors, divide the dough into five sections. Wrap each portion in plastic wrap to prevent drying.
Using gel food coloring (preferred for vibrant hues), knead each dough portion until the color is evenly distributed. Gel coloring offers richer shades without altering dough consistency, unlike liquid dyes. For pastel tones, use minimal coloring; for bold hues, add incrementally until desired intensity is achieved.
Shaping the Buttons
Preheat your oven to 350°F (175°C) and line baking sheets with parchment paper.
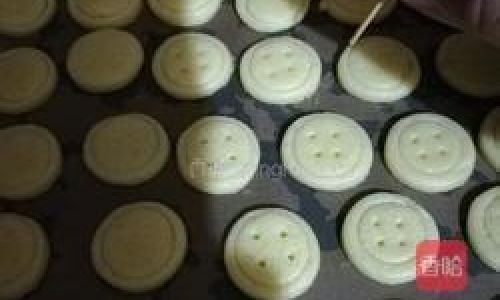
Take a small portion of colored dough (about 1 teaspoon) and roll it into a smooth ball. Gently flatten the ball between your palms to create a disc approximately ½ inch (1.25cm) thick. Using a clean straw, toothpick, or the end of a wooden skewer, press four evenly spaced indentations around the edge of the disc to mimic buttonholes. For authenticity, ensure the holes are shallow but defined.

Repeat this process with the remaining dough, spacing cookies 2 inches (5cm) apart on the baking sheet.
Baking to Perfection
Bake the cookies for 8-10 minutes, or until the edges are lightly golden. Avoid overbaking, as this can cause the colors to fade. Remove the trays from the oven and allow the cookies to cool on the sheet for 5 minutes before transferring them to a wire rack to cool completely.
Adding the Finishing Touches
While the cookies cool, prepare the icing by whisking powdered sugar and milk until smooth. The icing should be thick enough to adhere to the cookies but thin enough to pipe. Transfer the icing to a small piping bag or plastic zip-top bag with a tiny corner snipped off.
Pipe a small dot of icing into each “buttonhole” and immediately sprinkle with nonpareils, sanding sugar, or candy beads. Allow the icing to set for 15-20 minutes before handling.
Customization Tips: Unleash Your Creativity
Flavor Variations
- Citrus Burst: Add 1 tablespoon of lemon or orange zest to the dough for a refreshing twist.
- Chocolate Dreams: Incorporate 2 tablespoons of cocoa powder into one dough portion for chocolate buttons.
- Spiced Delight: Mix ½ teaspoon of cinnamon or ginger into the dough for warm, aromatic cookies.
Design Ideas
- Ombré Effect: Gradually blend two colors in the dough for a seamless color transition.
- Glitter Accents: Dust cooled cookies with edible glitter for added sparkle.
- Miniature Masterpieces: Use a smaller cookie cutter (e.g., 1-inch diameter) for dainty buttons suitable for garnishing cakes or cupcakes.
Dietary Adjustments
- Gluten-Free: Substitute all-purpose flour with a 1:1 gluten-free baking blend.
- Vegan: Replace butter with vegan baking sticks and use a flaxseed egg (1 tablespoon ground flaxseed + 3 tablespoons water).
Serving Suggestions: More Than Just a Cookie
Colorful button cookies are versatile treats that transcend ordinary snacking. Here are creative ways to showcase them:
- Party Favors: Package cookies in clear cellophane bags tied with ribbon for birthdays or bridal showers.
- Edible Gifts: Arrange cookies in a miniature sewing-themed tin or jar for a thoughtful, handmade present.
- Dessert Charcuterie: Pair cookies with fresh berries, chocolate-dipped pretzels, and mini macarons for a vibrant dessert board.
- Ice Cream Toppers: Crumble cookies over vanilla ice cream for a crunchy, colorful garnish.
Storage Tips: Preserving the Magic
To maintain freshness and vibrancy:

- Room Temperature: Store cookies in an airtight container for up to 5 days. Place parchment paper between layers to prevent sticking.
- Freezer: Freeze undecorated cookies for up to 3 months. Thaw at room temperature before icing.
- Icing Longevity: Avoid refrigerating decorated cookies, as condensation may cause the icing to bleed.
Troubleshooting: Common Pitfalls and Solutions
-
Cookies Spread During Baking:
- Cause: Dough too warm or butter overly softened.
- Fix: Chill shaped cookies in the refrigerator for 15 minutes before baking.
-
Colors Faded After Baking:
- Cause: Overbaking or low-quality food coloring.
- Fix: Use gel food coloring and monitor baking time closely.
-
Icing Too Runny:
- Cause: Excess liquid added.
- Fix: Gradually add powdered sugar to thicken.
Conclusion: A Sweet Symphony of Creativity
Colorful button cookies are more than just a recipe—they’re an invitation to embrace playfulness in the kitchen. Whether you’re baking with children, hosting a themed event, or simply indulging a creative whim, these cookies offer endless opportunities for experimentation. From pastel spring hues to bold holiday palettes, each batch tells a story through flavor, texture, and design. So, preheat your oven, don your apron, and let the magic of button-making begin. After all, life’s sweetest moments are often the ones we craft with our own hands.
Word Count: 1,820


0 comments